Ionian Basin Traverse and Tehipite Gorge
For a long time, I had been wanting to use the trail that parallels the Middle Fork of the Kings River as part of a big loop – hopefully exploring the entire length of the trail. Most loops looked too big, and didn’t allow for exploring Tehipite valley (except as an out-and-back). For example, from Road’s end, you could head up Woods Creek Trail > JMT > Descend Middle Fork of Kings River > Head back over Granite Pass… but that would still leave an out and back to Tehipite, and it would be a very long loop. Recently, I read about the Enchanted Gorge in Steve Roper’s “The Sierra High Route.” Out of all the geographical features mentioned in the book, this one named by Theodore Solomons left me with the most enticing images. The map came out again, and soon I realized that it would be possible to make the desired loop: Rancherita Trailhead > Blue Lakes Canyon > Enchanted Gorge Descent > Middle Fork Kings River Trail (Simpson Meadow Trail?) > Tehipite Valley Trail. The plan looked exciting, so I started doing some research on the Enchanted Gorge. Would I be able to descend it safely? I started doing some research online…
“…you will reach several large waterfalls. Bush whacking to get past these waterfalls is murderous”
‘cmon, guys, you’re not really selling me on this route… and the pictures (while beautiful) represent a stark, barren landscape. I wasn’t sure I wanted to risk a difficult route, and do lots of bushwhacking for that level of scenery. So, a new route evolved that traverses the Ionian Basin, and makes use of the JMT for a larger loop that also has the benefit of using the entire trail descending the Middle Fork of the Kings River. Here is a discussion of that route, advice for your trip, and a mention of the few people I met along the way.
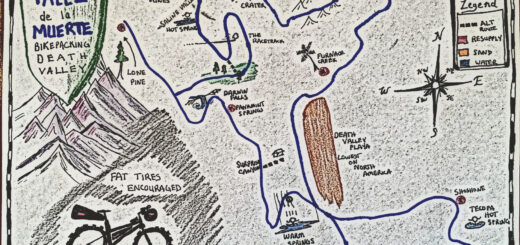
This is the map for the entire route discussed in this post. To Export GPX files, click on the three horizontal bars in the upper right hand corner of the map and select Export selected map data…
To see full screen, click here (opens in new window)
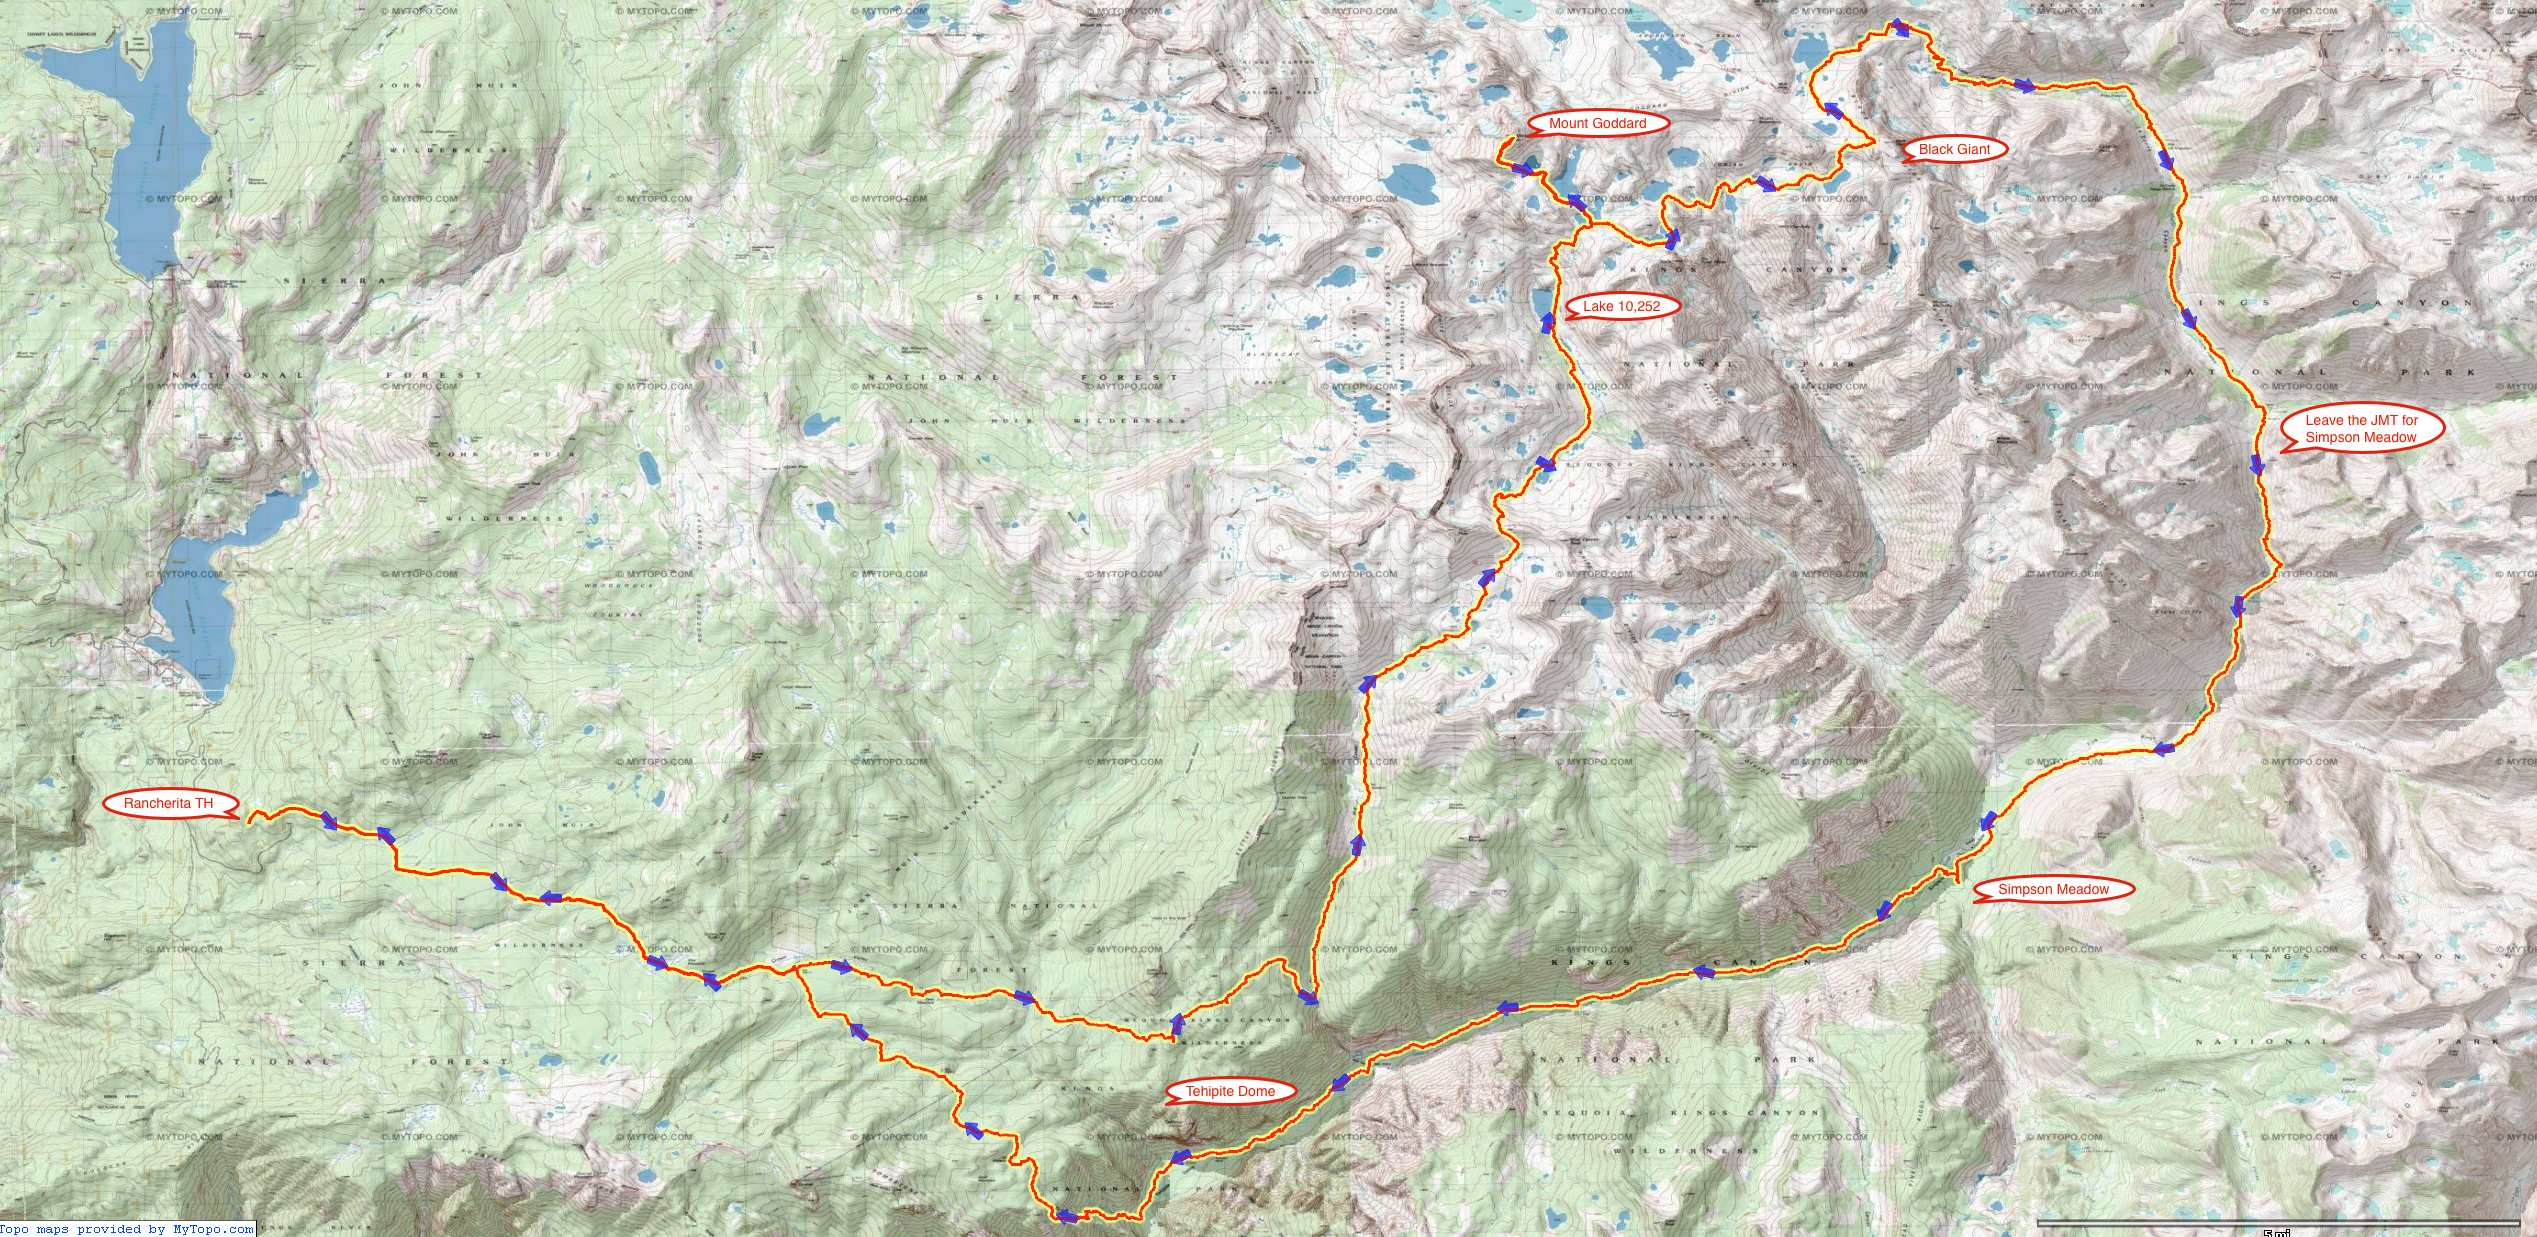
Annotated Overview of the Route: Rancherita TH > Blue Lakes Canyon > Ionian Basin Traverse > JMT > Simpson Meadow Middle Fork of Kings River > Tehipite Dome Trail.
The route starts at the Rancherita Trailhead. If you plan to go overnight, you’ll need to get your Wilderness Permit at the High Sierra Ranger Distric in Auberry: 29688 Auberry Road, Prather, CA 93651. They close at 3:30 PM, and are open 7 days a week. The permit is free. From Rancherita, you travel the well used trail East towards Cow Camp, which is on private land. It’s about 8 miles from the trail head. This section of trail is easy in good condition. It’s sandy/dusty due to use by stock and ranging cows. Be sure to filter any water you obtain along the 5 creek crossings! Shortly after passing the Cow camp, the quality of the trail begins to deteriorate. The trail also ascends and descends steeply.
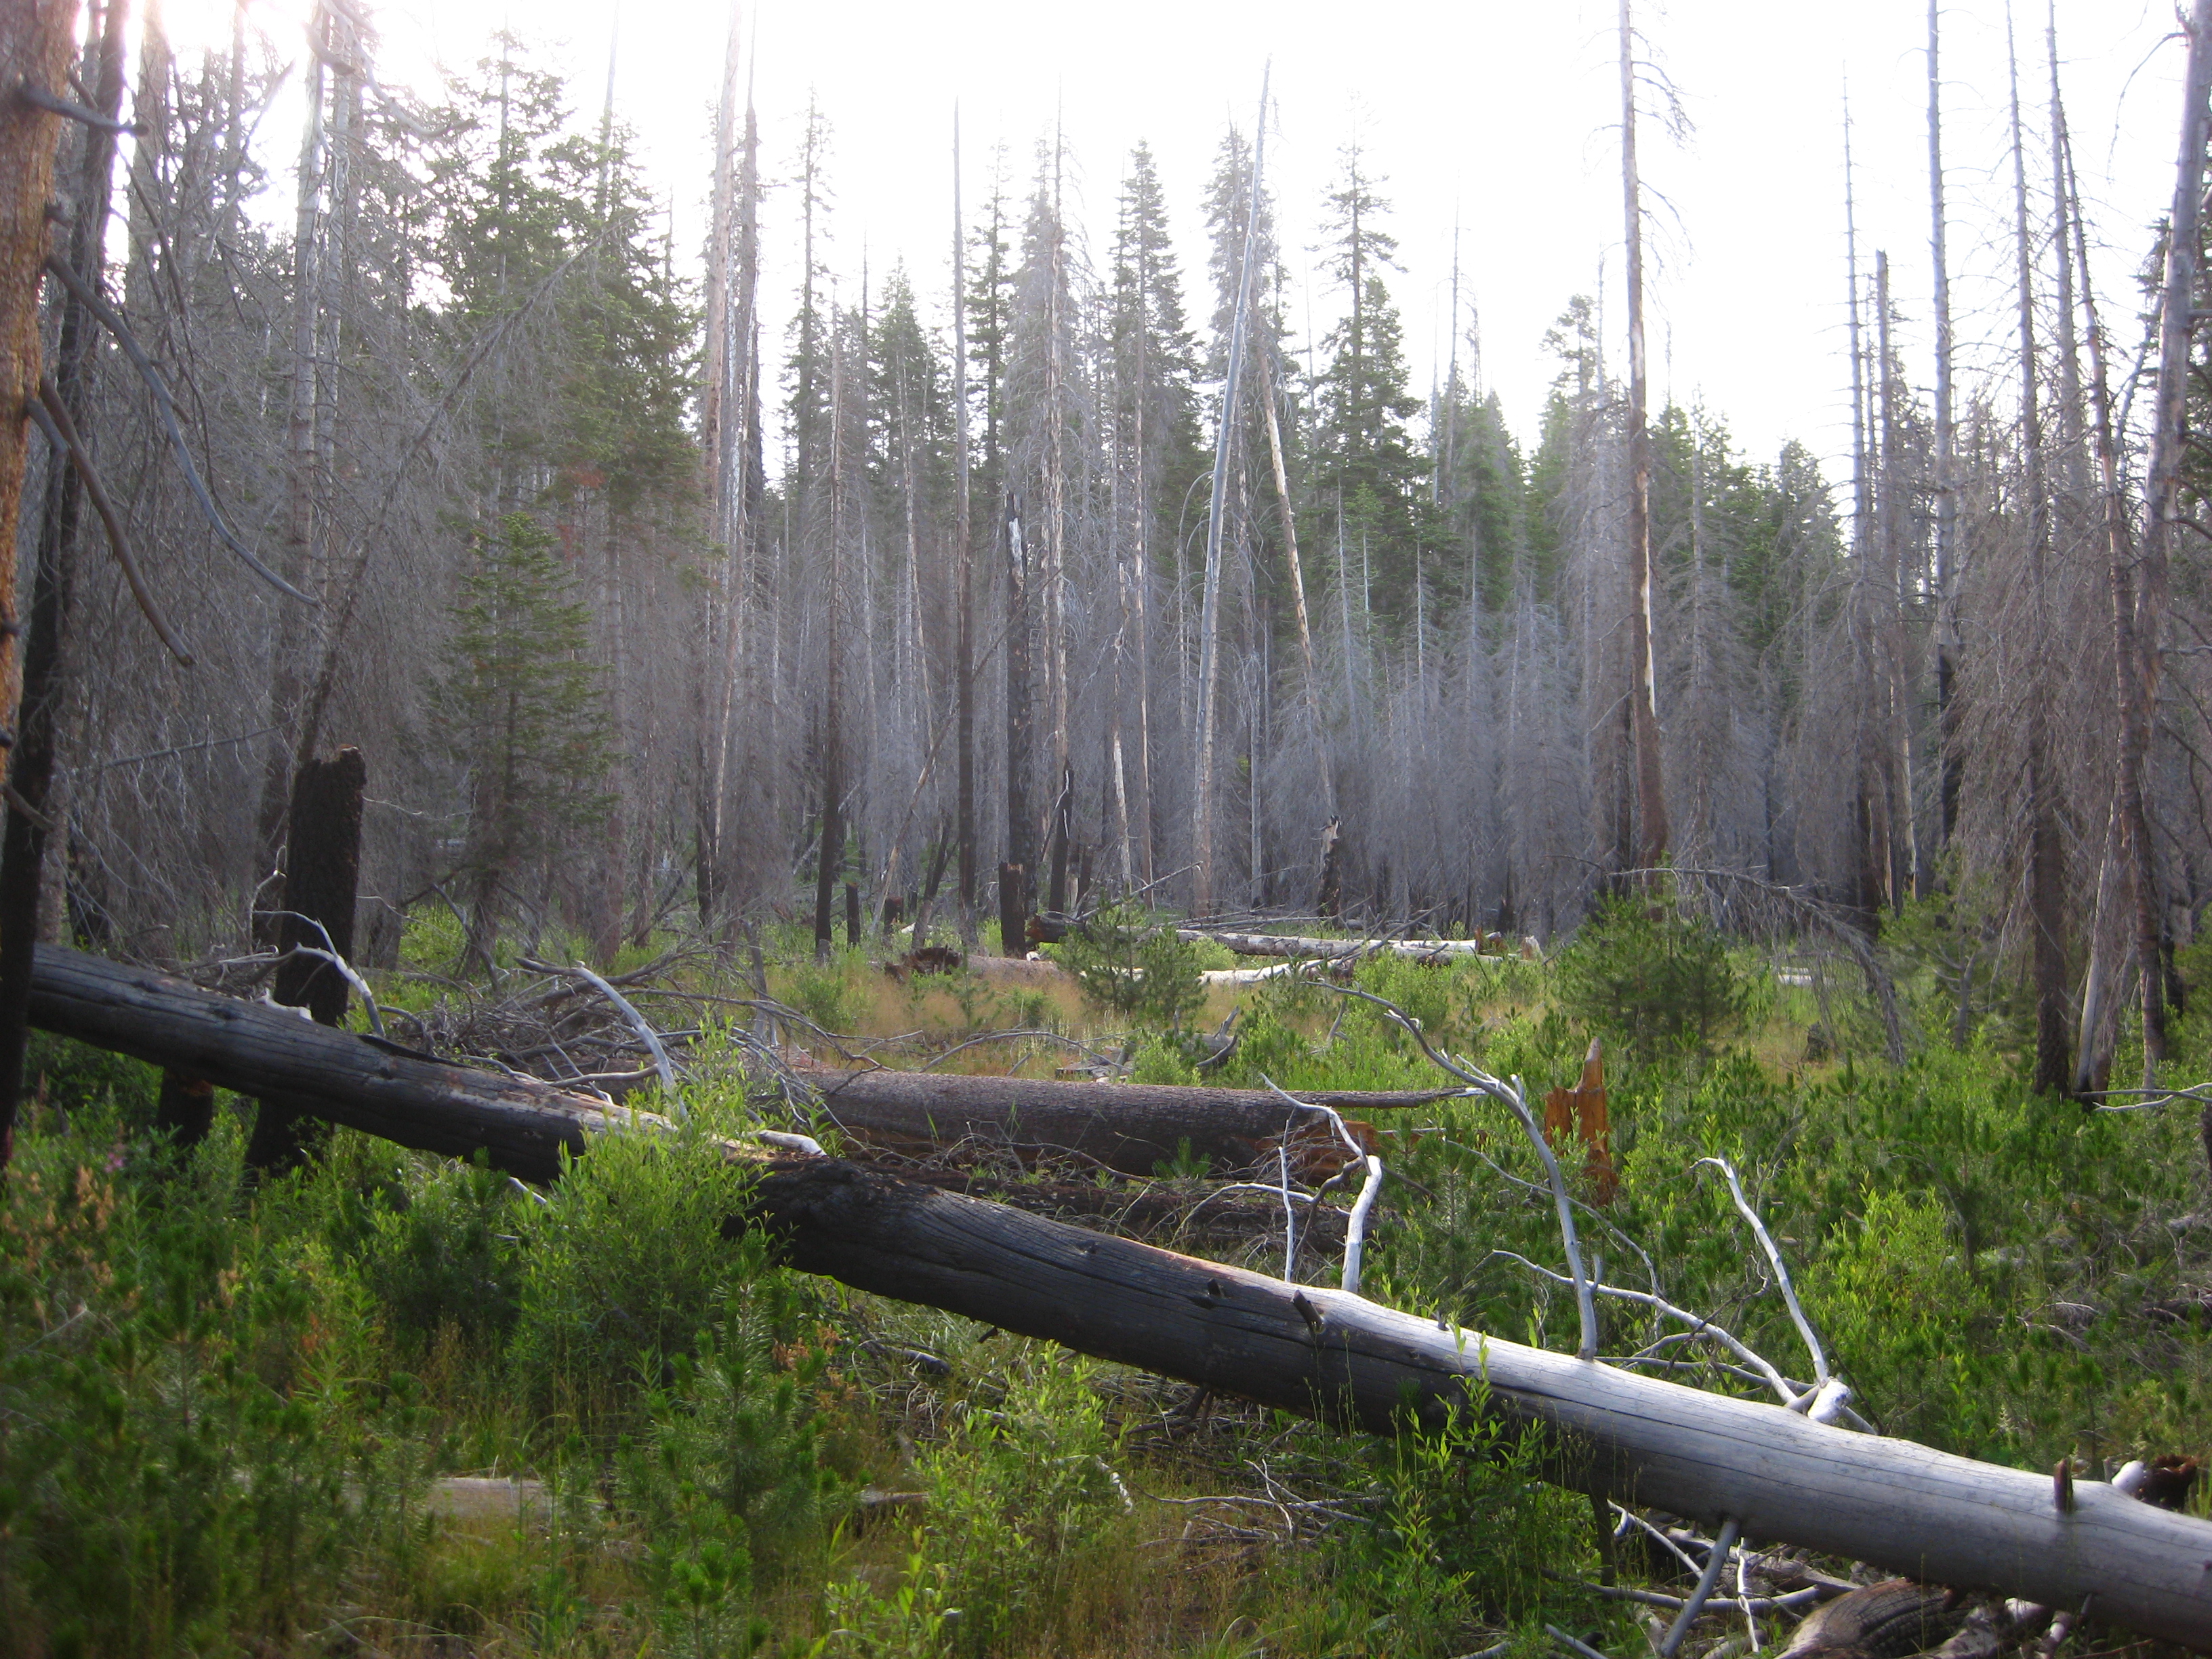
The trail becomes overgrown and unmaintained approximately around “Deer Meadow” on the topo map. This is the trail.
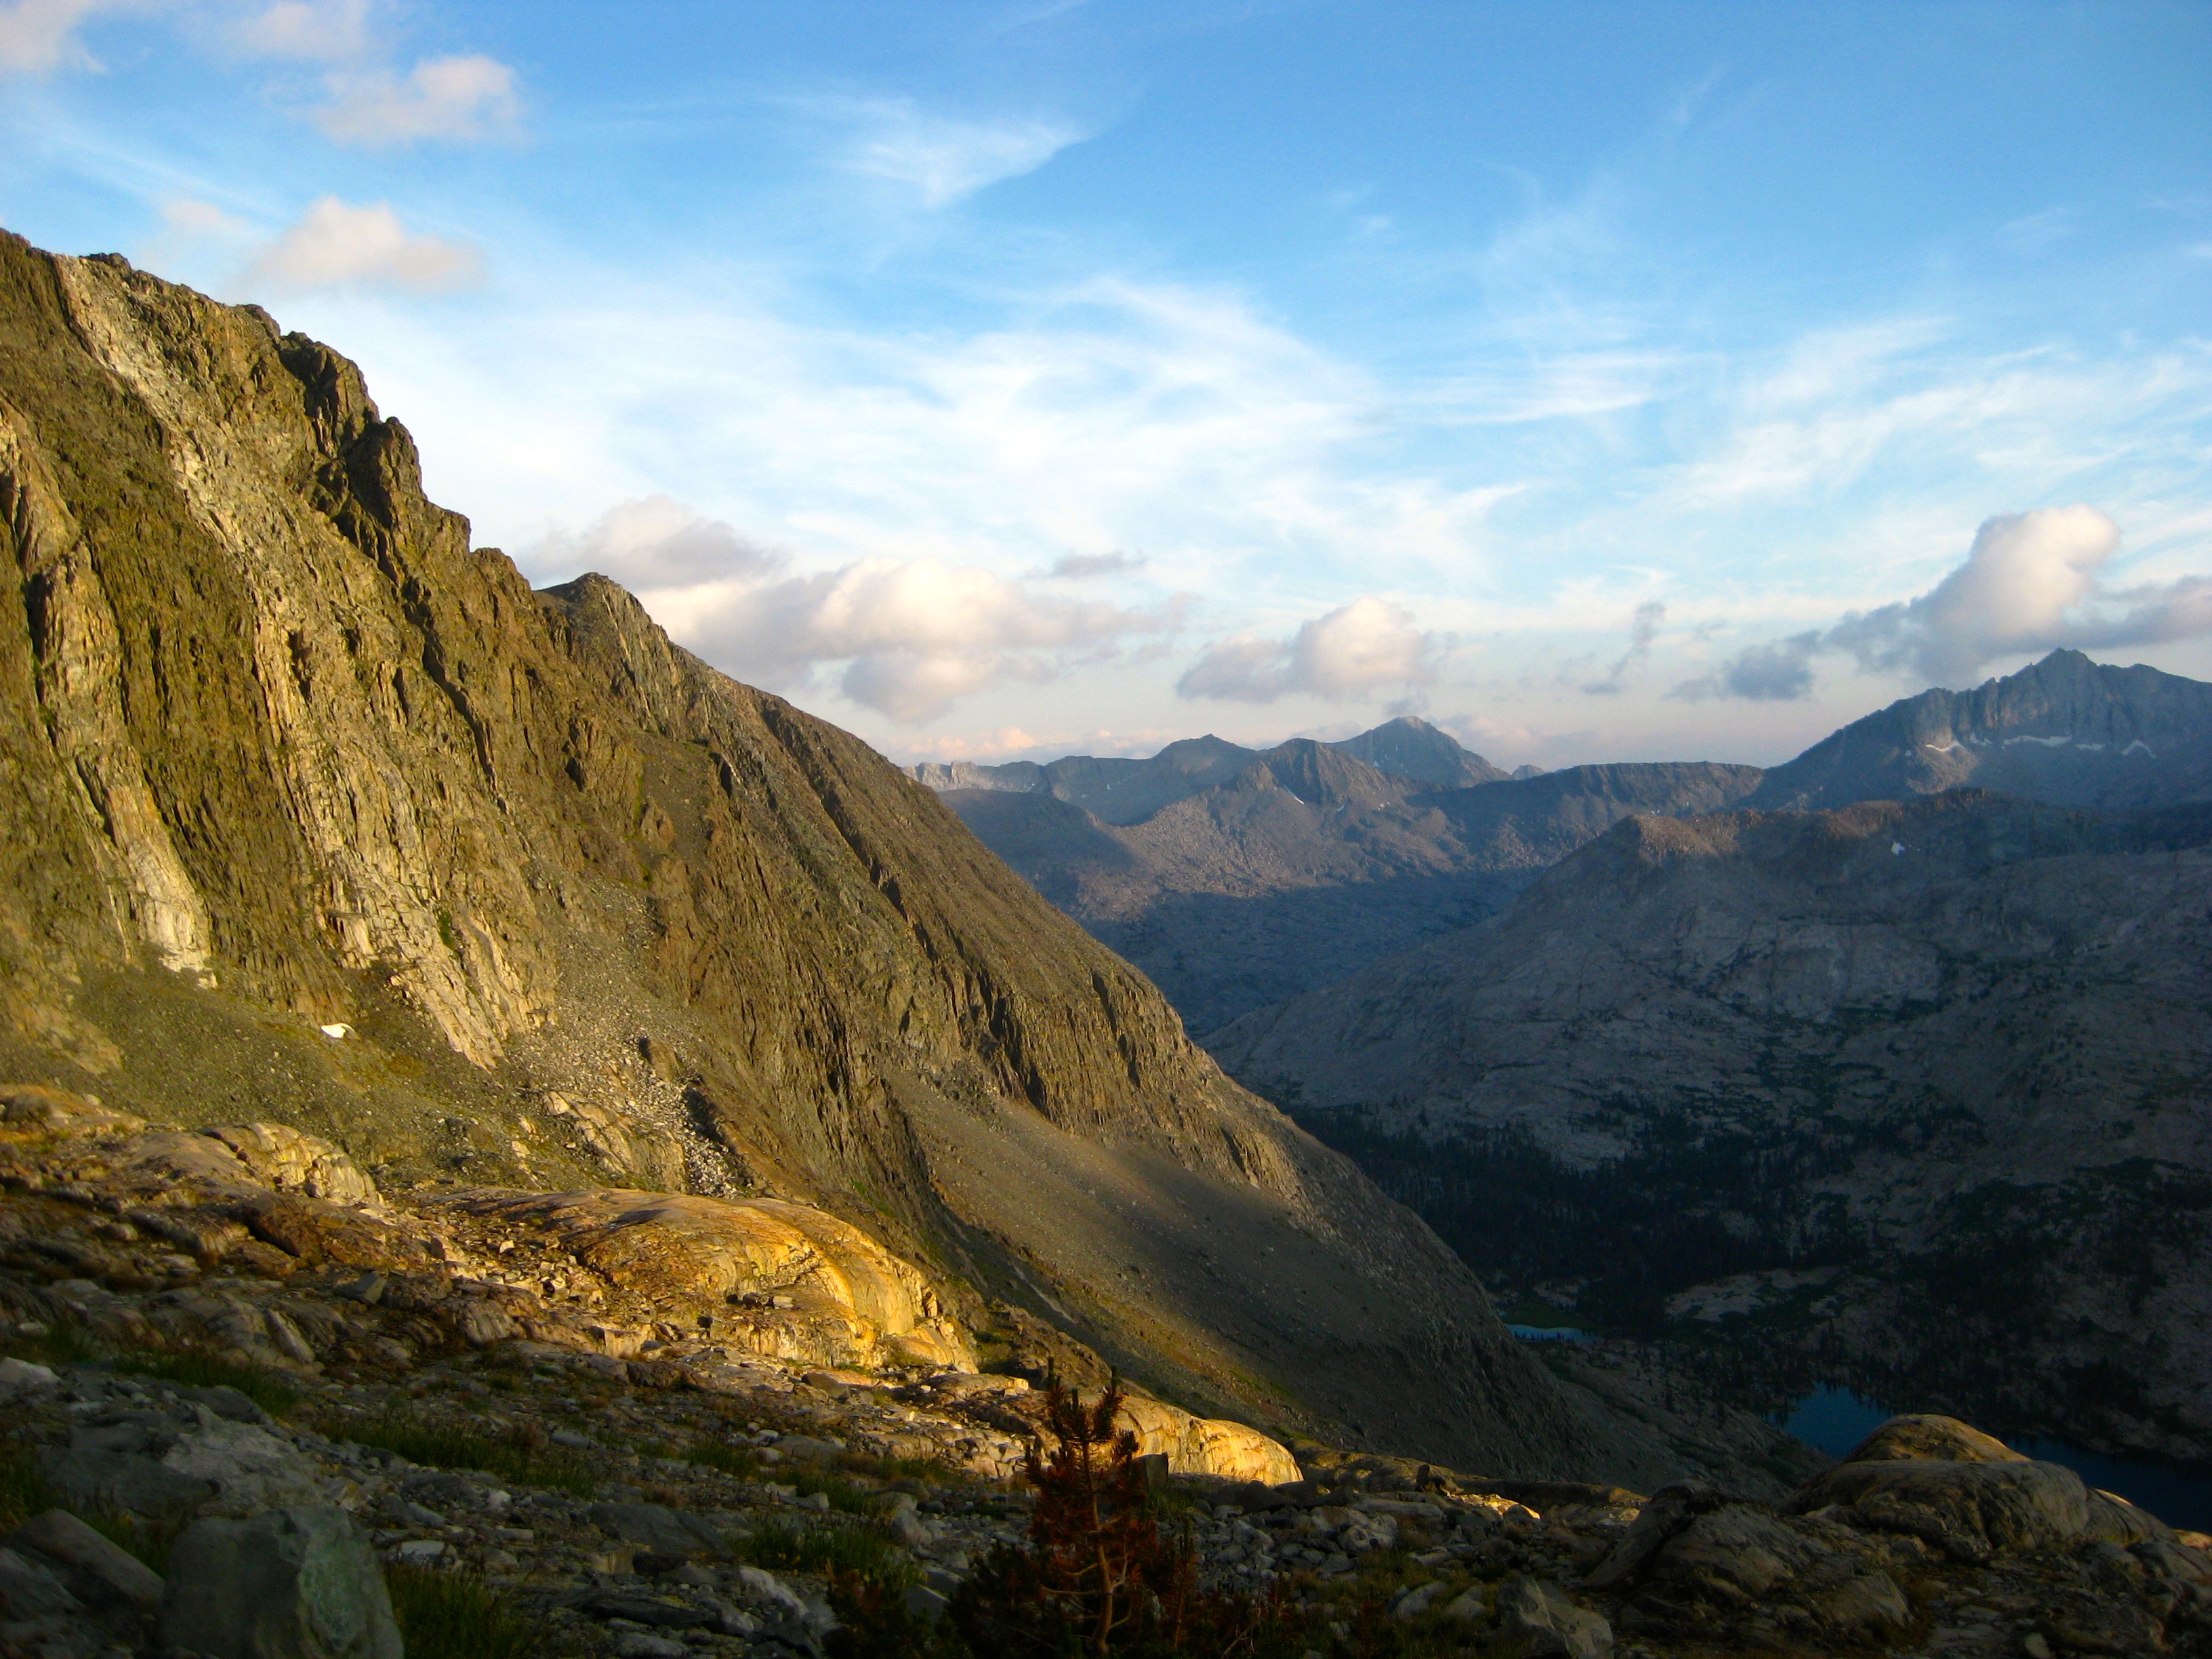
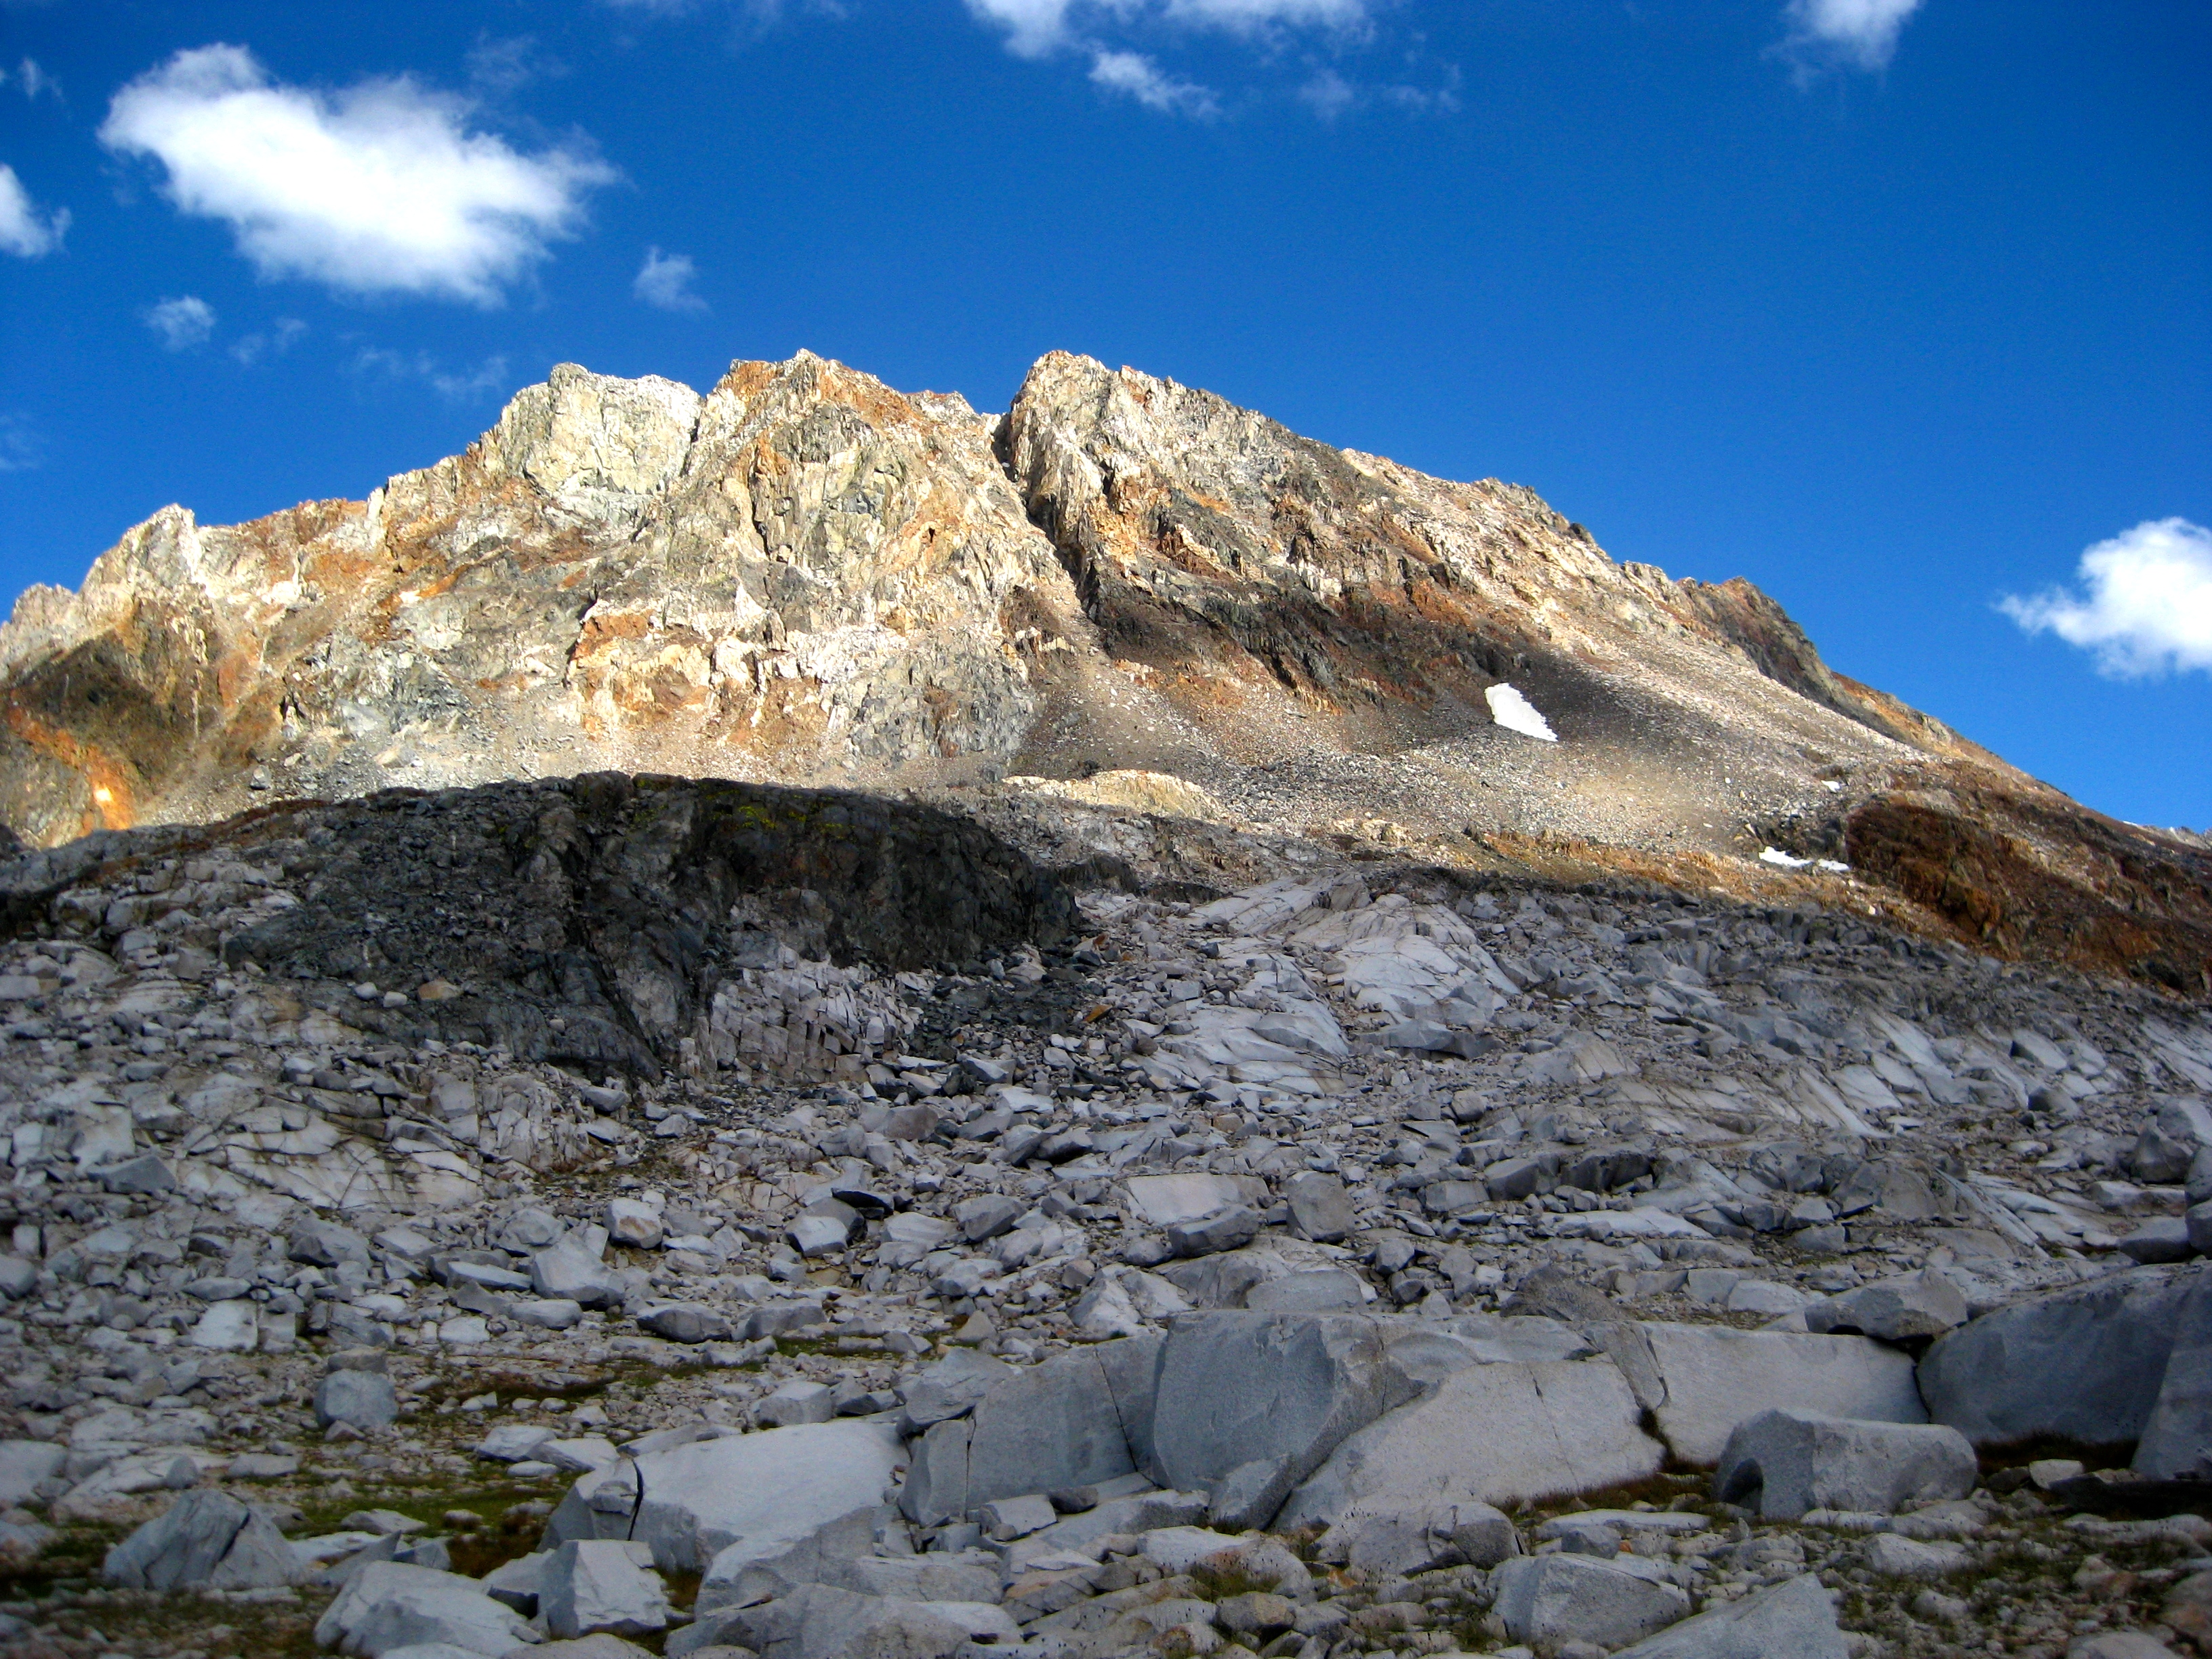
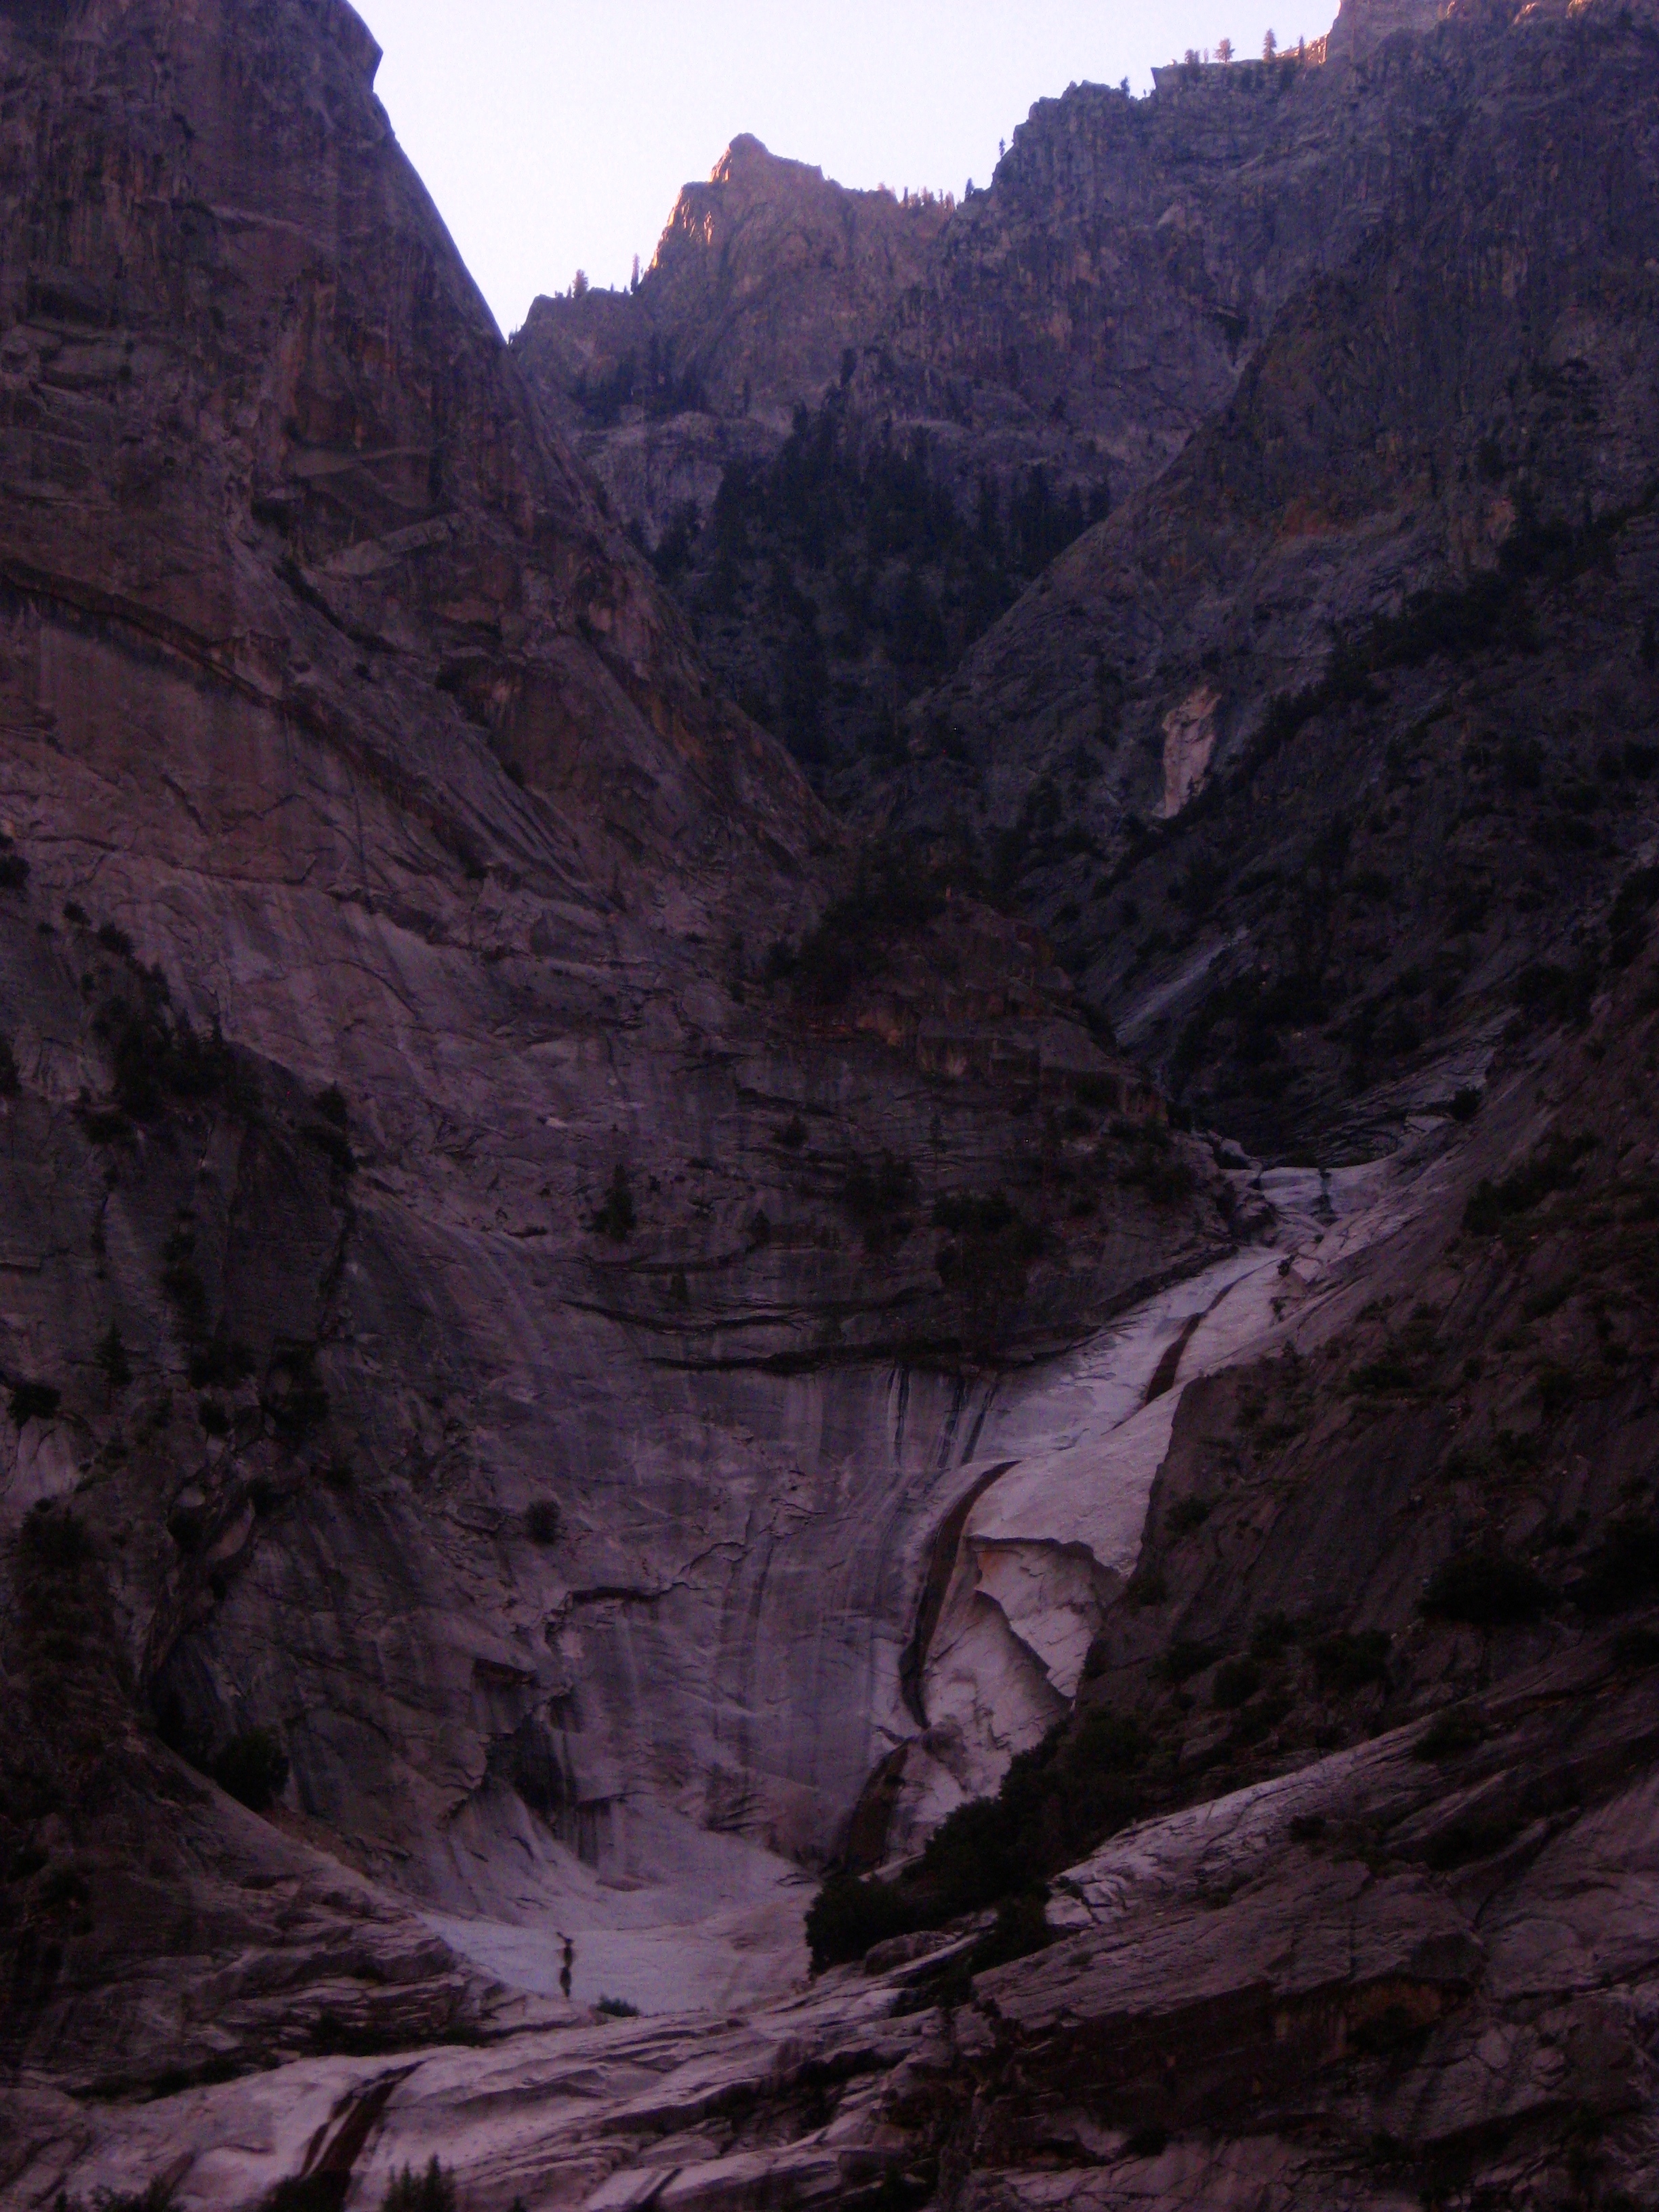
I did not lose the trail, but needed my GPS and careful route finding in several locations – especially in places where there was extended deadfall. I wouldn’t call this route a bushwhack, although there was some. Before you get to Tehipite dome, you will start to see some good Sierra Scenery. It was near here that I saw the first (and last) person I would encounter all the way until JMT. His name was “Lincoln,” and he had just climbed Finger Peak and Tunemah Peak. He told me a story about original explorers taking a Chinese cook up here with stock, and upon seeing the difficulty of the terrain, the cook shouted “Tunemah!” In Chinese, this is apparently an expletive, and so the peak was named. Lincoln’s intention was to go climb Tehipite dome next.
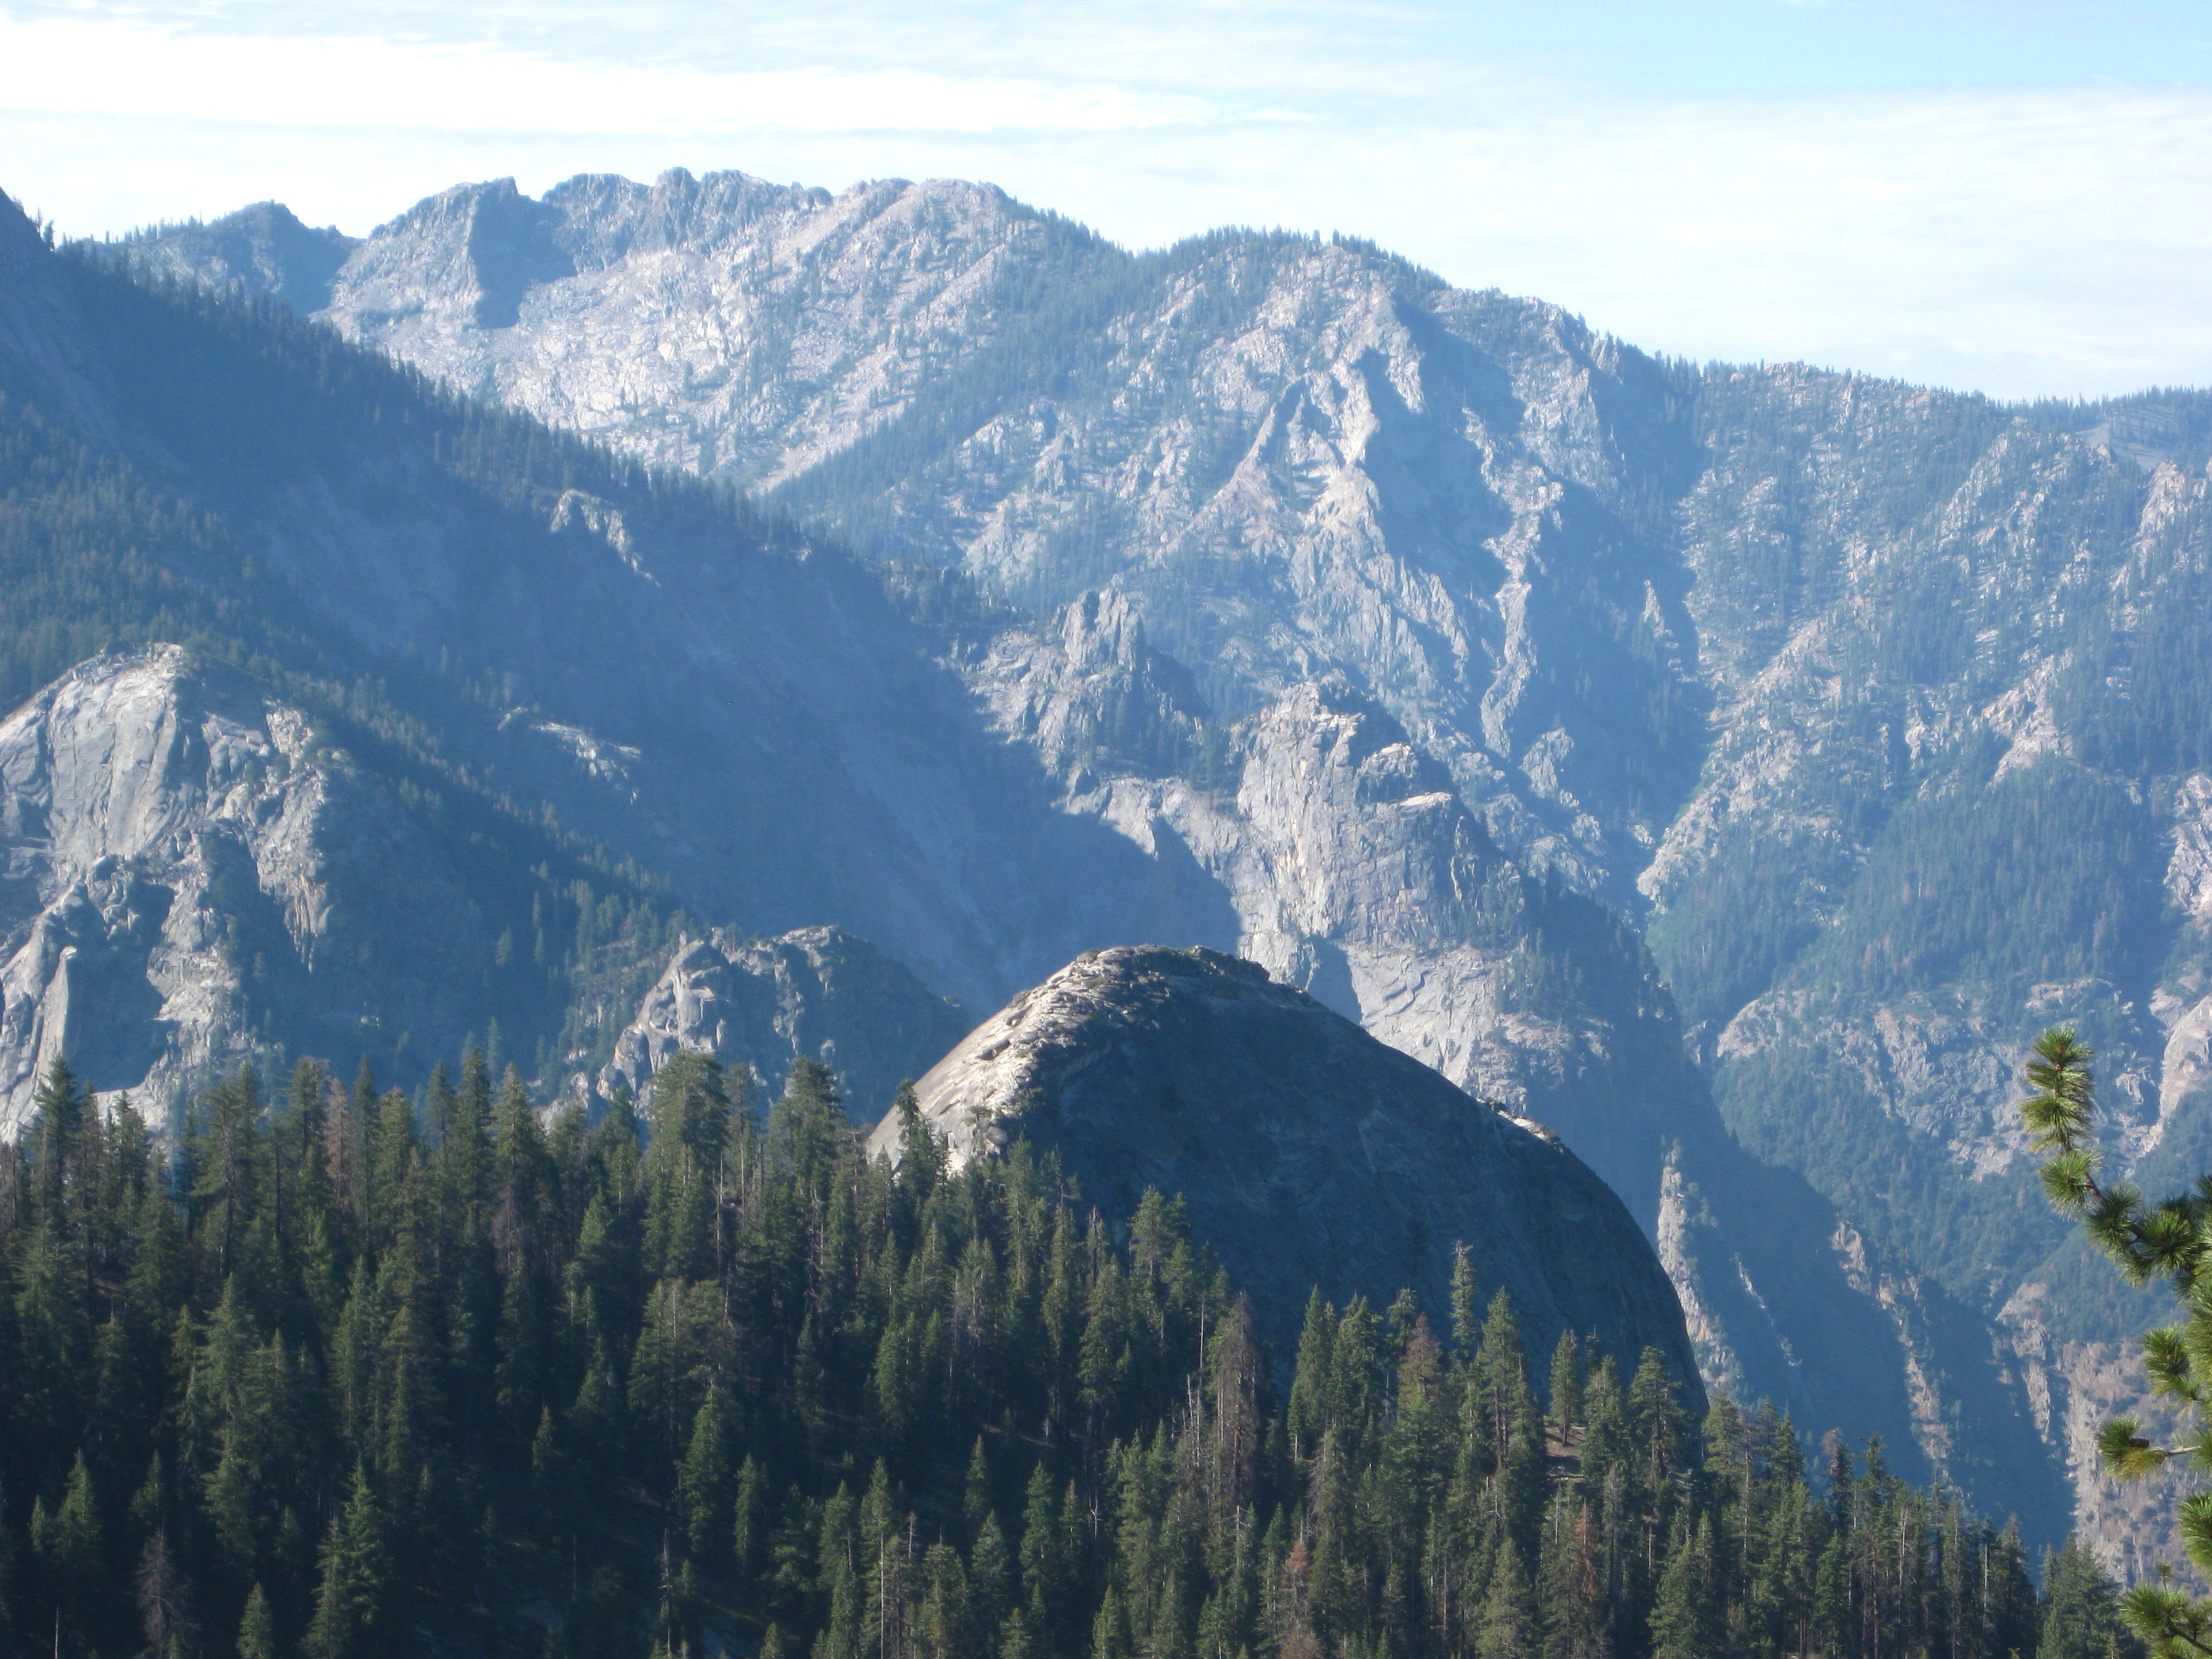
This is the scene along the trail due South of Kettle Dome. It is possible to walk cross-country out to the top of Tehipite Dome. I hear there is a short class 3 section, but I have not done it myself.
After several ascents and decents, you begin a continuous ascent up Blue Canyon towards Blue Lakes. This section, while also severely overgrown, is increasingly beautiful as you reach the higher elevations.
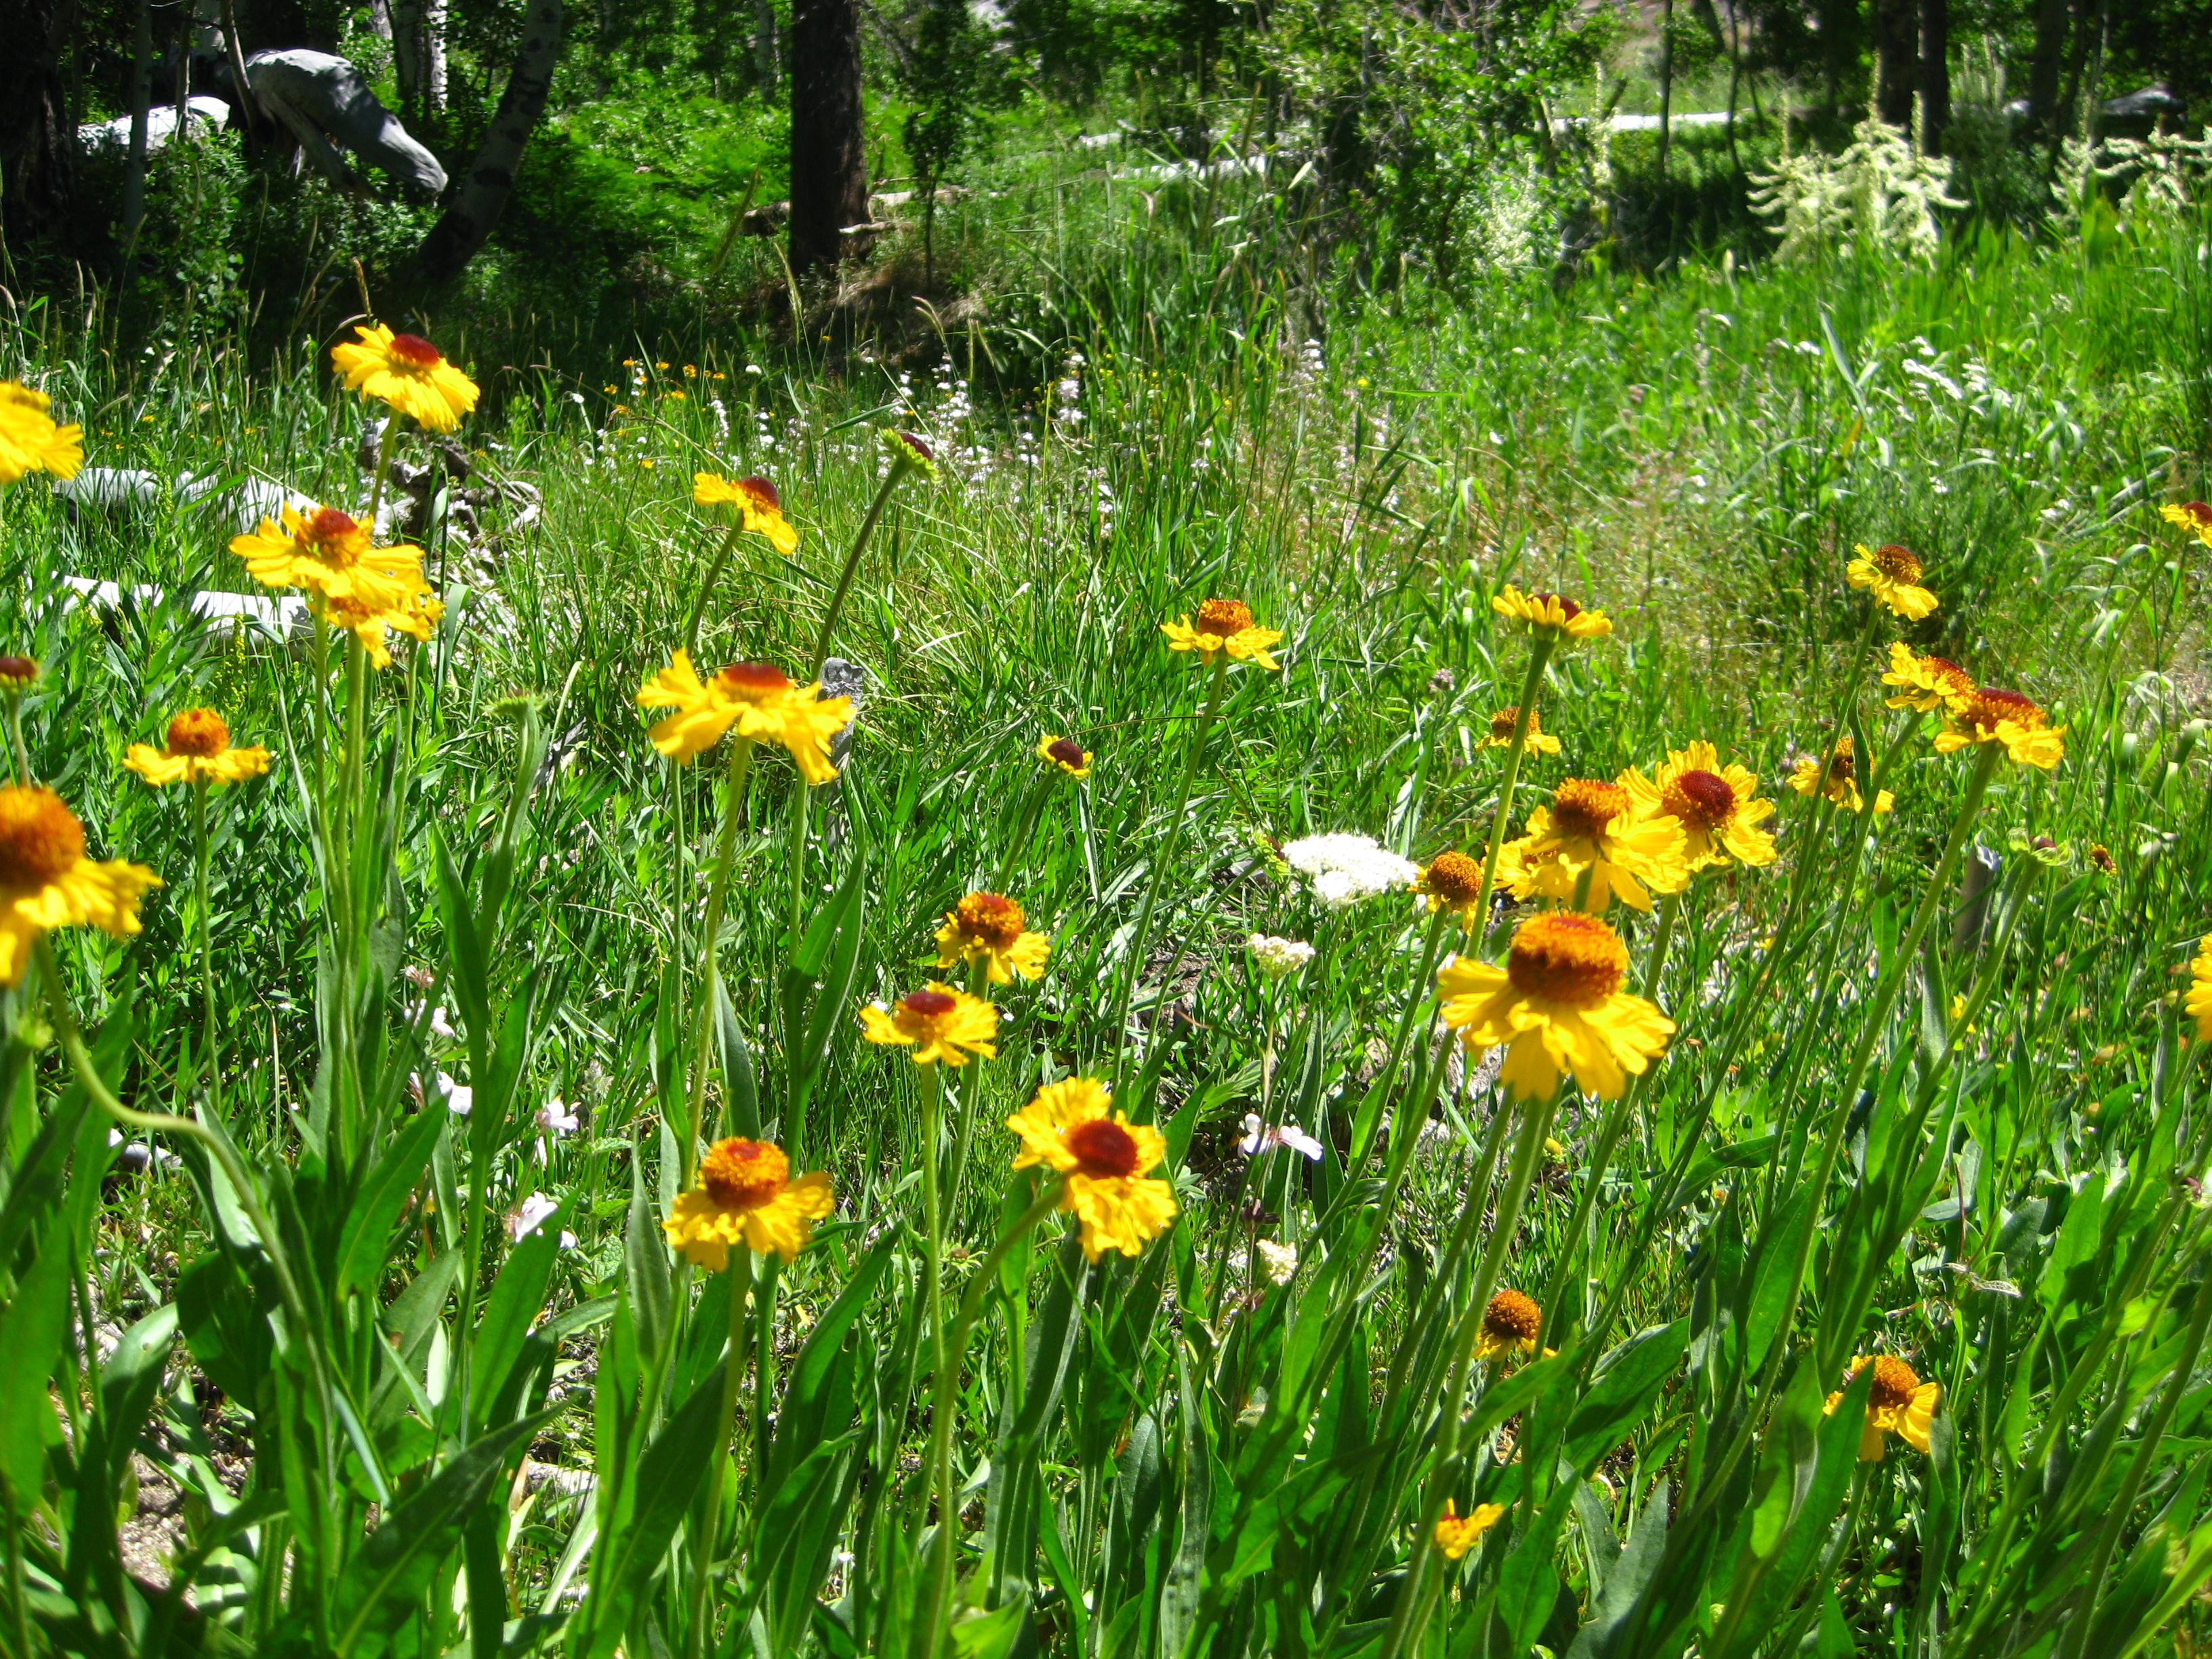
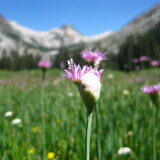
Lots of flowers in Blue Canyon Bigelow’s Sneezeweed

Meadows with flowers of varying colors make for an excellent foreground to the high sierra backdrop. These are wild Onions
The trail does not go all the way to the actual blue lakes, but I suggest you follow it as long as possible. The best way is to use the GPS track linked above. If you lose the trail, it will help you route a few feet right or left to find it again. I mostly took the trail, but deviated in one section in favor of talus versus bushwhack.
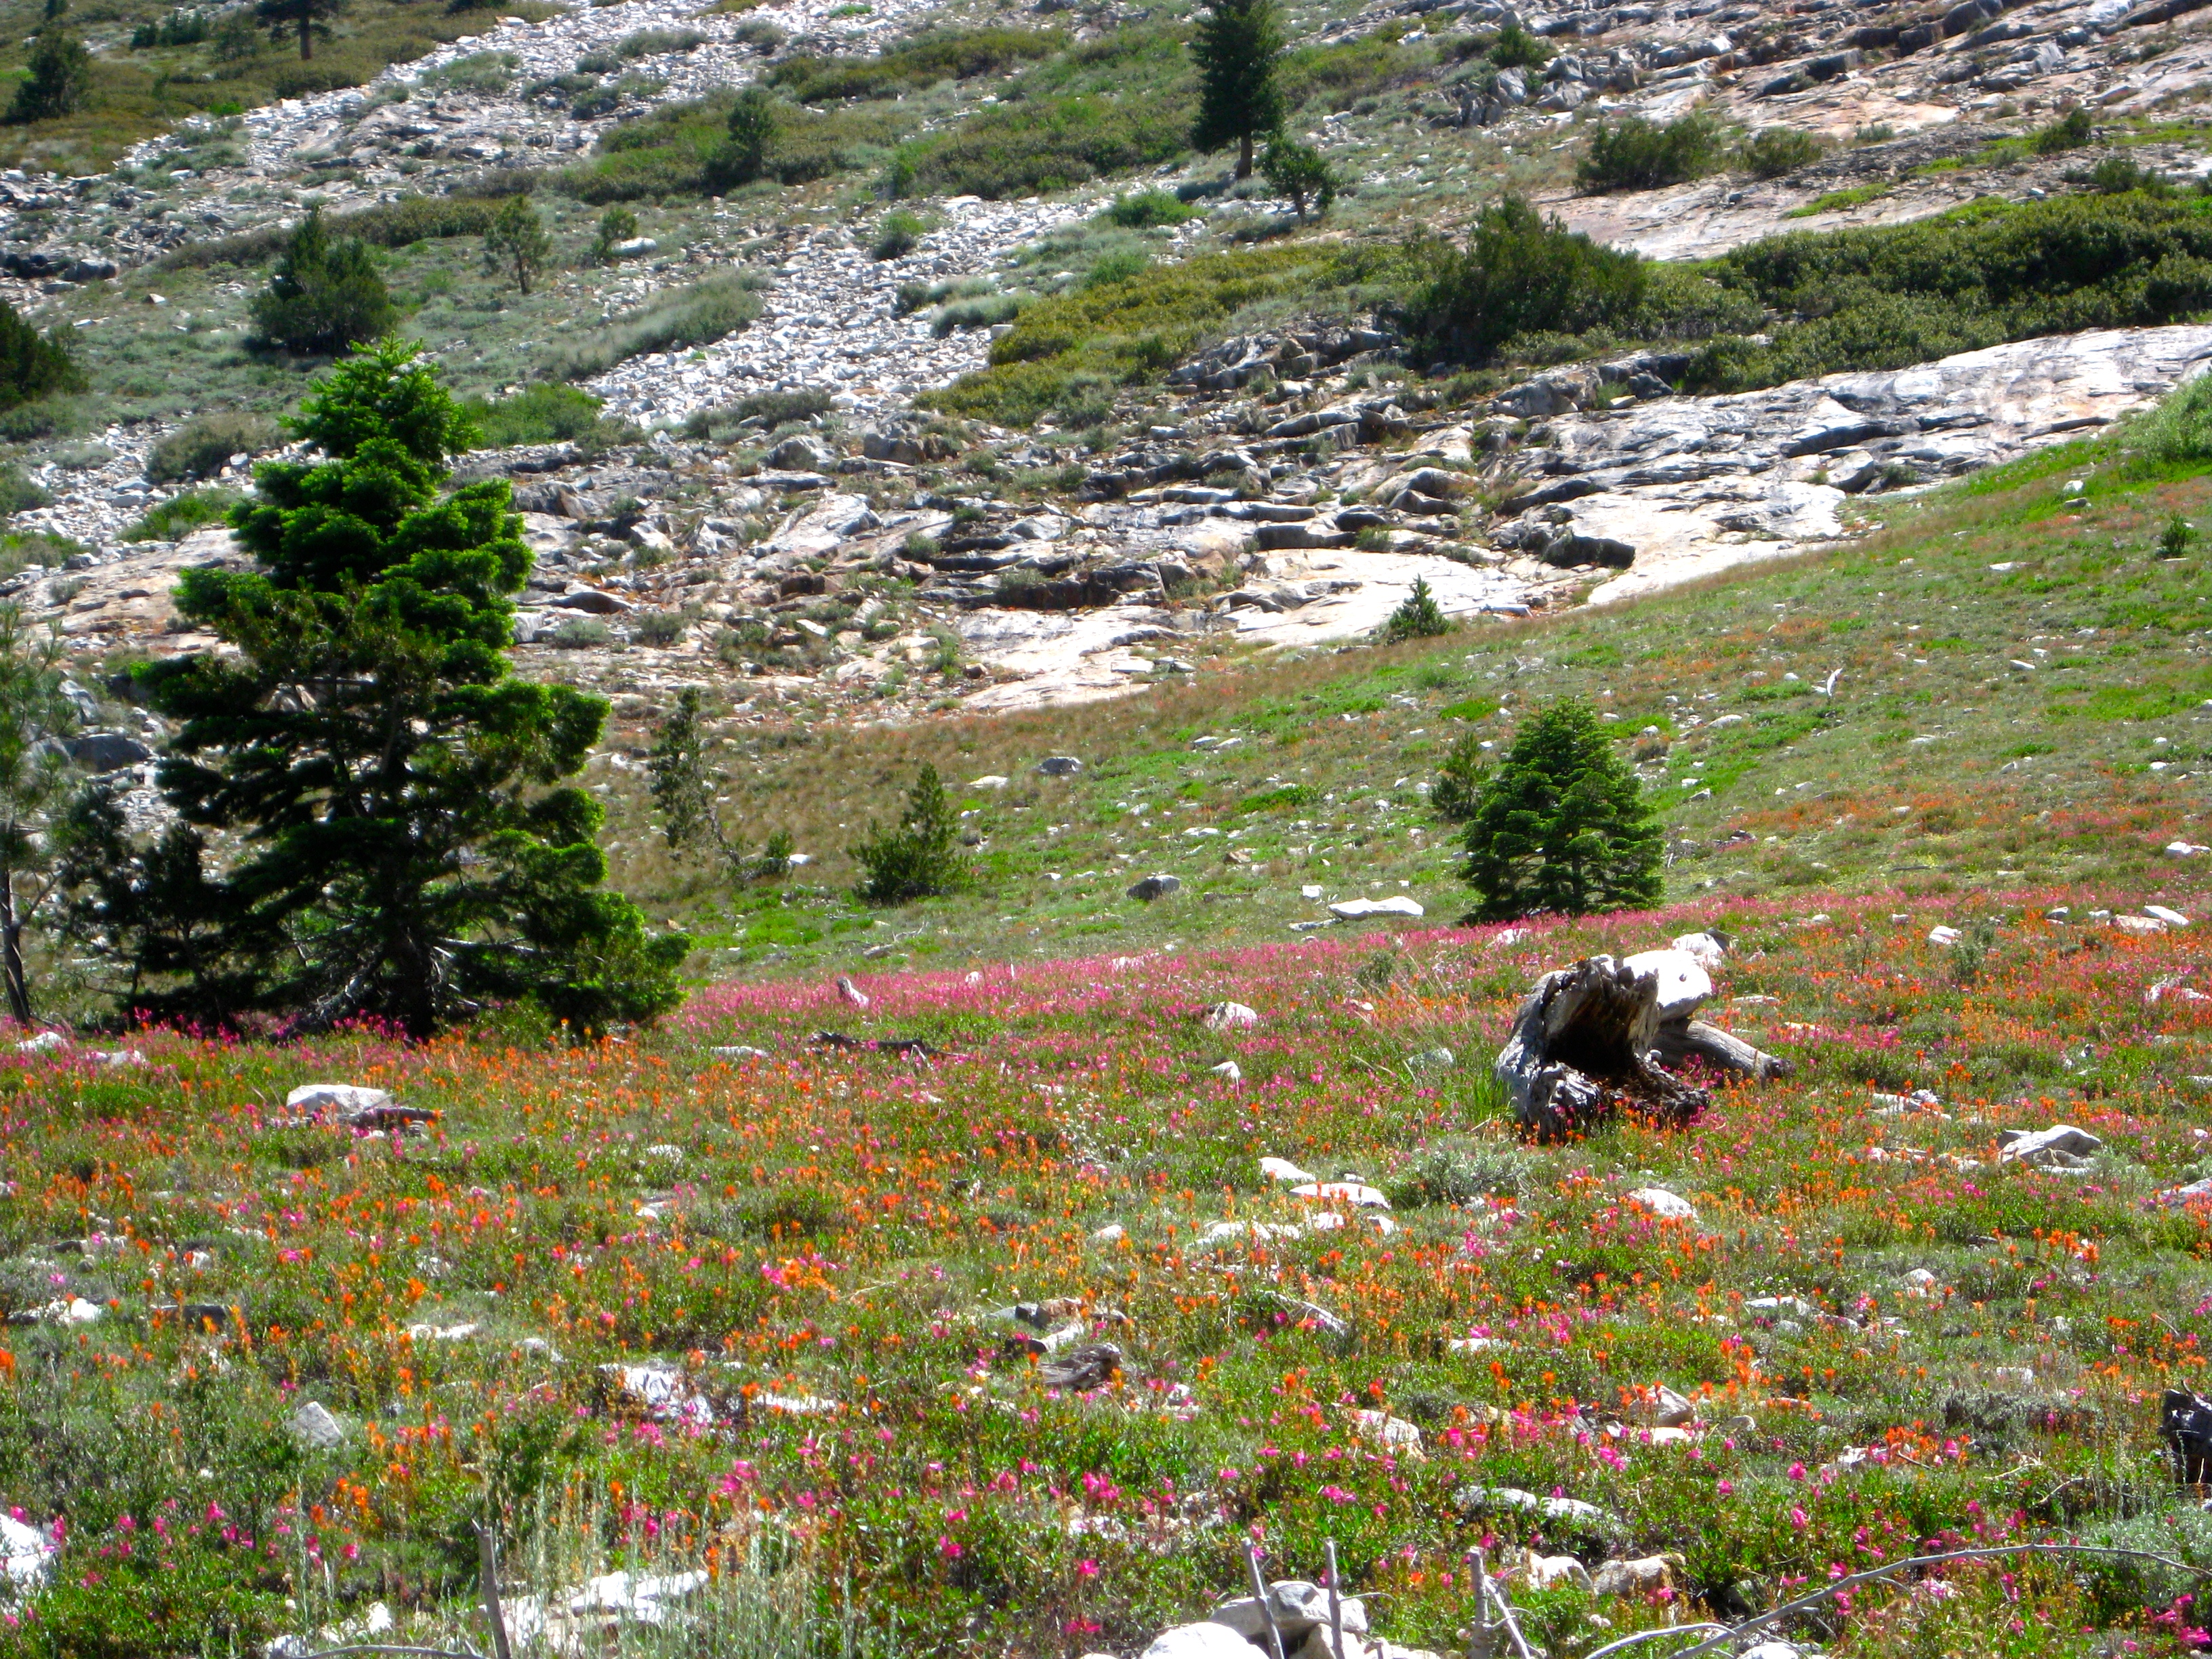
Before you reach Blue Lakes, you will encounter stunning meadows of color.
After you round a meadow (on the right hand side), you will soon encounter an increase in the slope – and you will see a small, deep canyon on your left. You may want to explore the canyon, but that does not seem to be a feasible way to make it up to the lakes. Stay right and go up the talus-y trail. Eventually, the trail ends. The easiest way to make it up to Blue Lakes is to go to the right of the big knob, which will take you to lower blue lake.
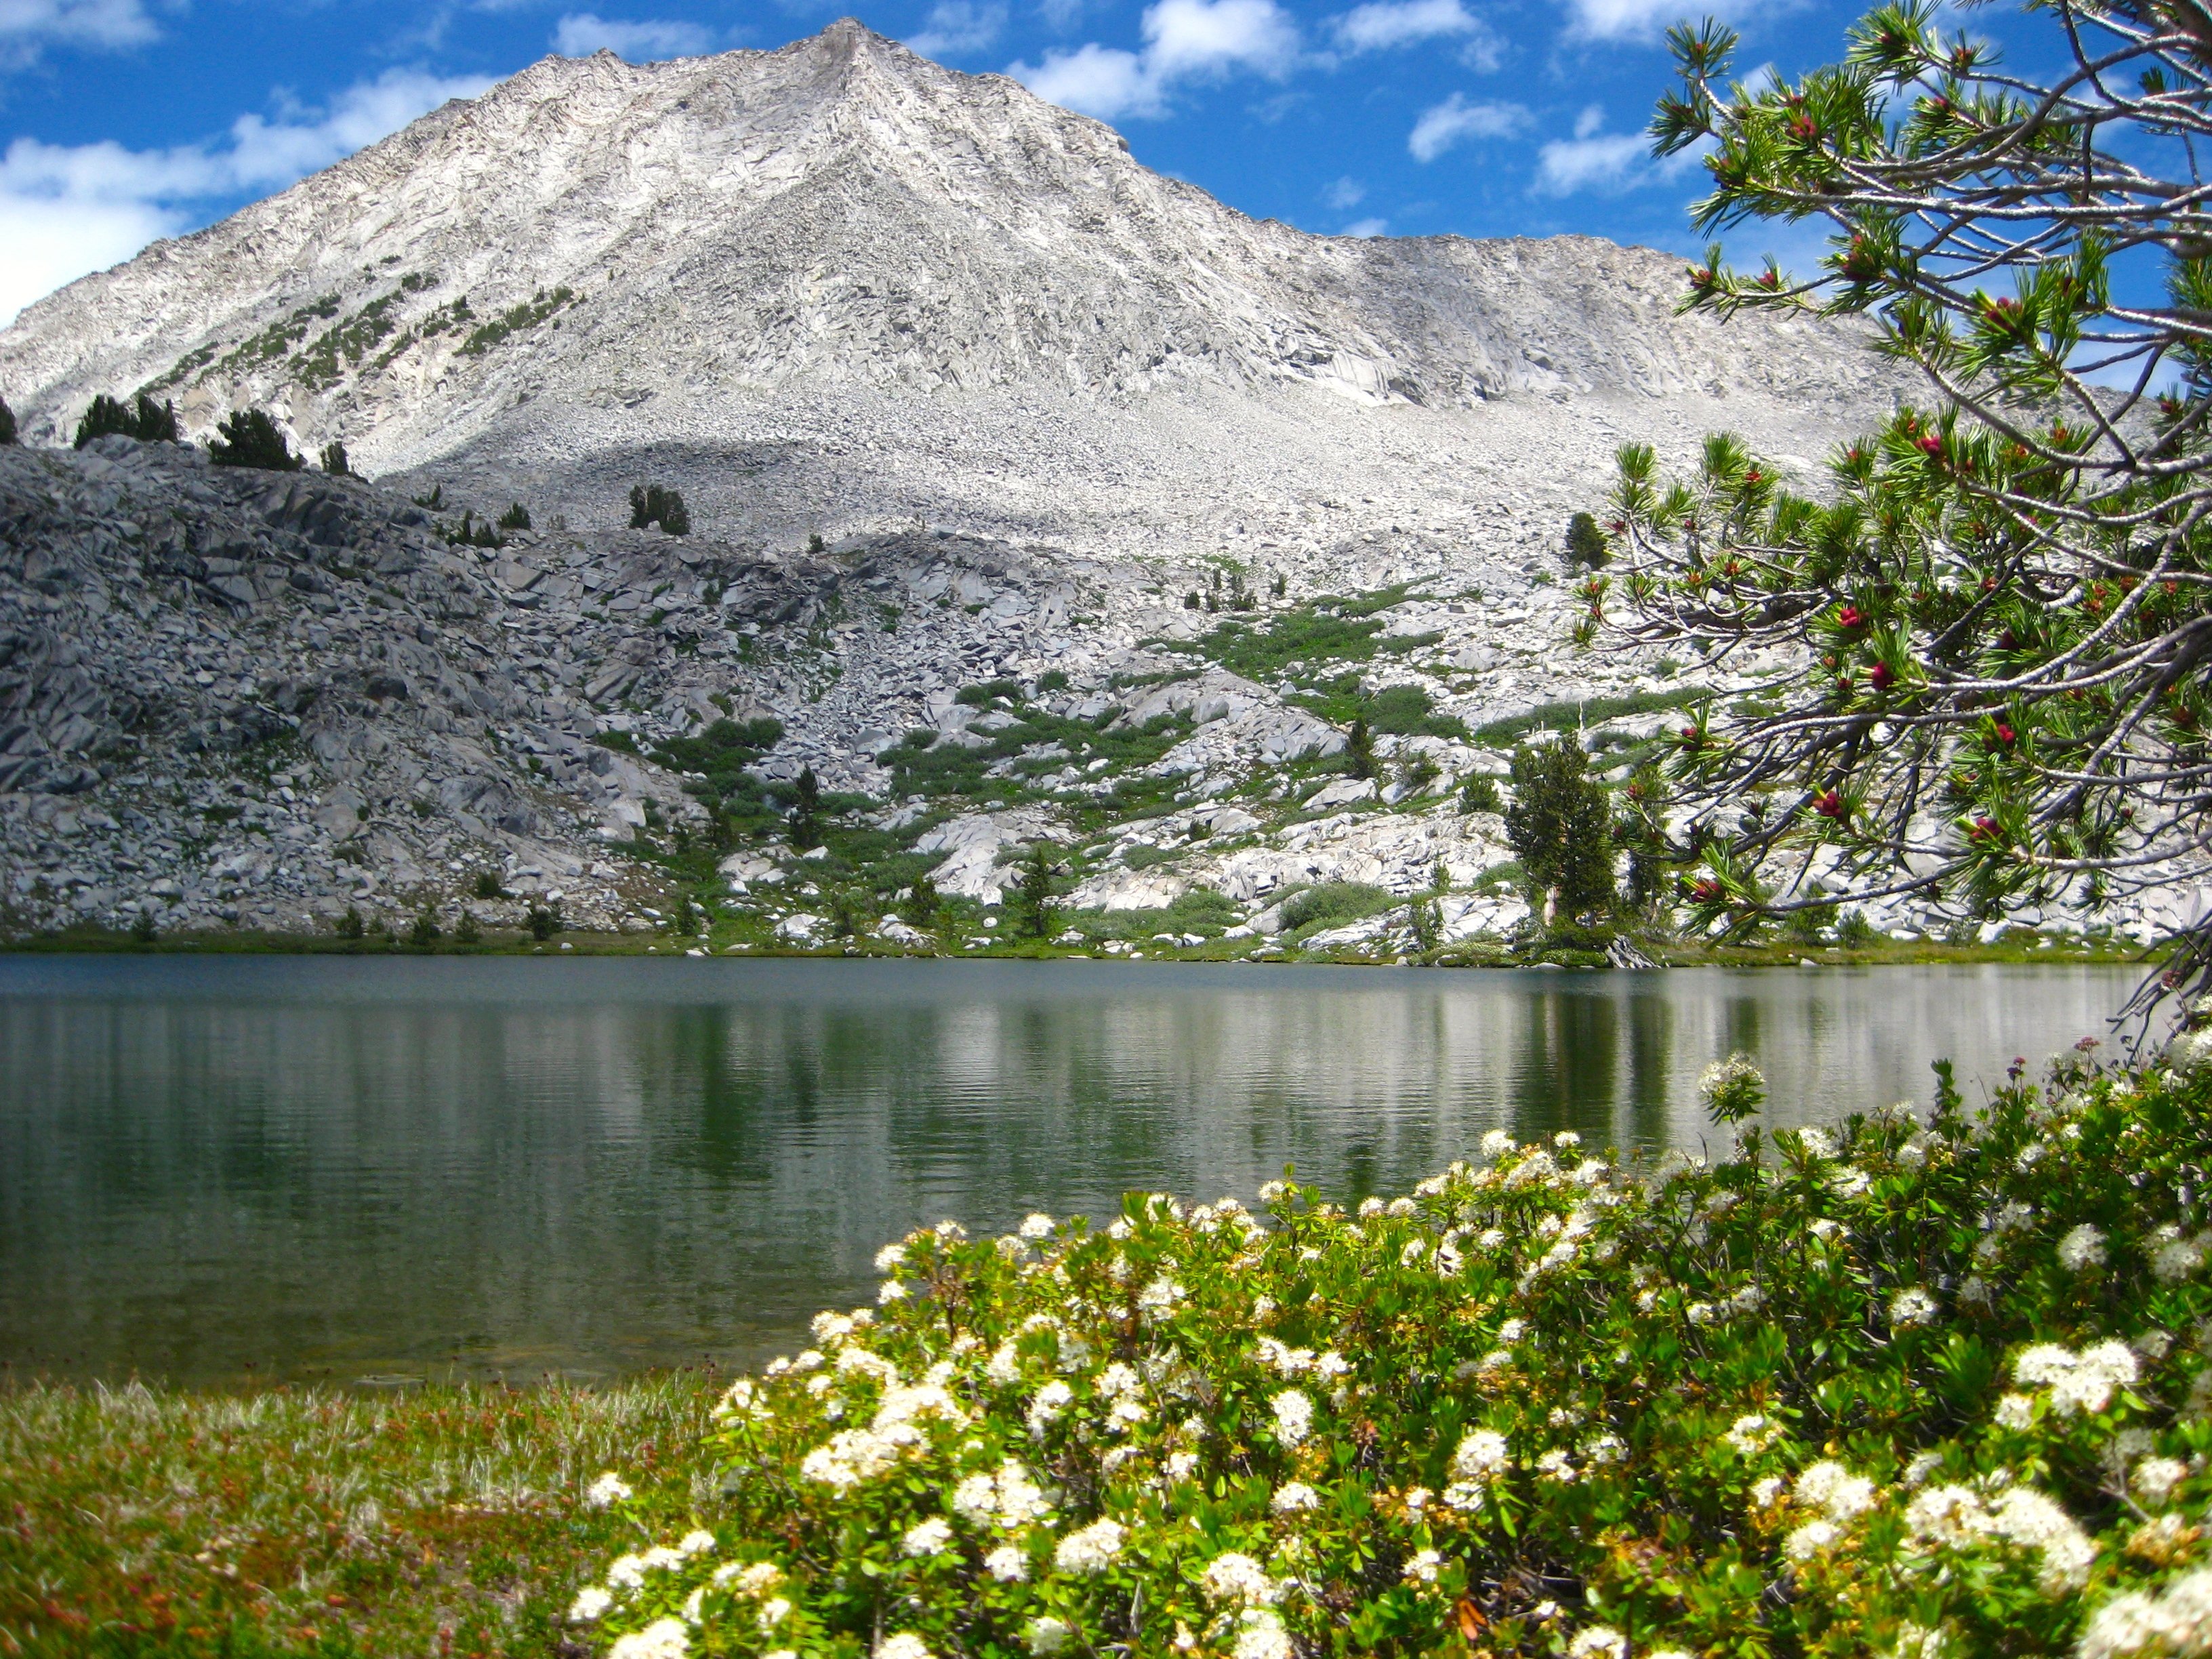
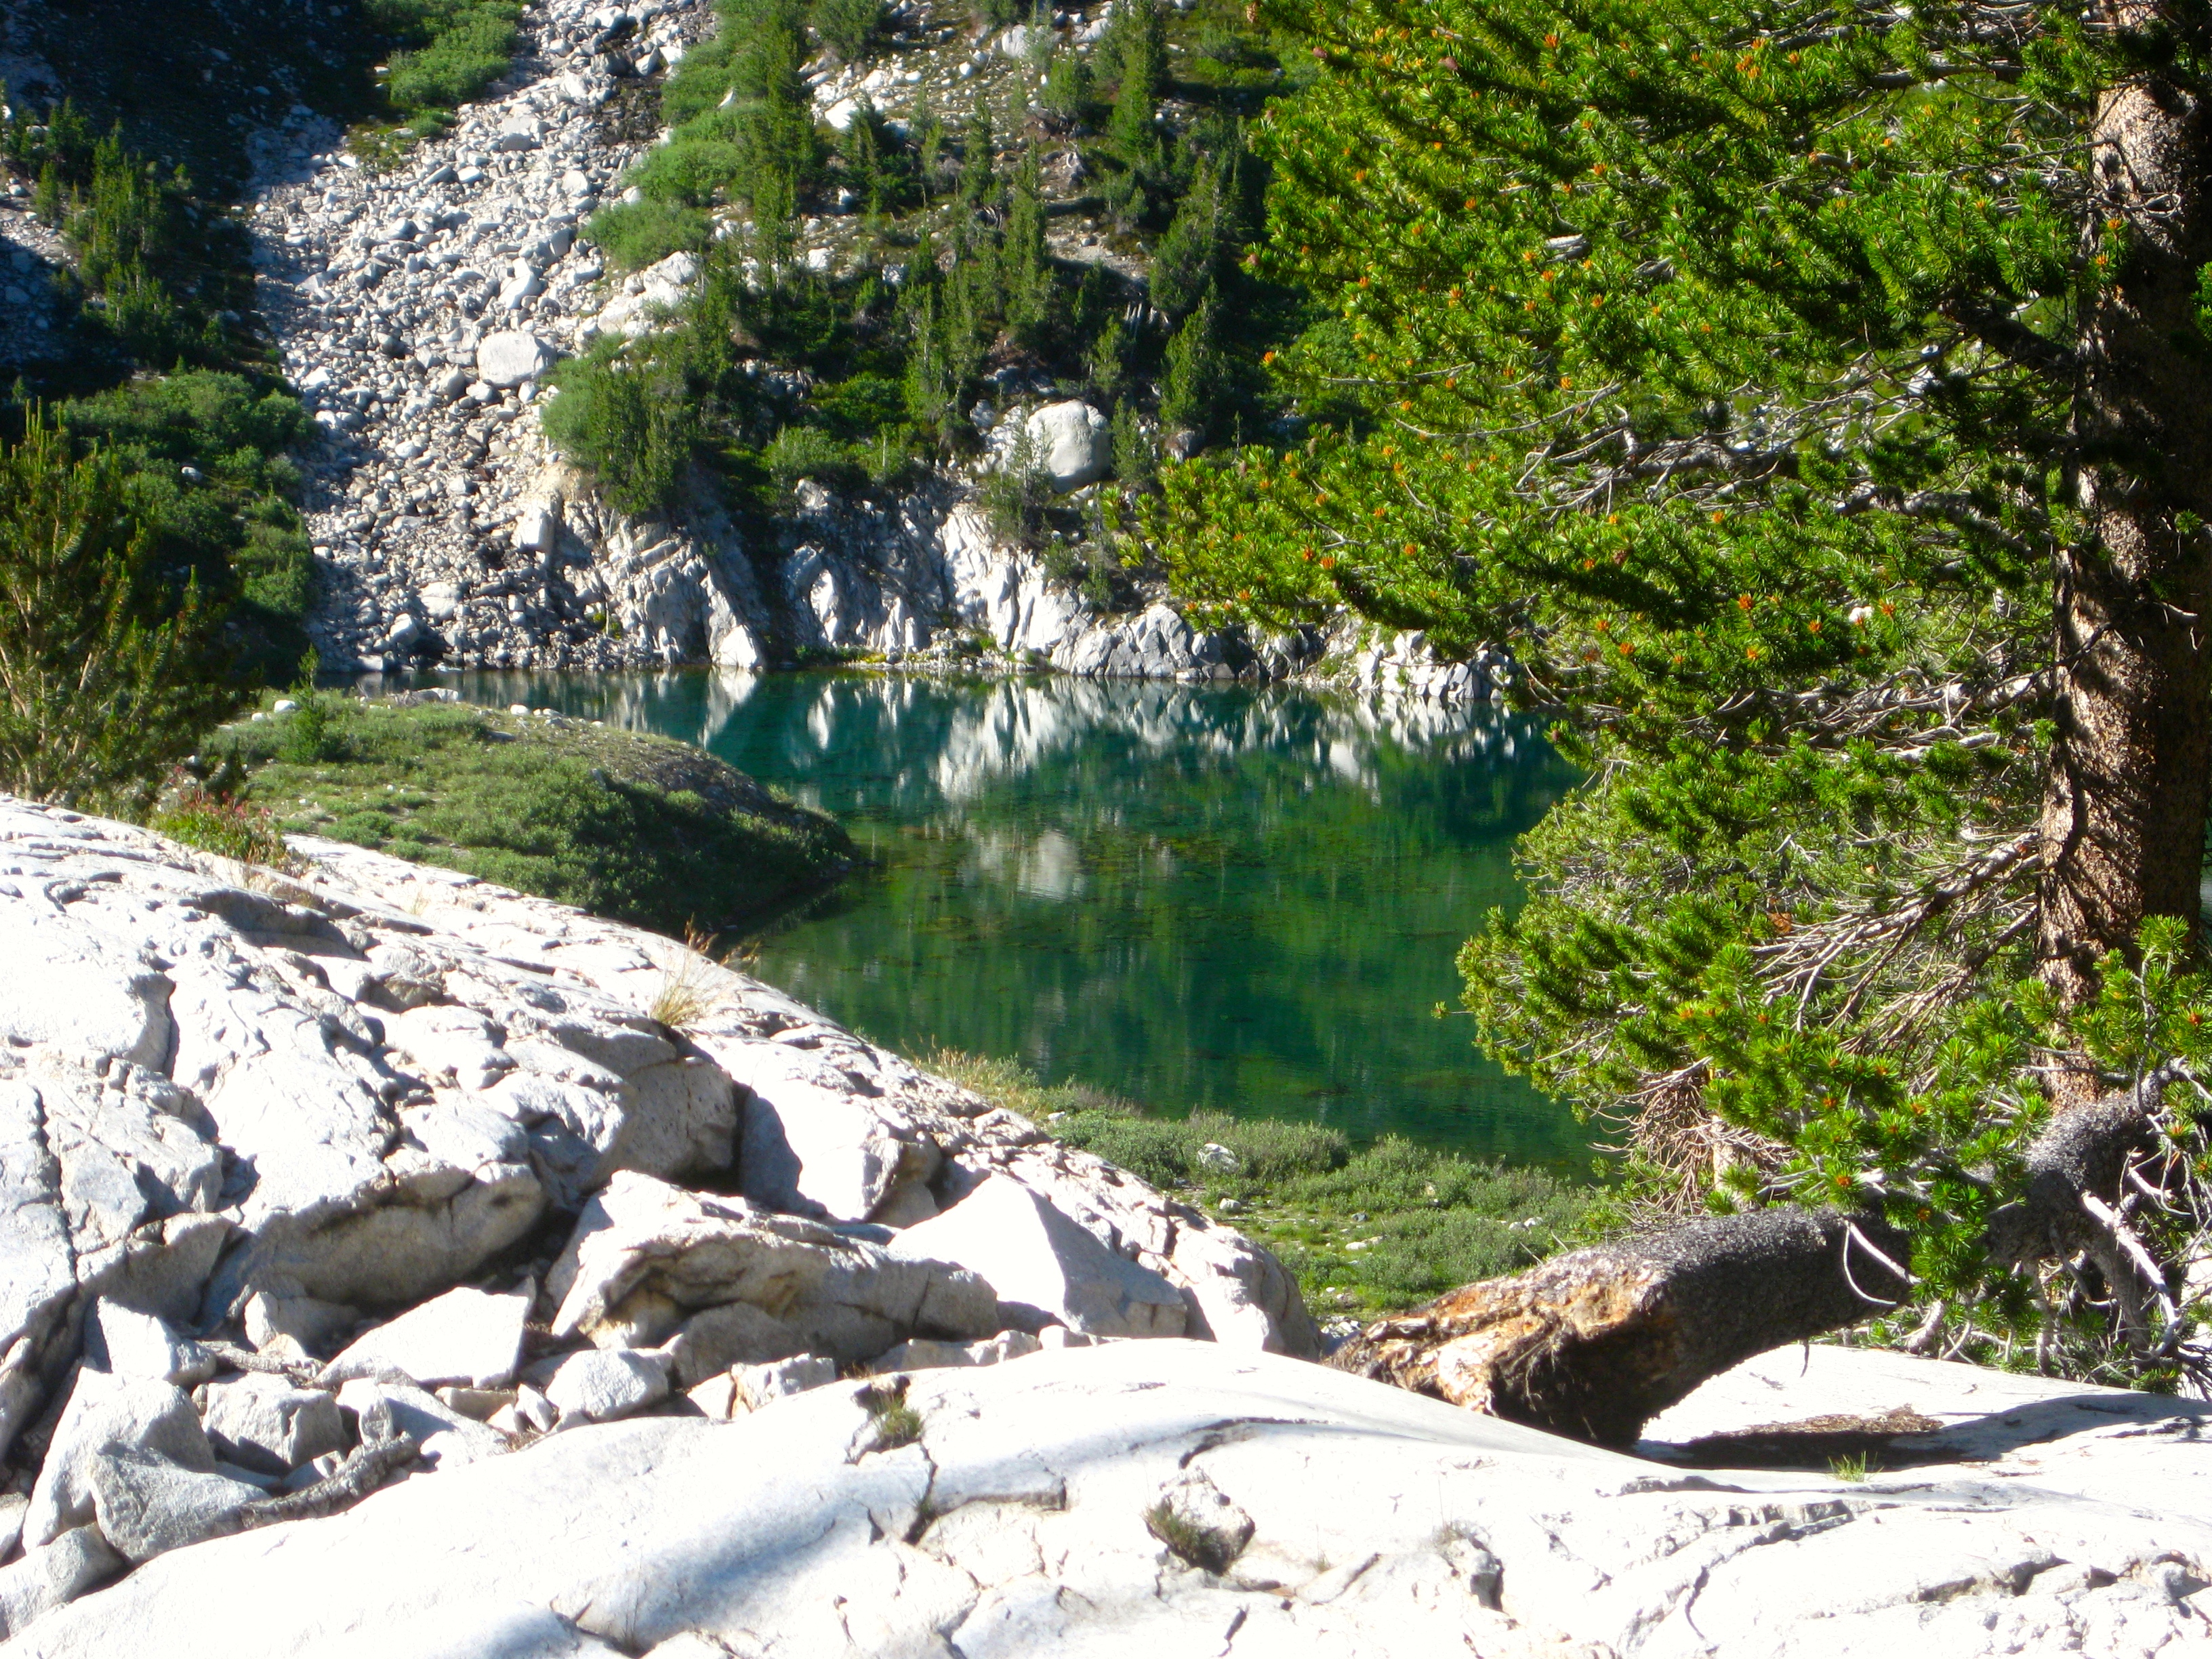
Lower Blue Lake is a great place for a swim. Even after a relatively cool July, water temperatures were very comfortable.
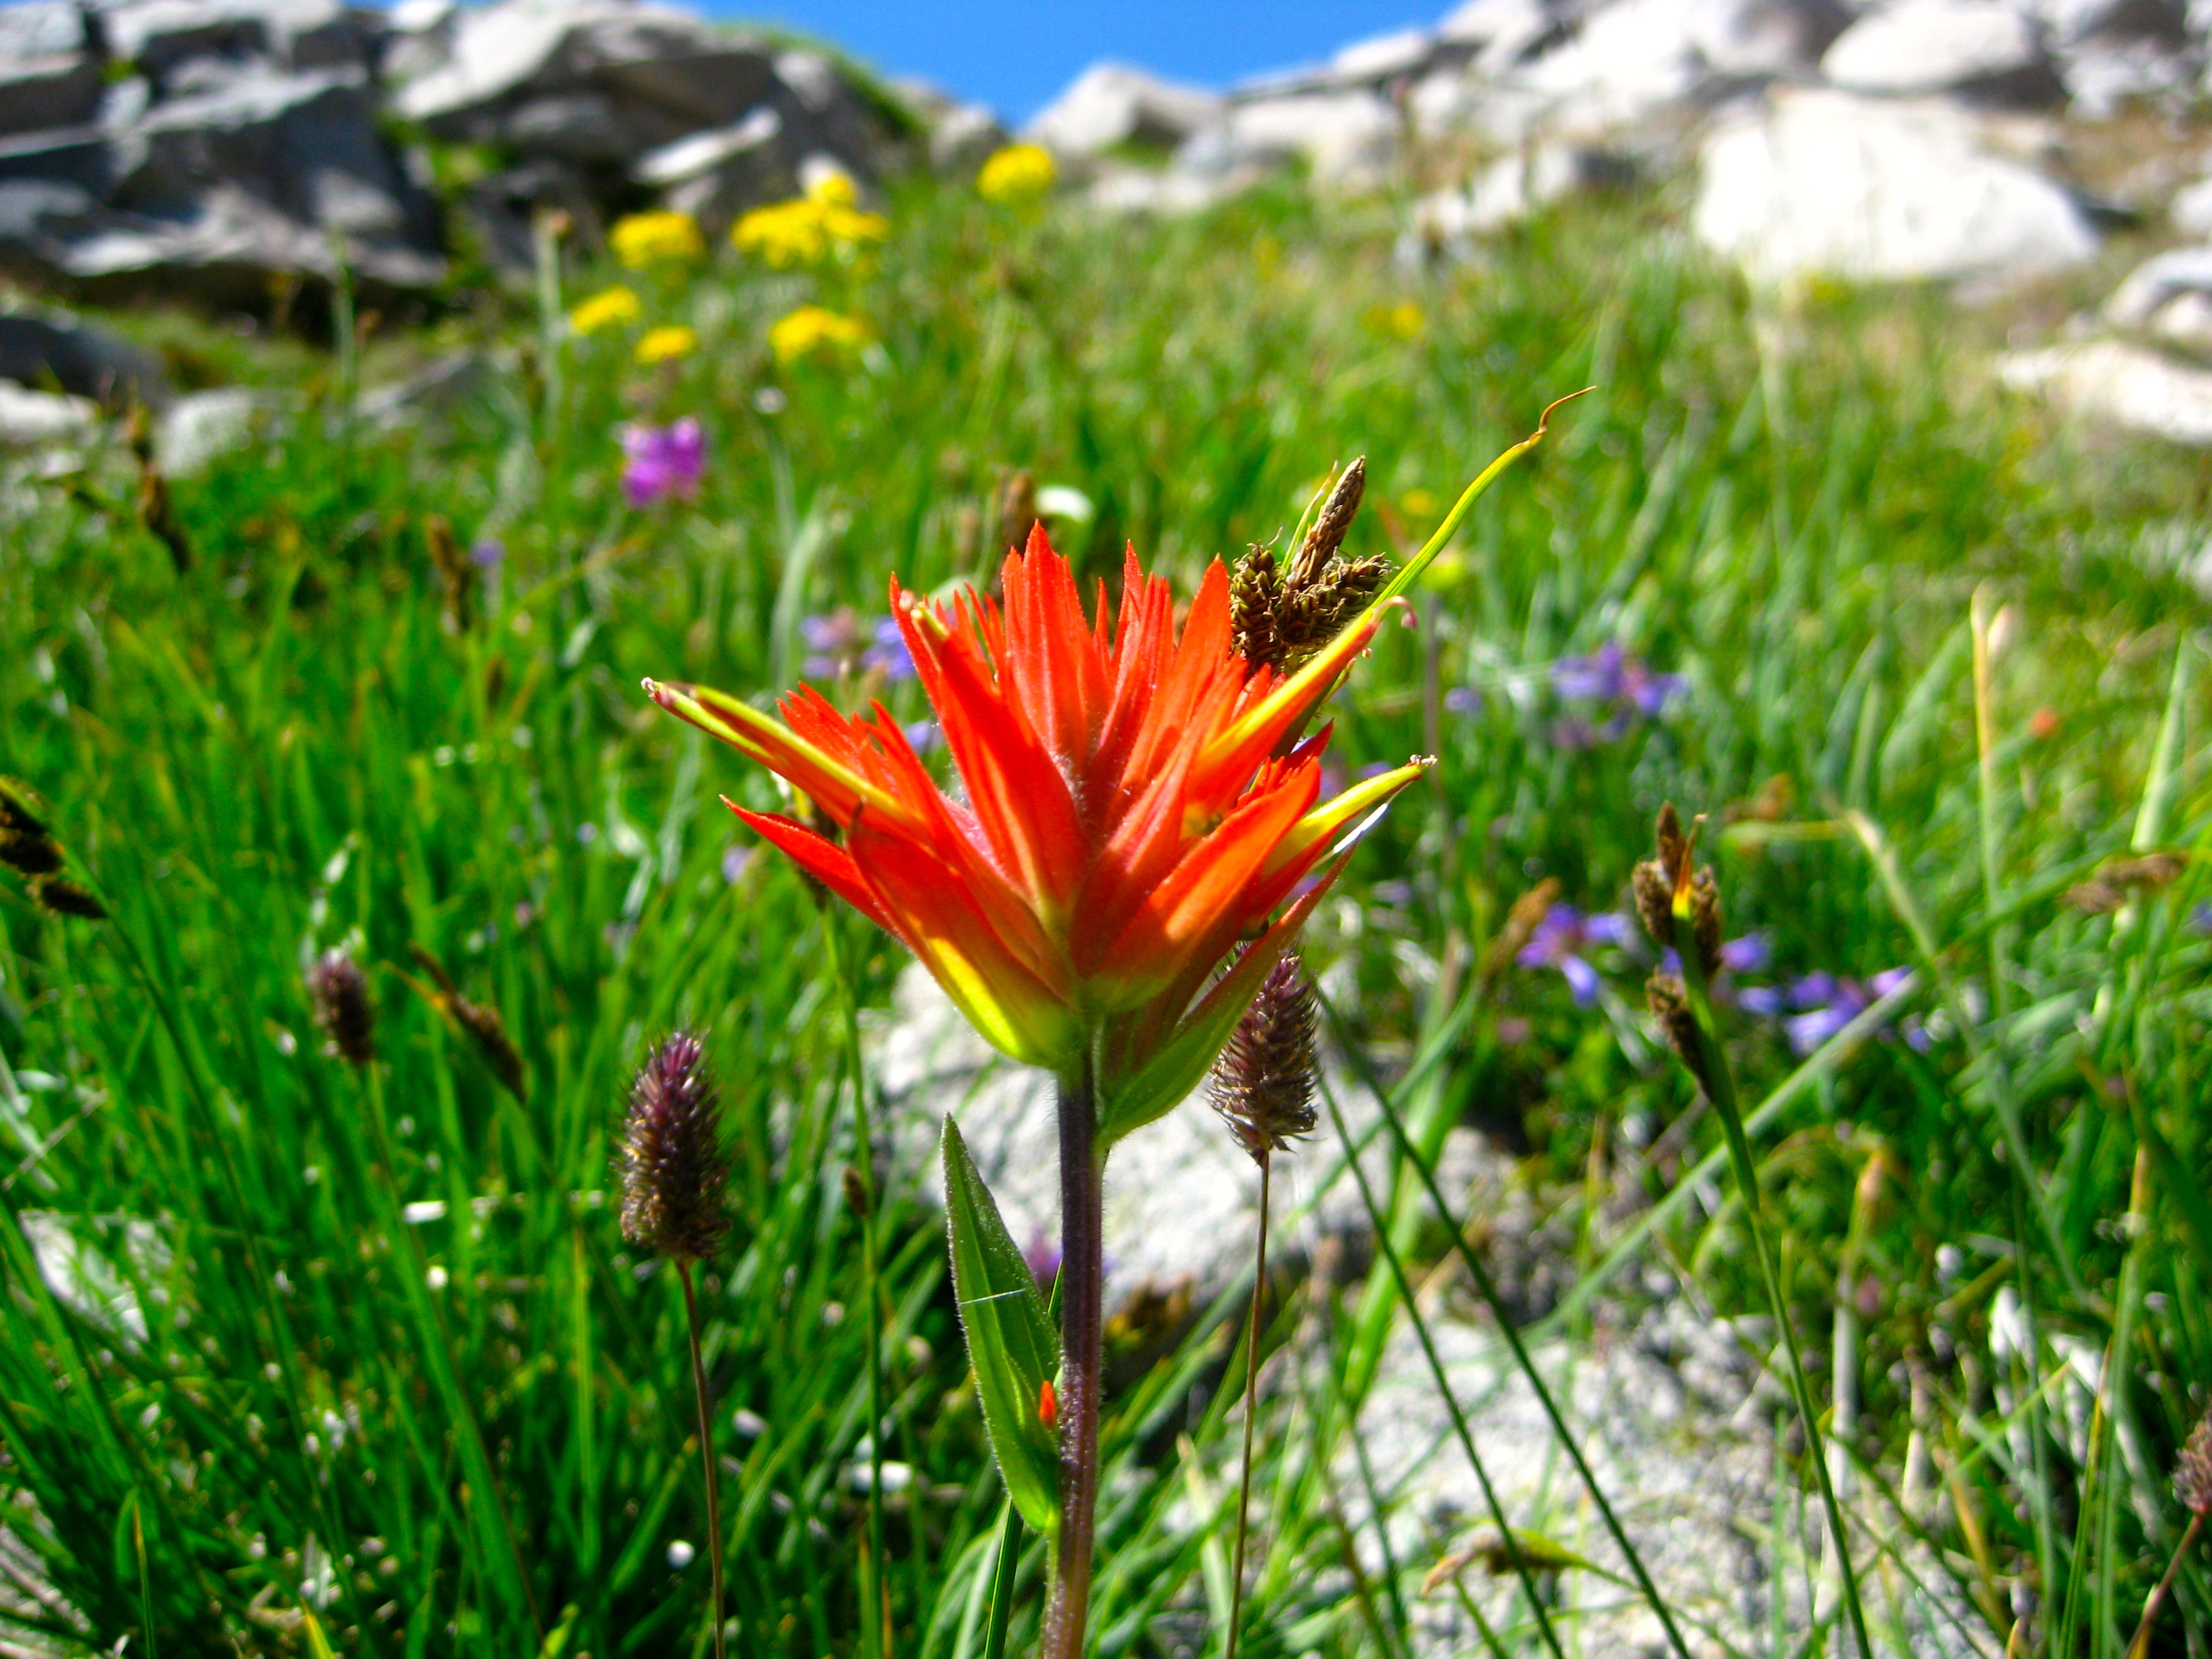
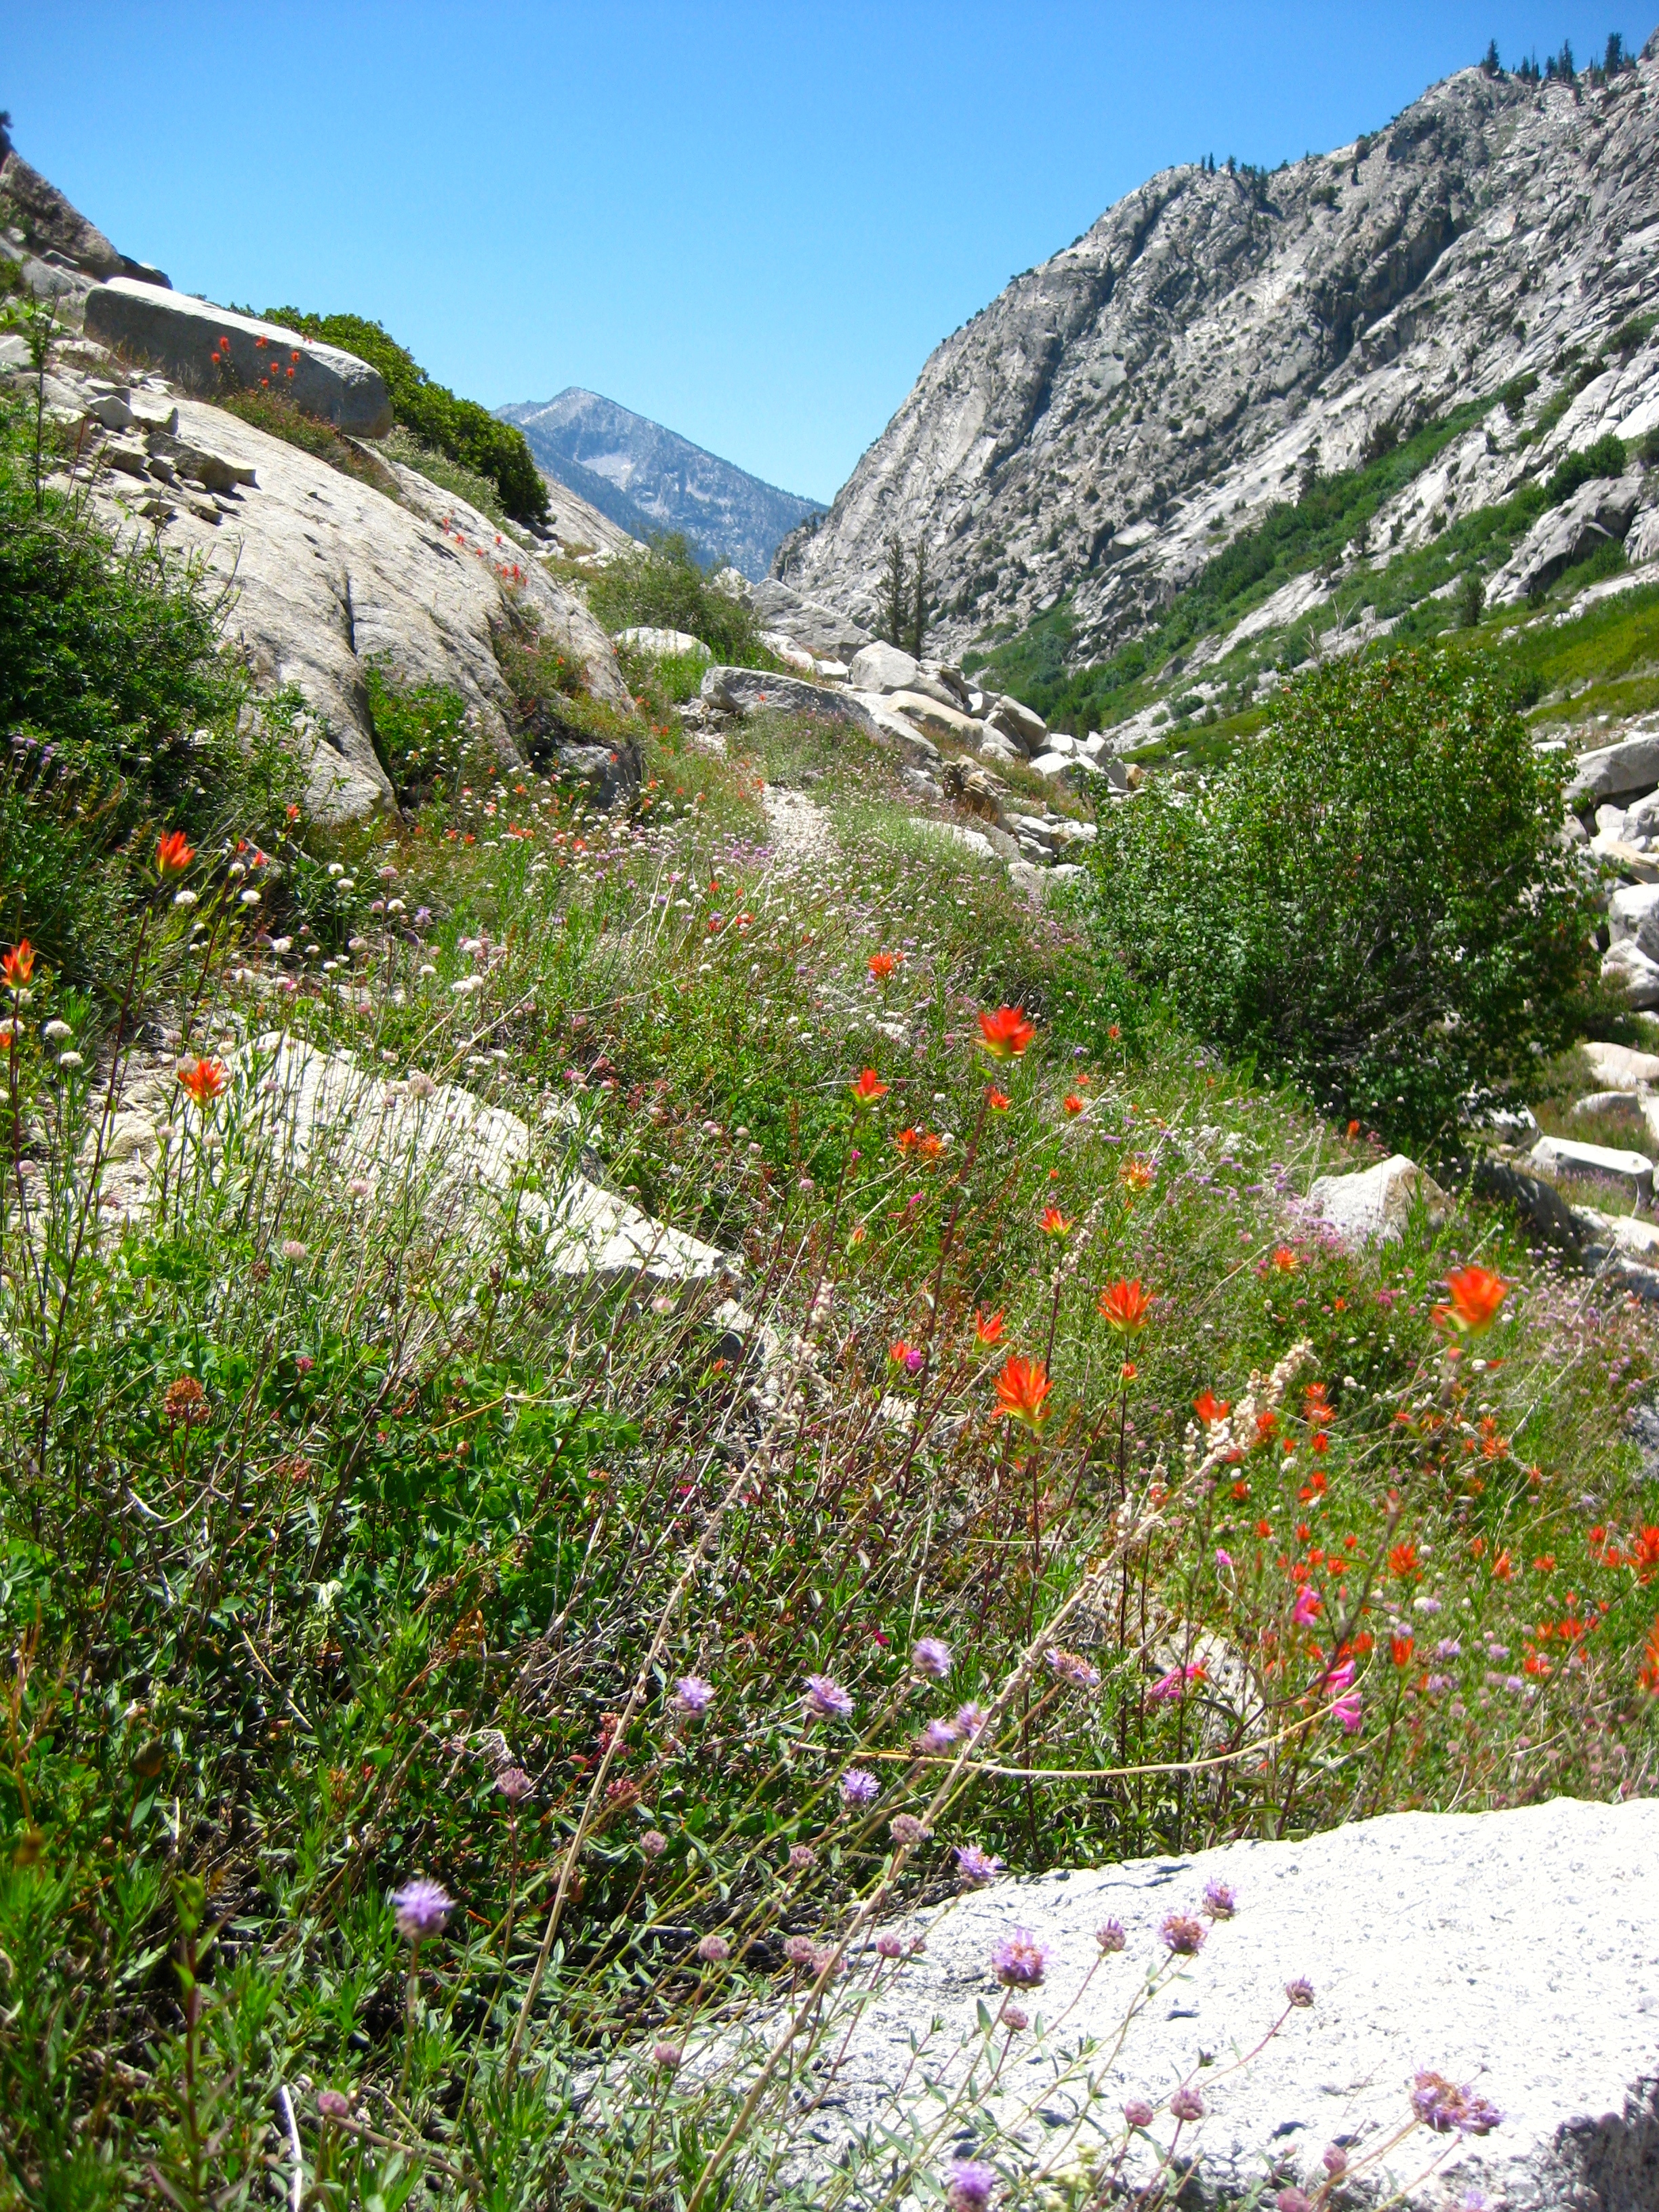
The flowers are being generous on the way up Finger Peak Pass! Indian Paintbrush
After passing the Blue Lakes, you find yourself in a cirque with two options for continuing North. You can go over Finger Peak Pass (just to the East of Finger Peak) or Blue Canyon Peak Pass (just to the West of Blue Canyon Peak). From the South, both passes can be traversed combining series of ledges and benches. Finger Peak pass is slightly higher. I chose to go over that pass because I thought it would be nice to traverse more of the shoreline of Lake 10,594 on the North Side of the pass. This proved to be a mistake – not only was the pass higher, but the descent on the North side was far more difficult. The terrain was very steep Class-2, borderline Class-3. As I looked over at the lower pass, I saw a moderate, scree slope that could probably be boot-skied.
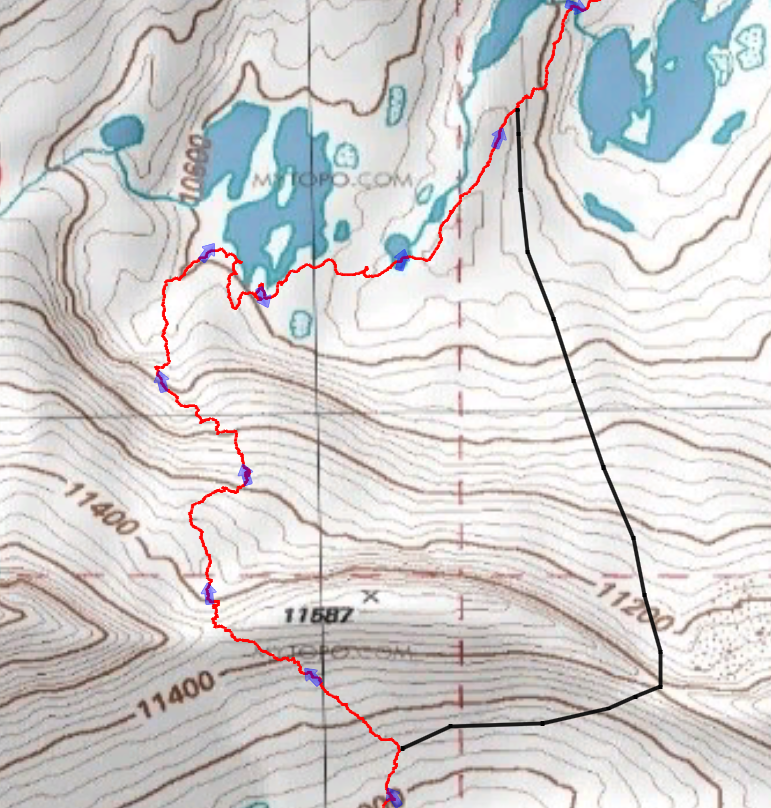
The red line represents the route I took. The black line represents what I believe would be an easier route: a lower pass and much easier terrain over Blue Lakes Peak Pass
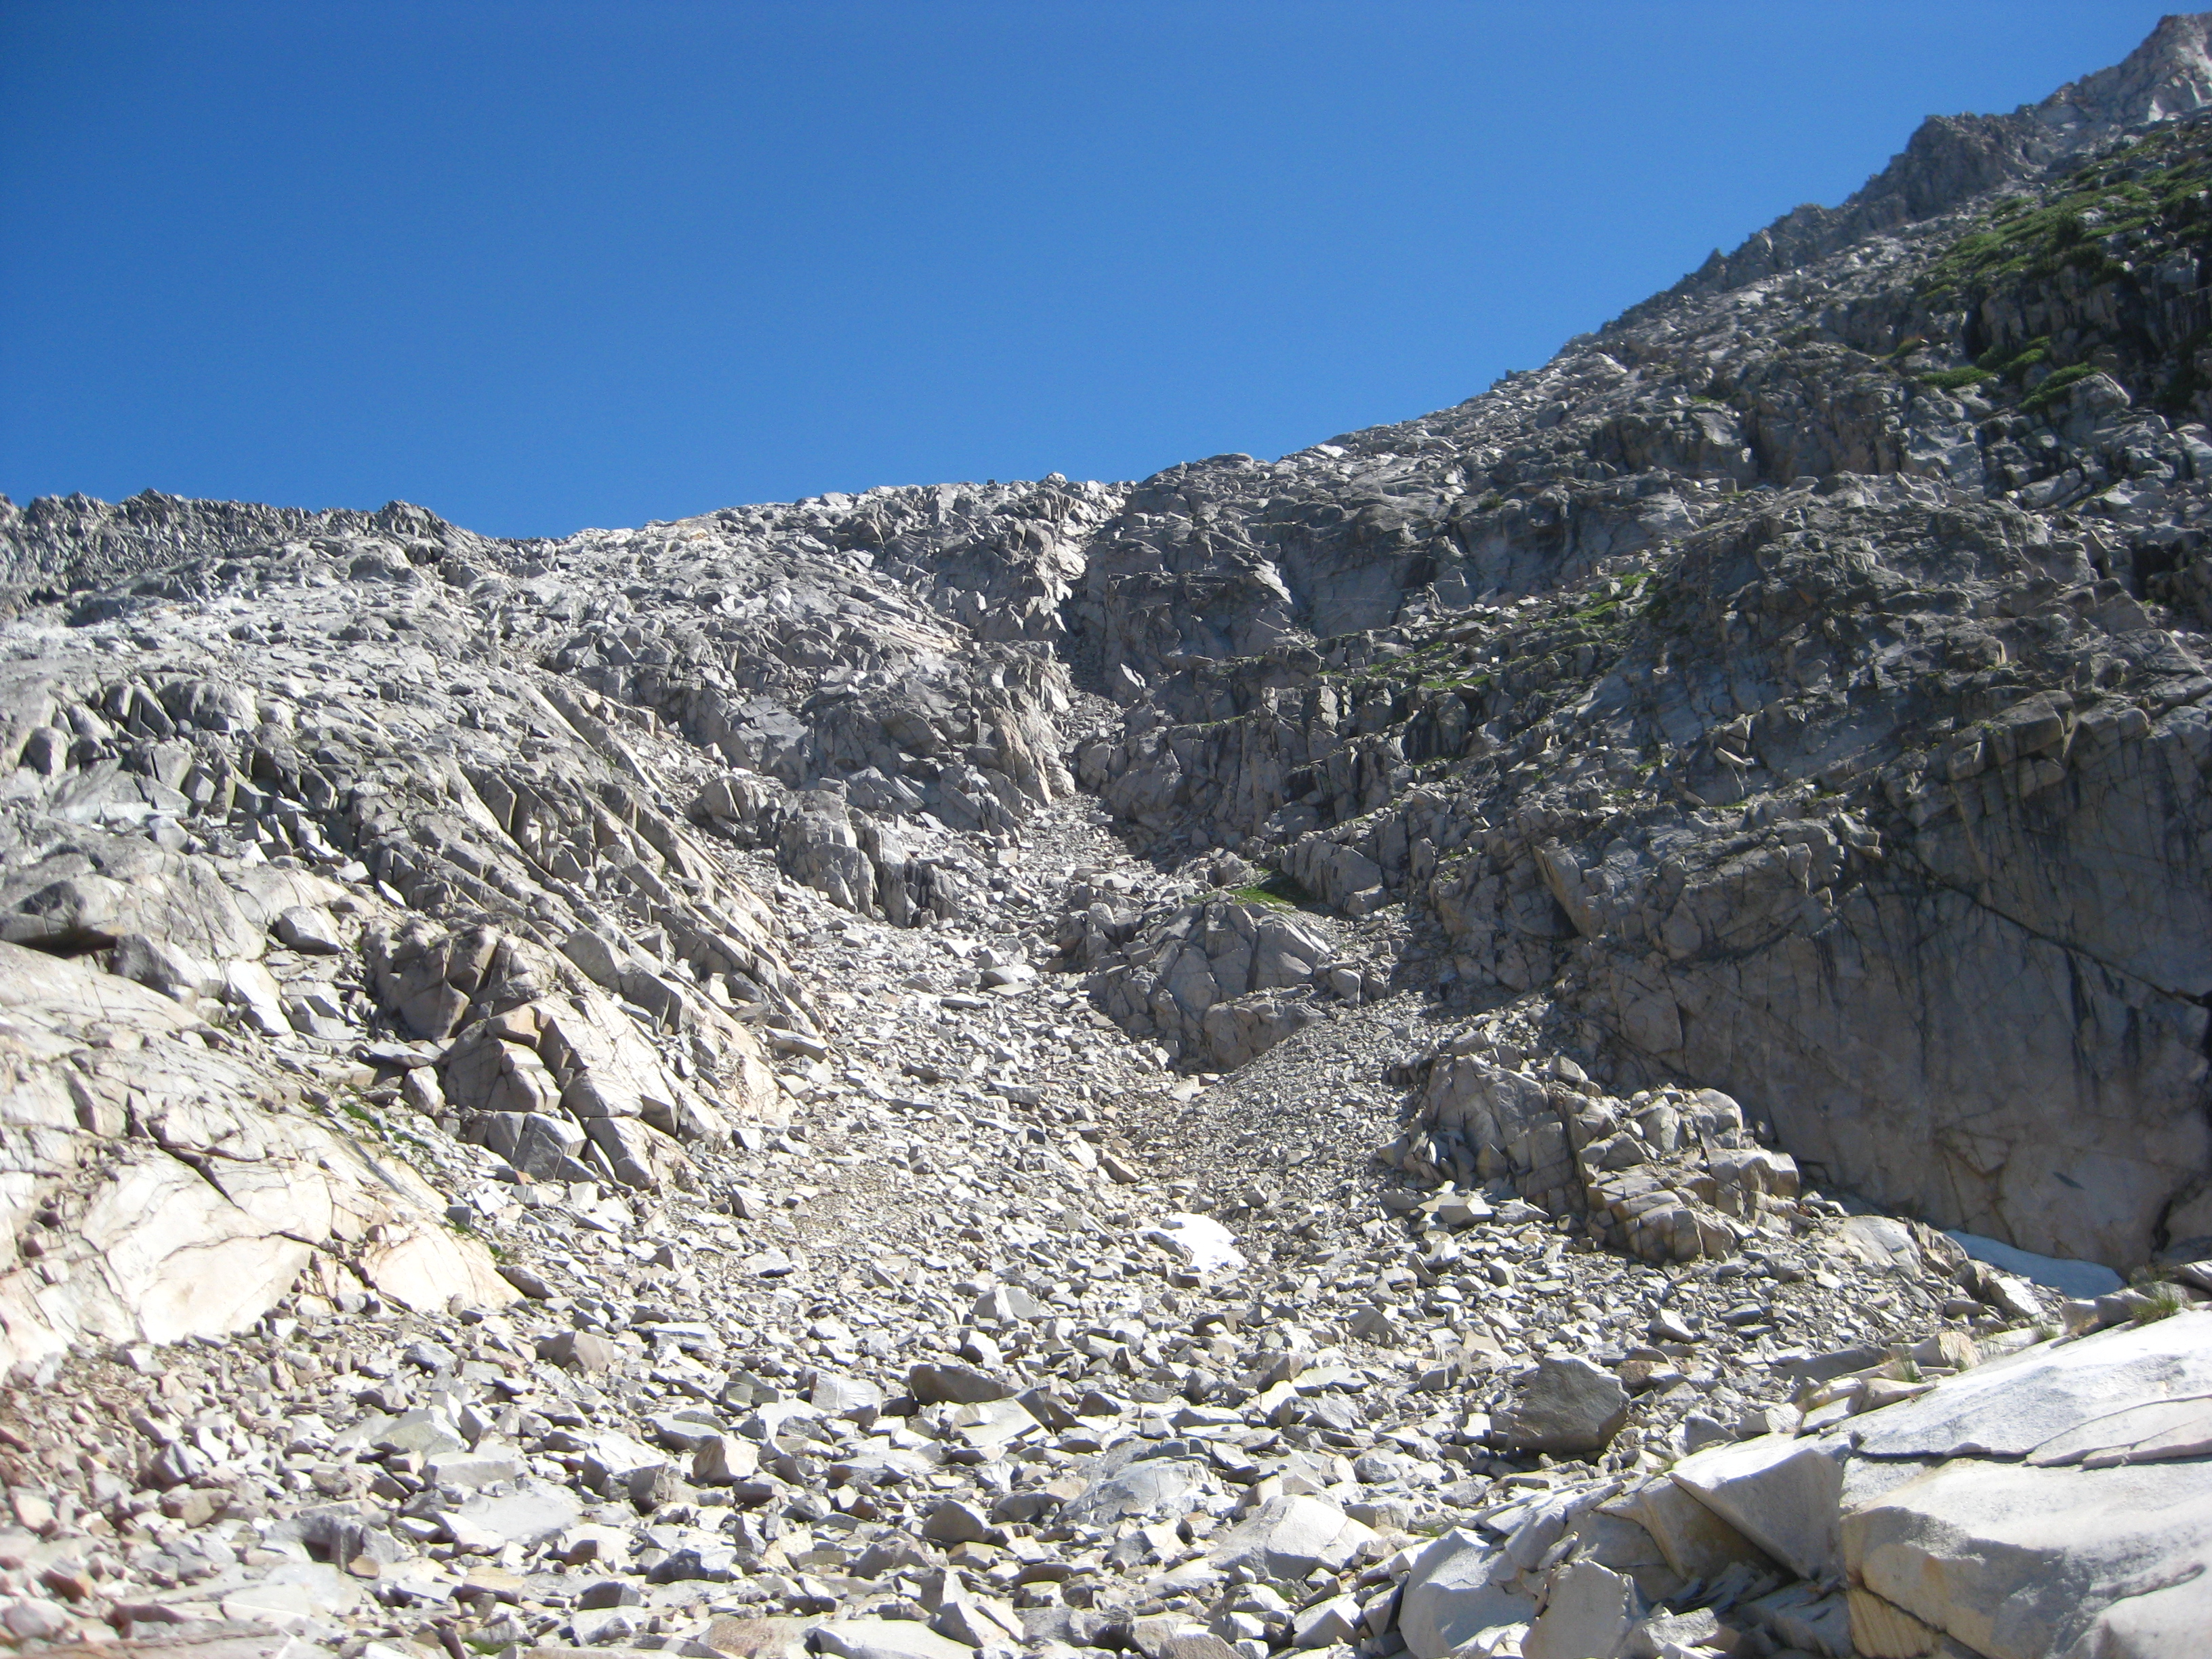
This is Finger Peak pass after I descended a couple hundred feet. I climbed down that gully in the middle, which took some care and time.

The view of Lake 10,587 from above is awesome!
From here, you are take circuitous paths in the North East direction. Many seemingly possible routes end up terminating in small cliffs or at bodies of water. For best results, you’ll want to follow my GPS track here (minus the couple short out-and backs). This will take you to lake 10,272. Shortly after this lake, it is fairly easy terrain on a gentle upslope. Finding a route is fairly easy all the way to the lake just below lake 10,232!
Lake 10,232 offers some fantastic scenery! I had originally considered ascending the lake on the West side via a long gently up sloping bench, and then traversing the cirque midway via another bench near the top of the cirque. Scoping it out in real life revealed forest on the west side, and an apparently much easier route on the East side of the lake.
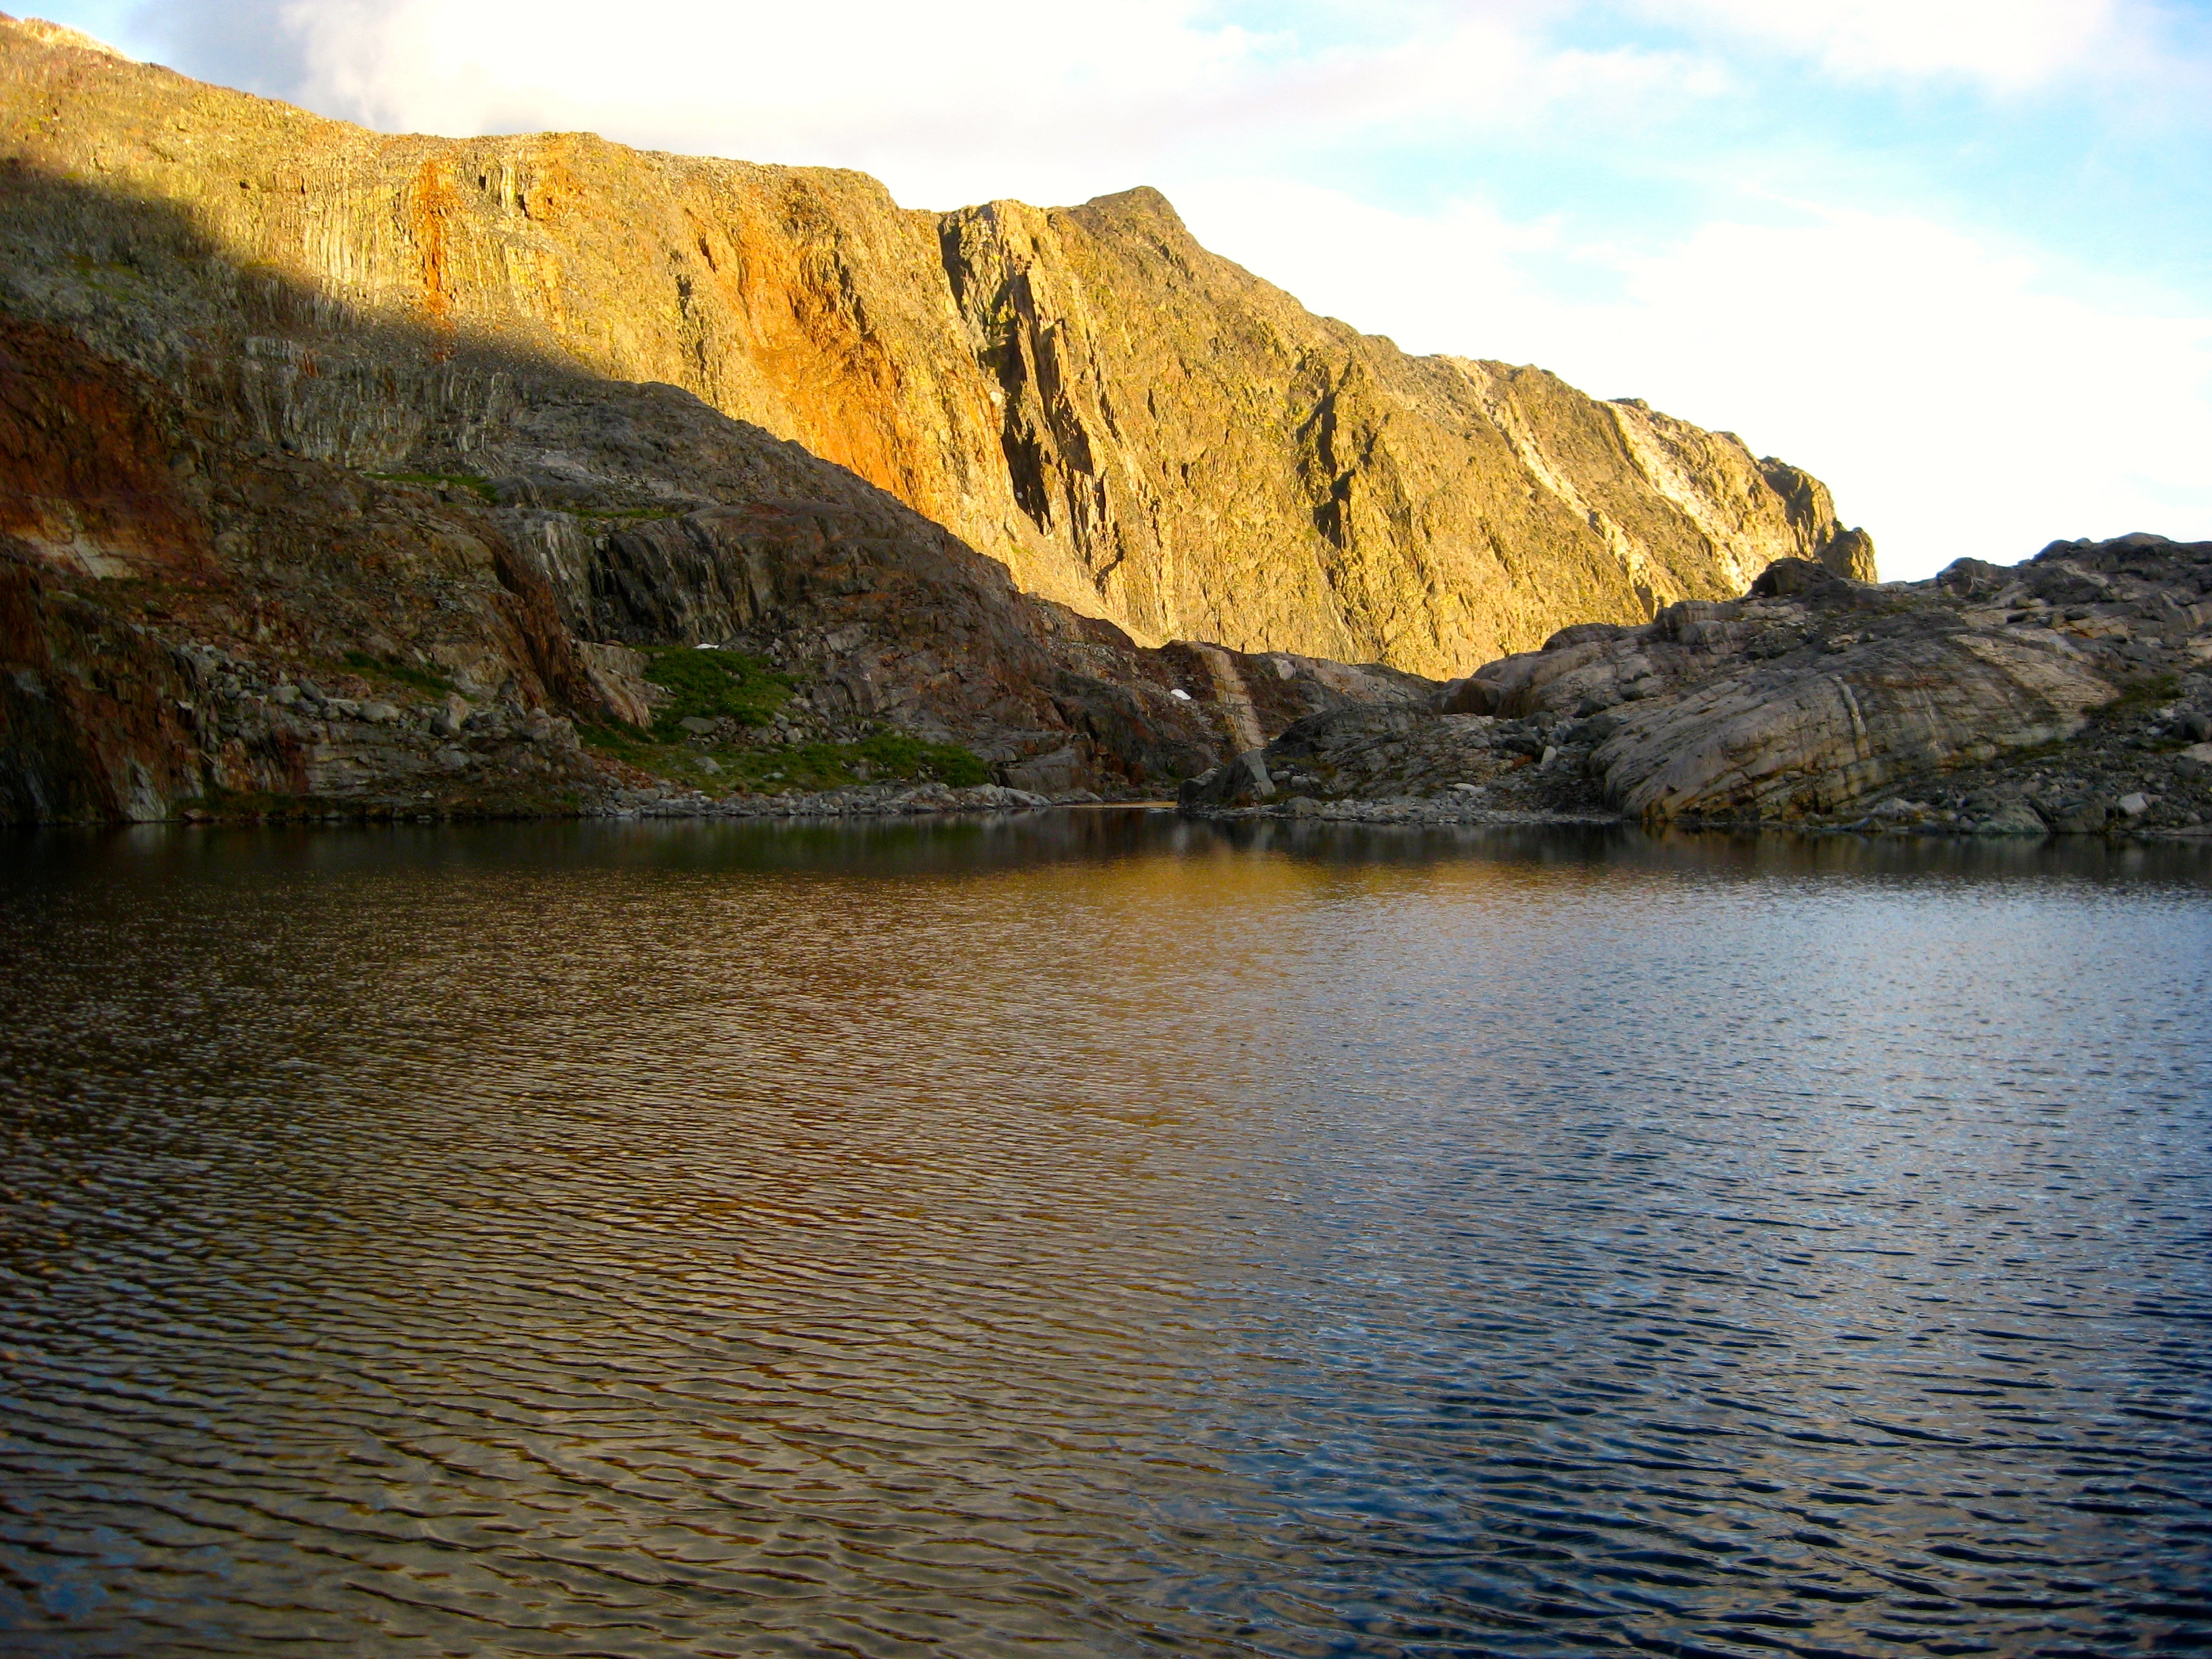
From here, I went around the East side of the lake, and indeed found an easy Class-2 route all the way to lake 11,818. If you carefully pick your way, there is nothing scary or technical; you could probably walk the entire section with just trekking poles.
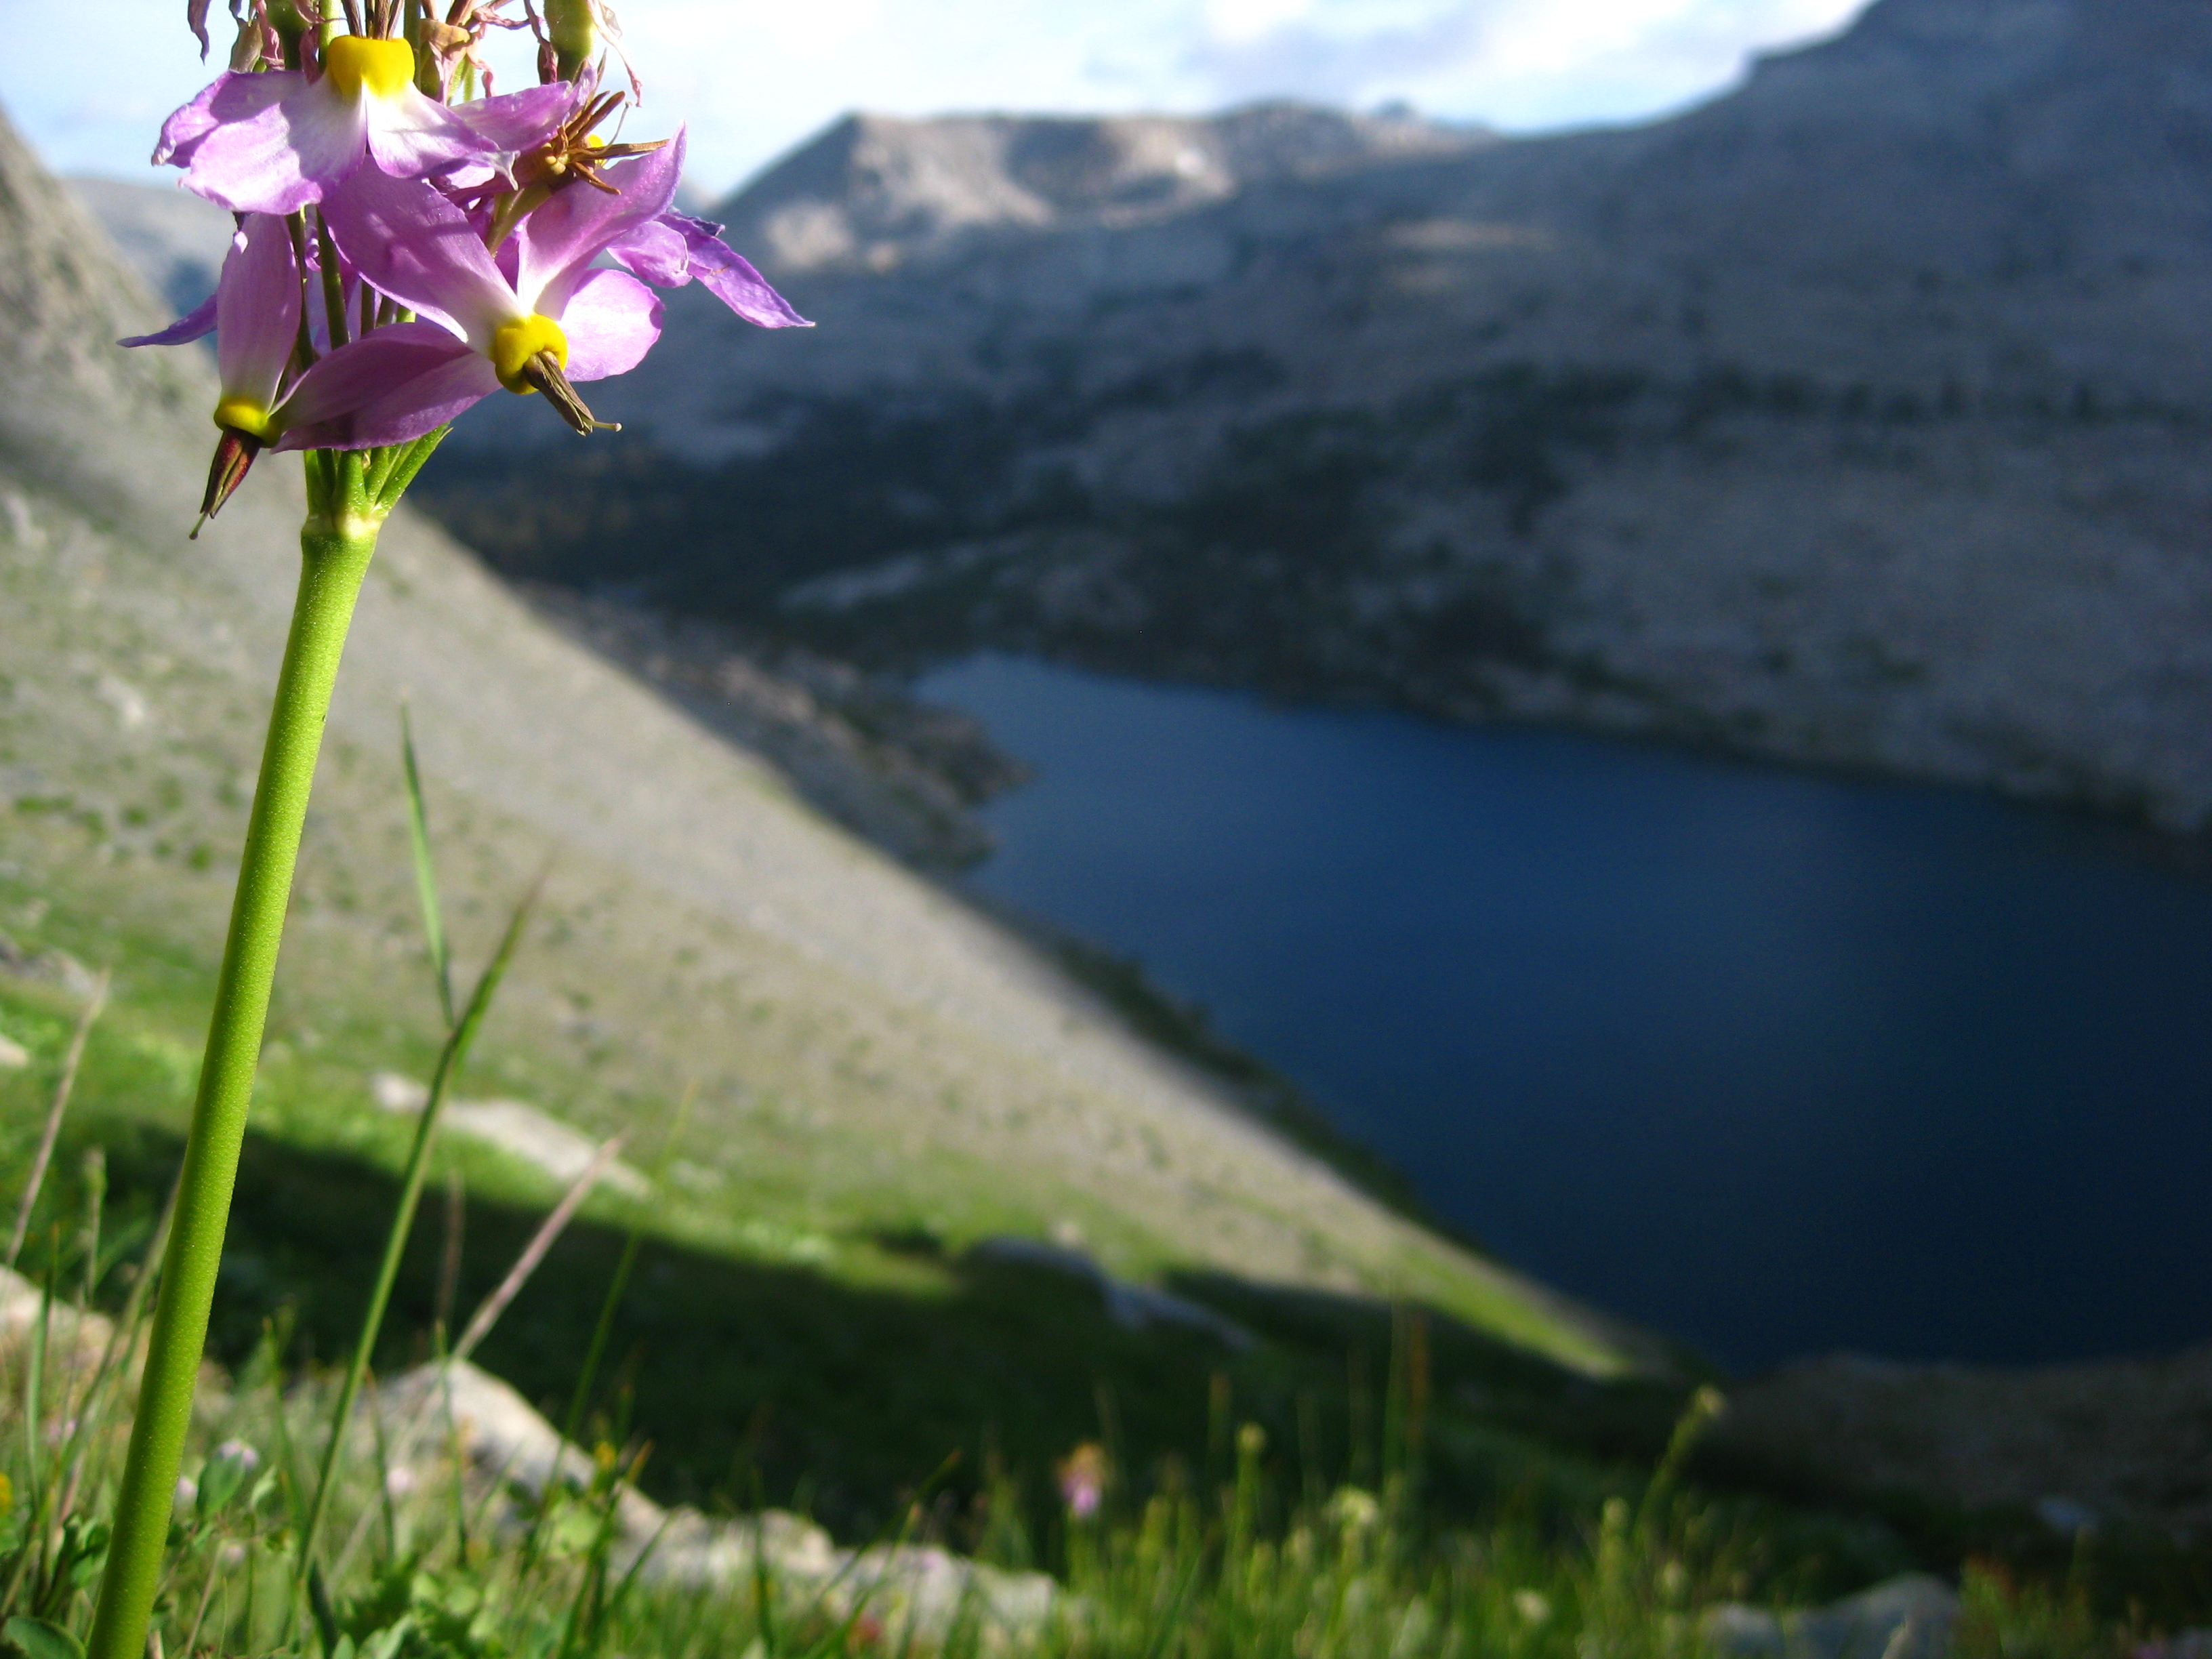
The views on the East slopes of lake 10,232 are great! Shooting Stars
The views on the East slopes of lake 10,232 just keep getting better
The views on the East slopes of lake 10,232 just keep getting better
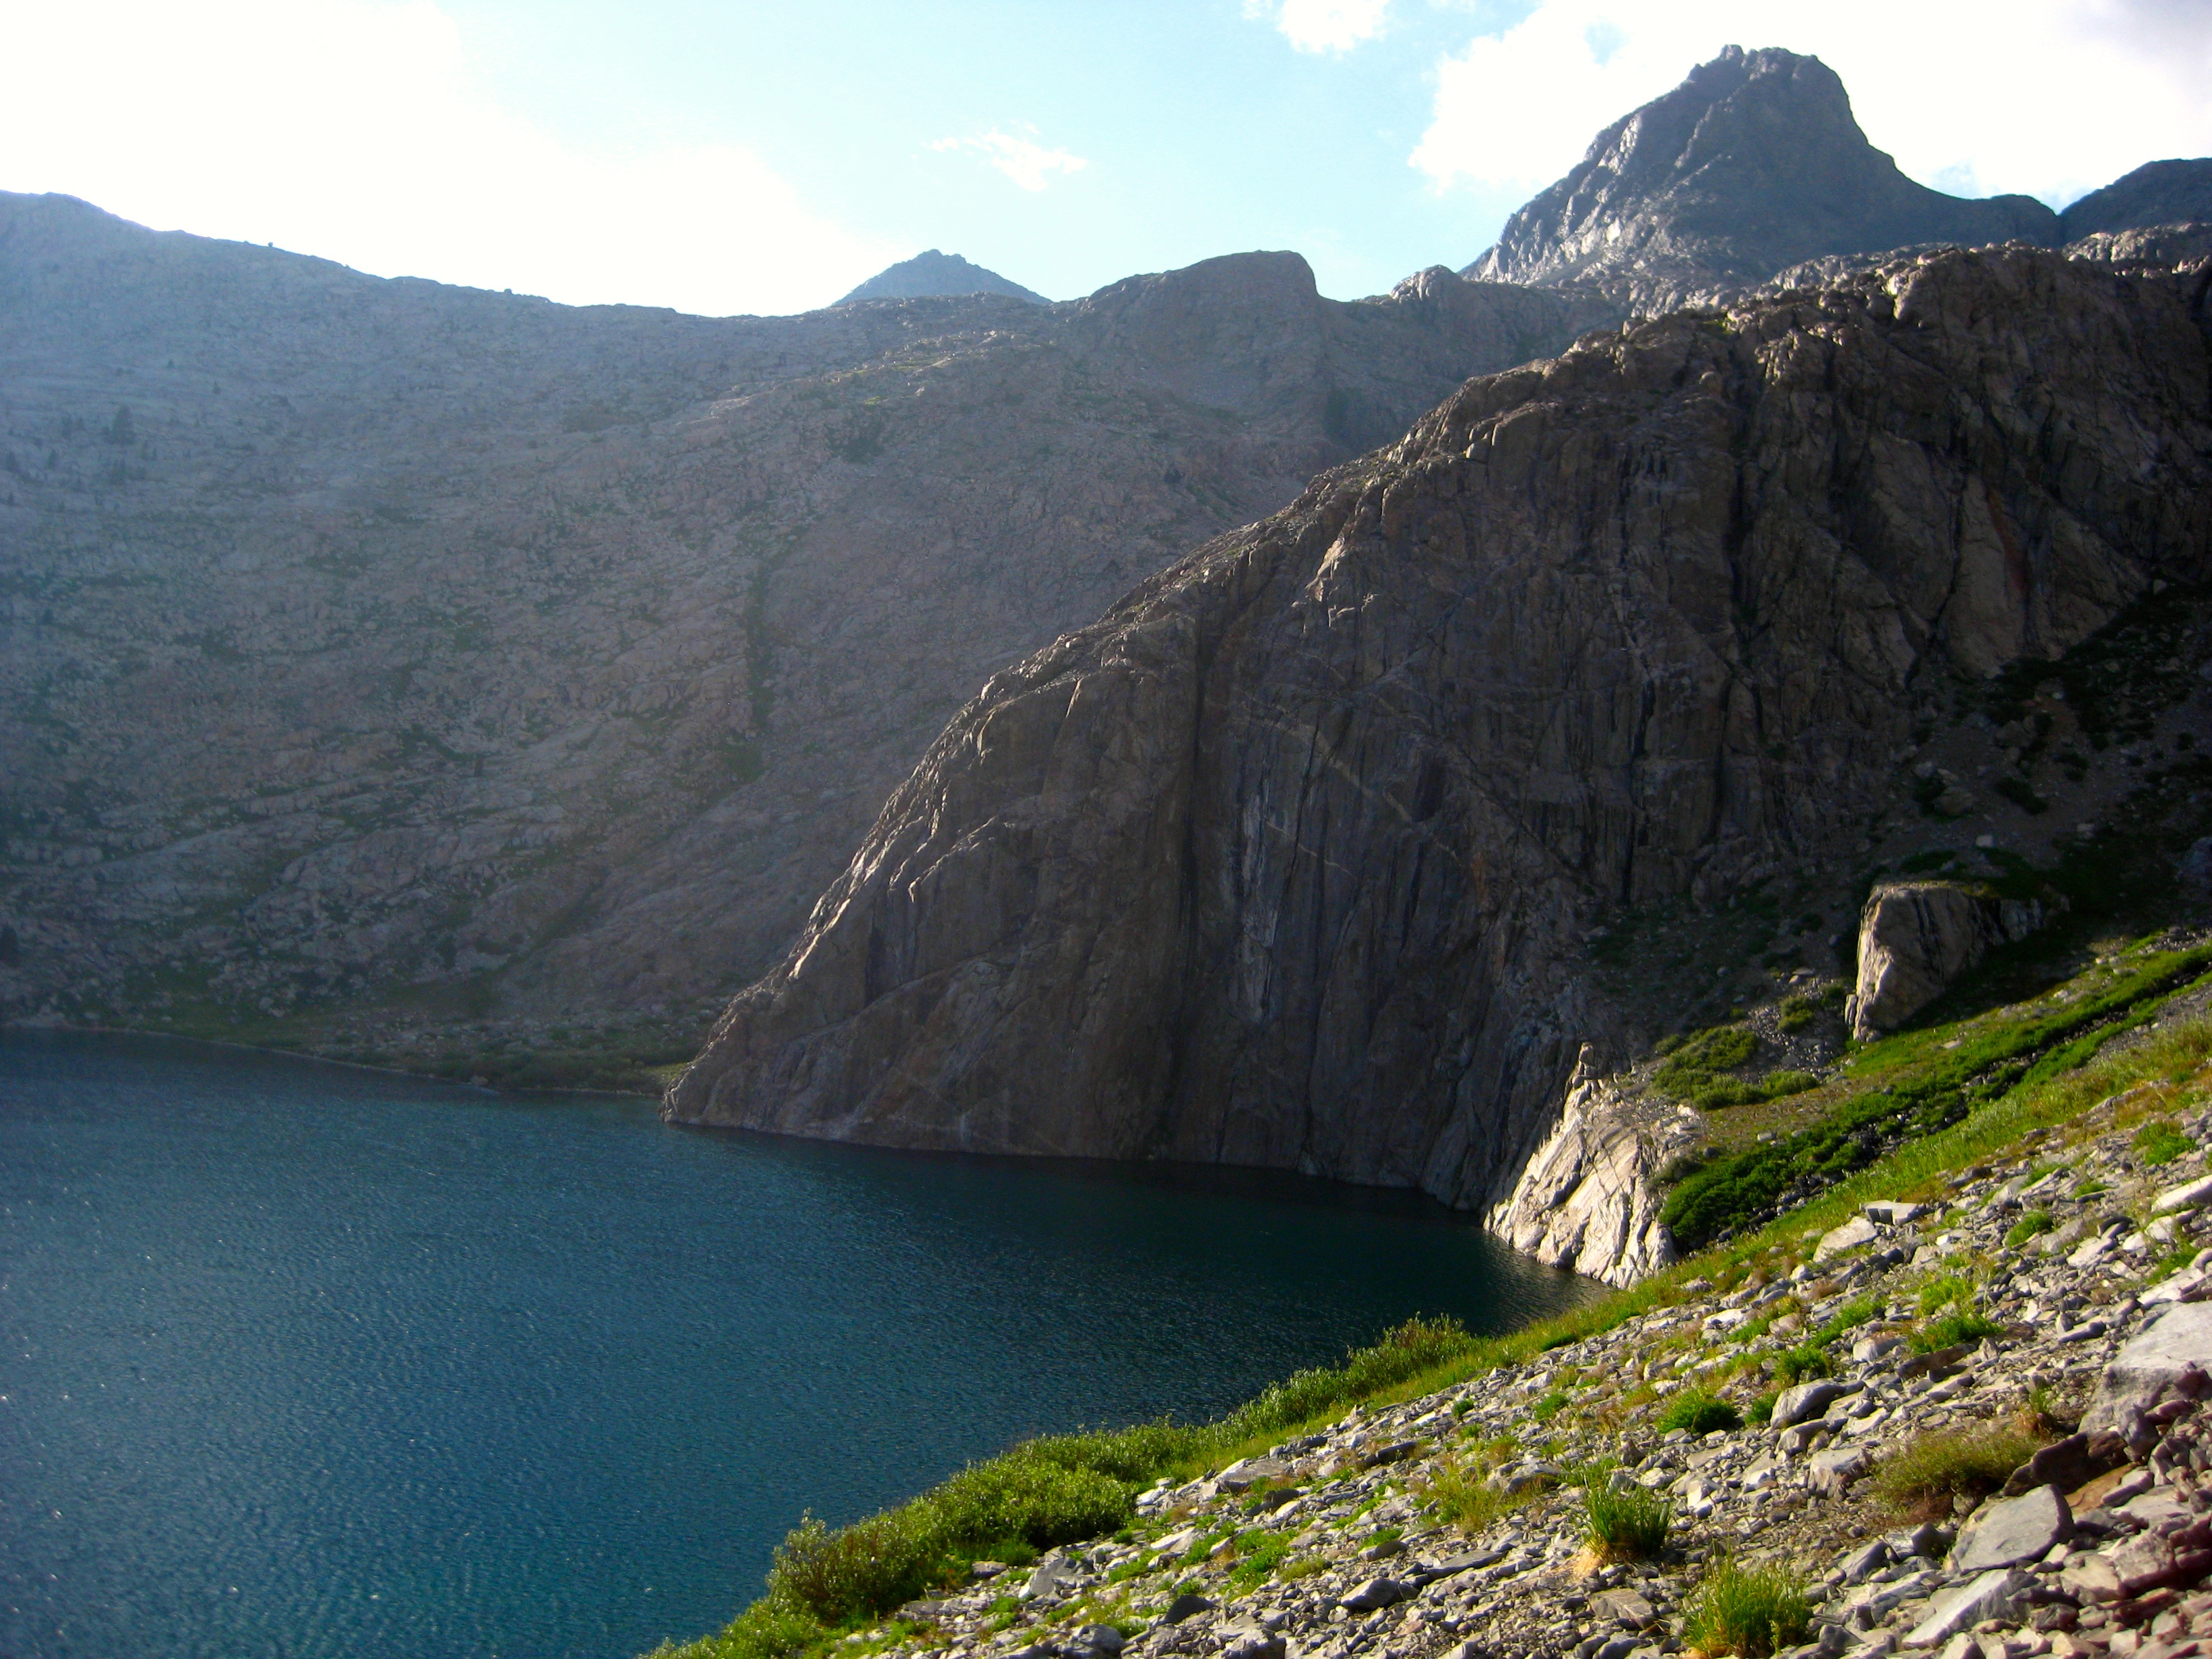
I arrived at lake 11,818 just in time to spend the night. This location was fabulous. My appreciation and gratitude for the privilege of being able to spend the night in this glorious location was limitless. 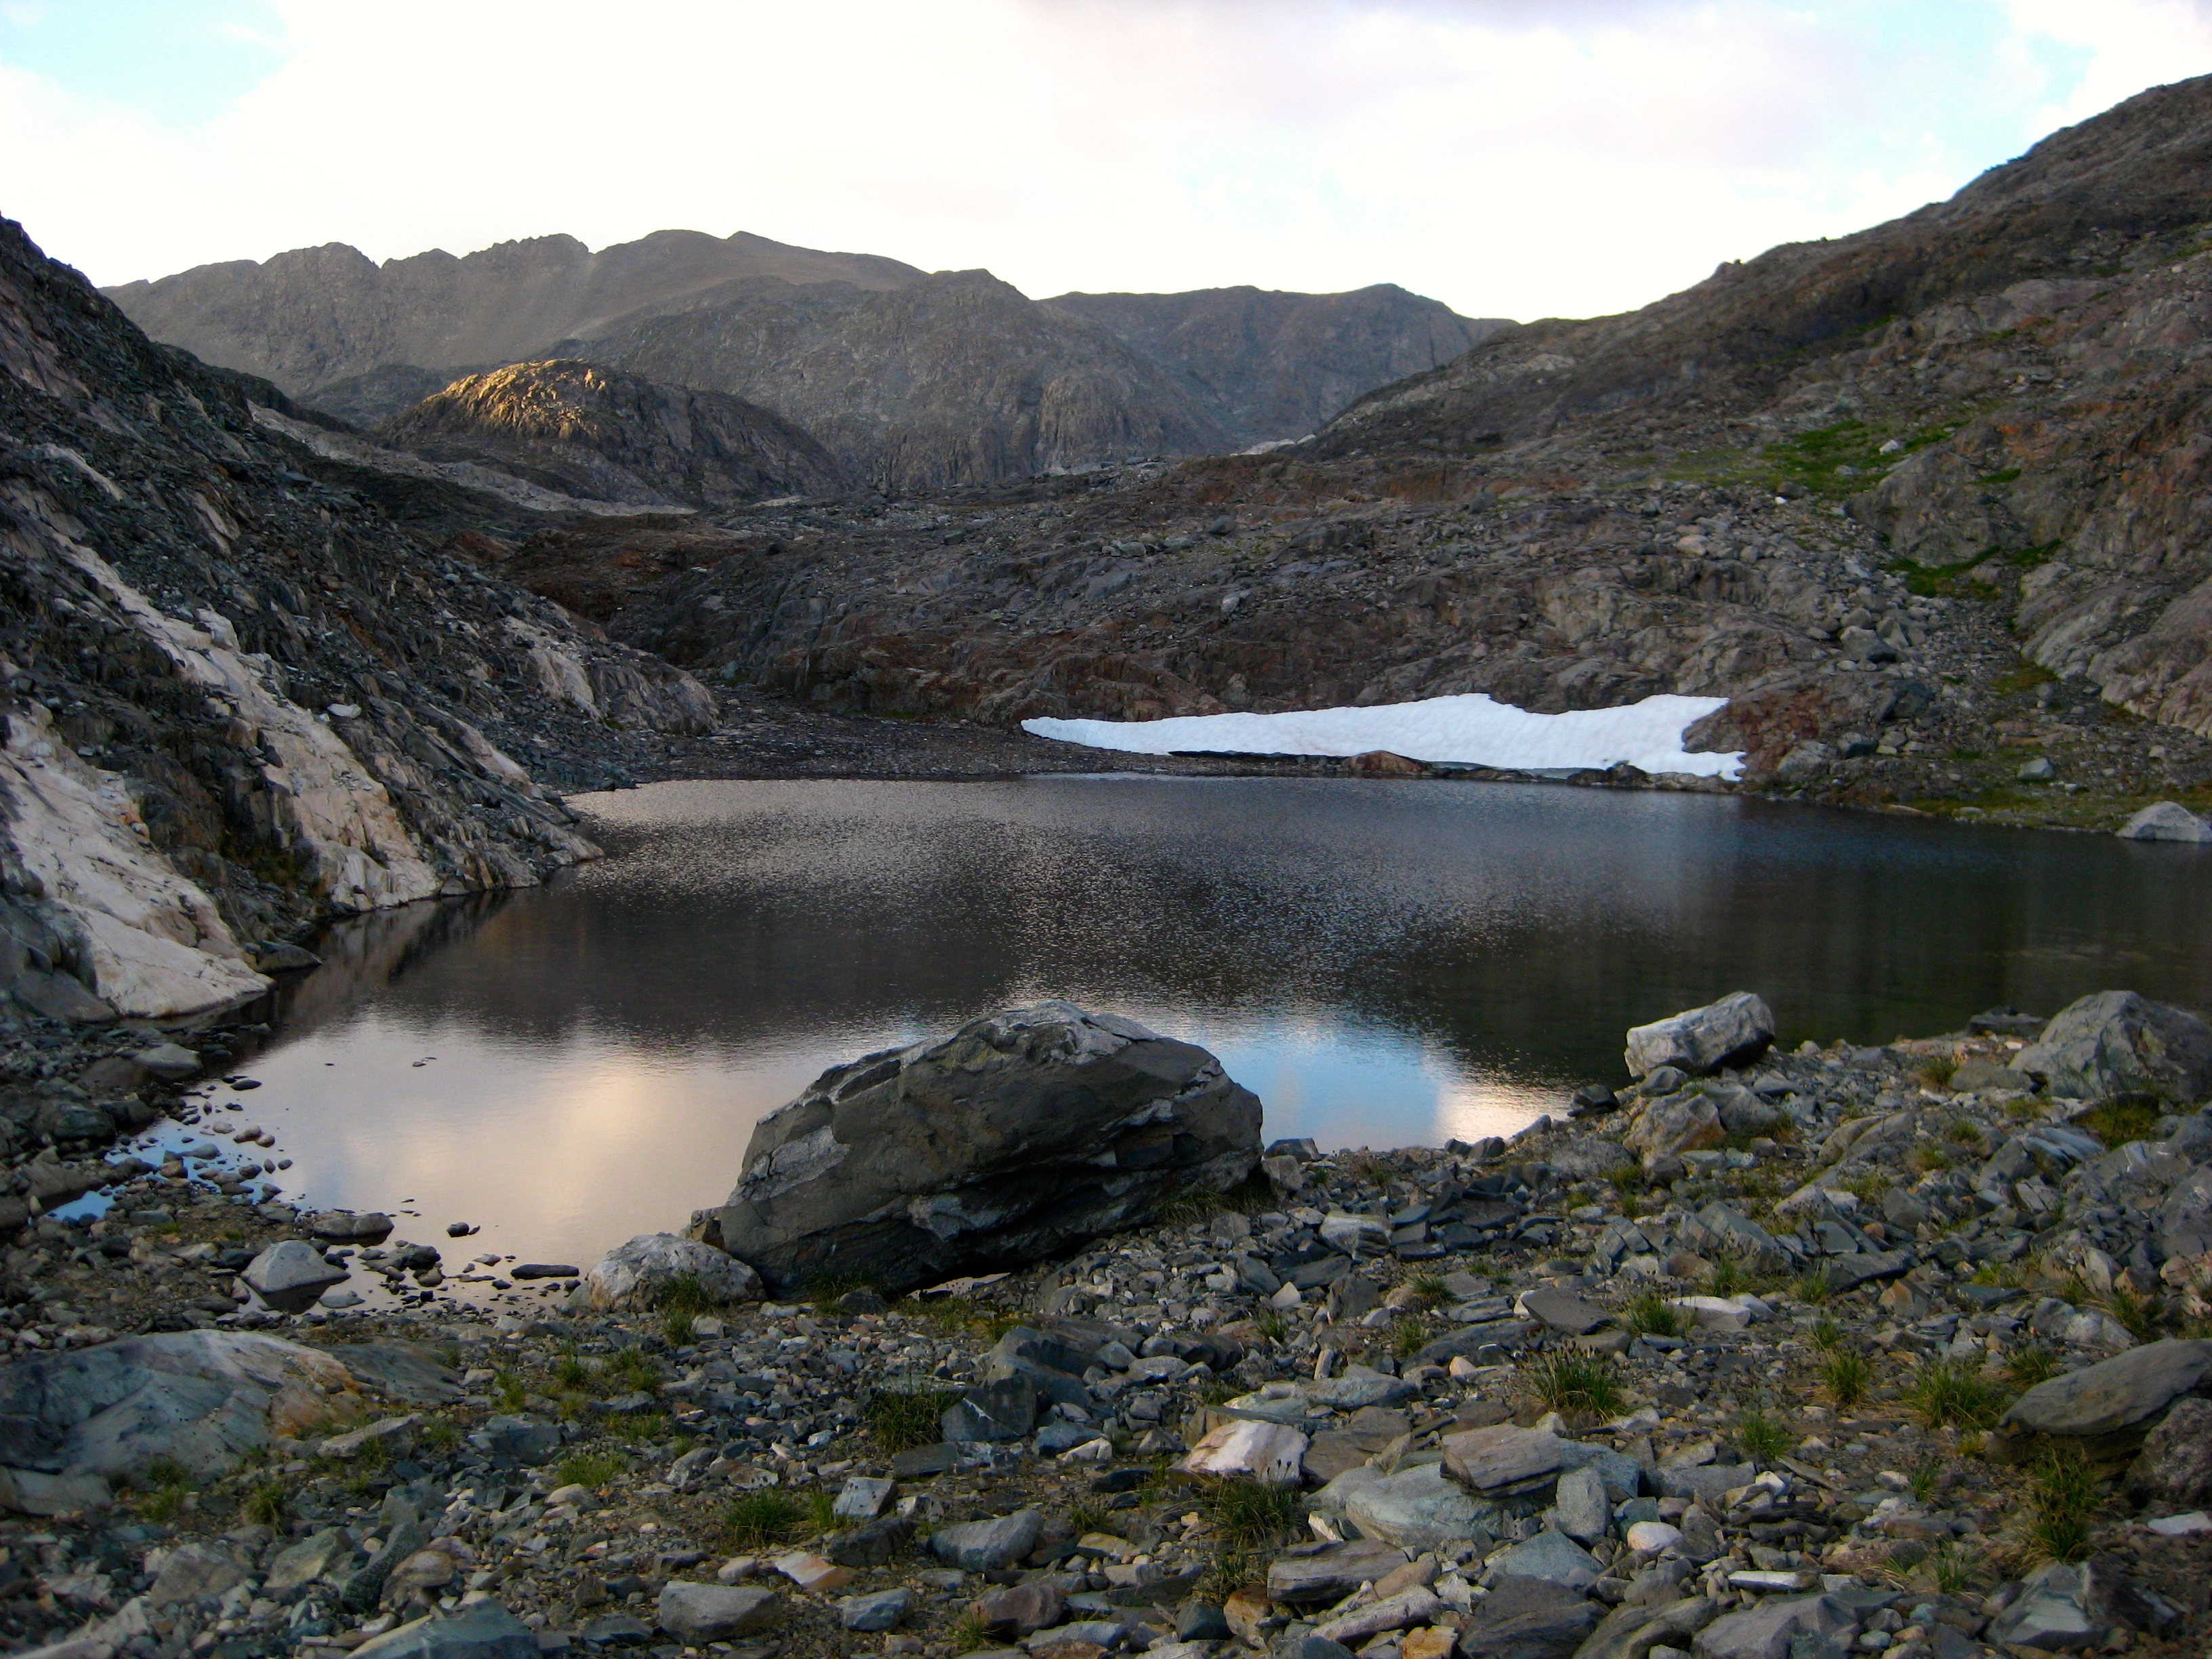
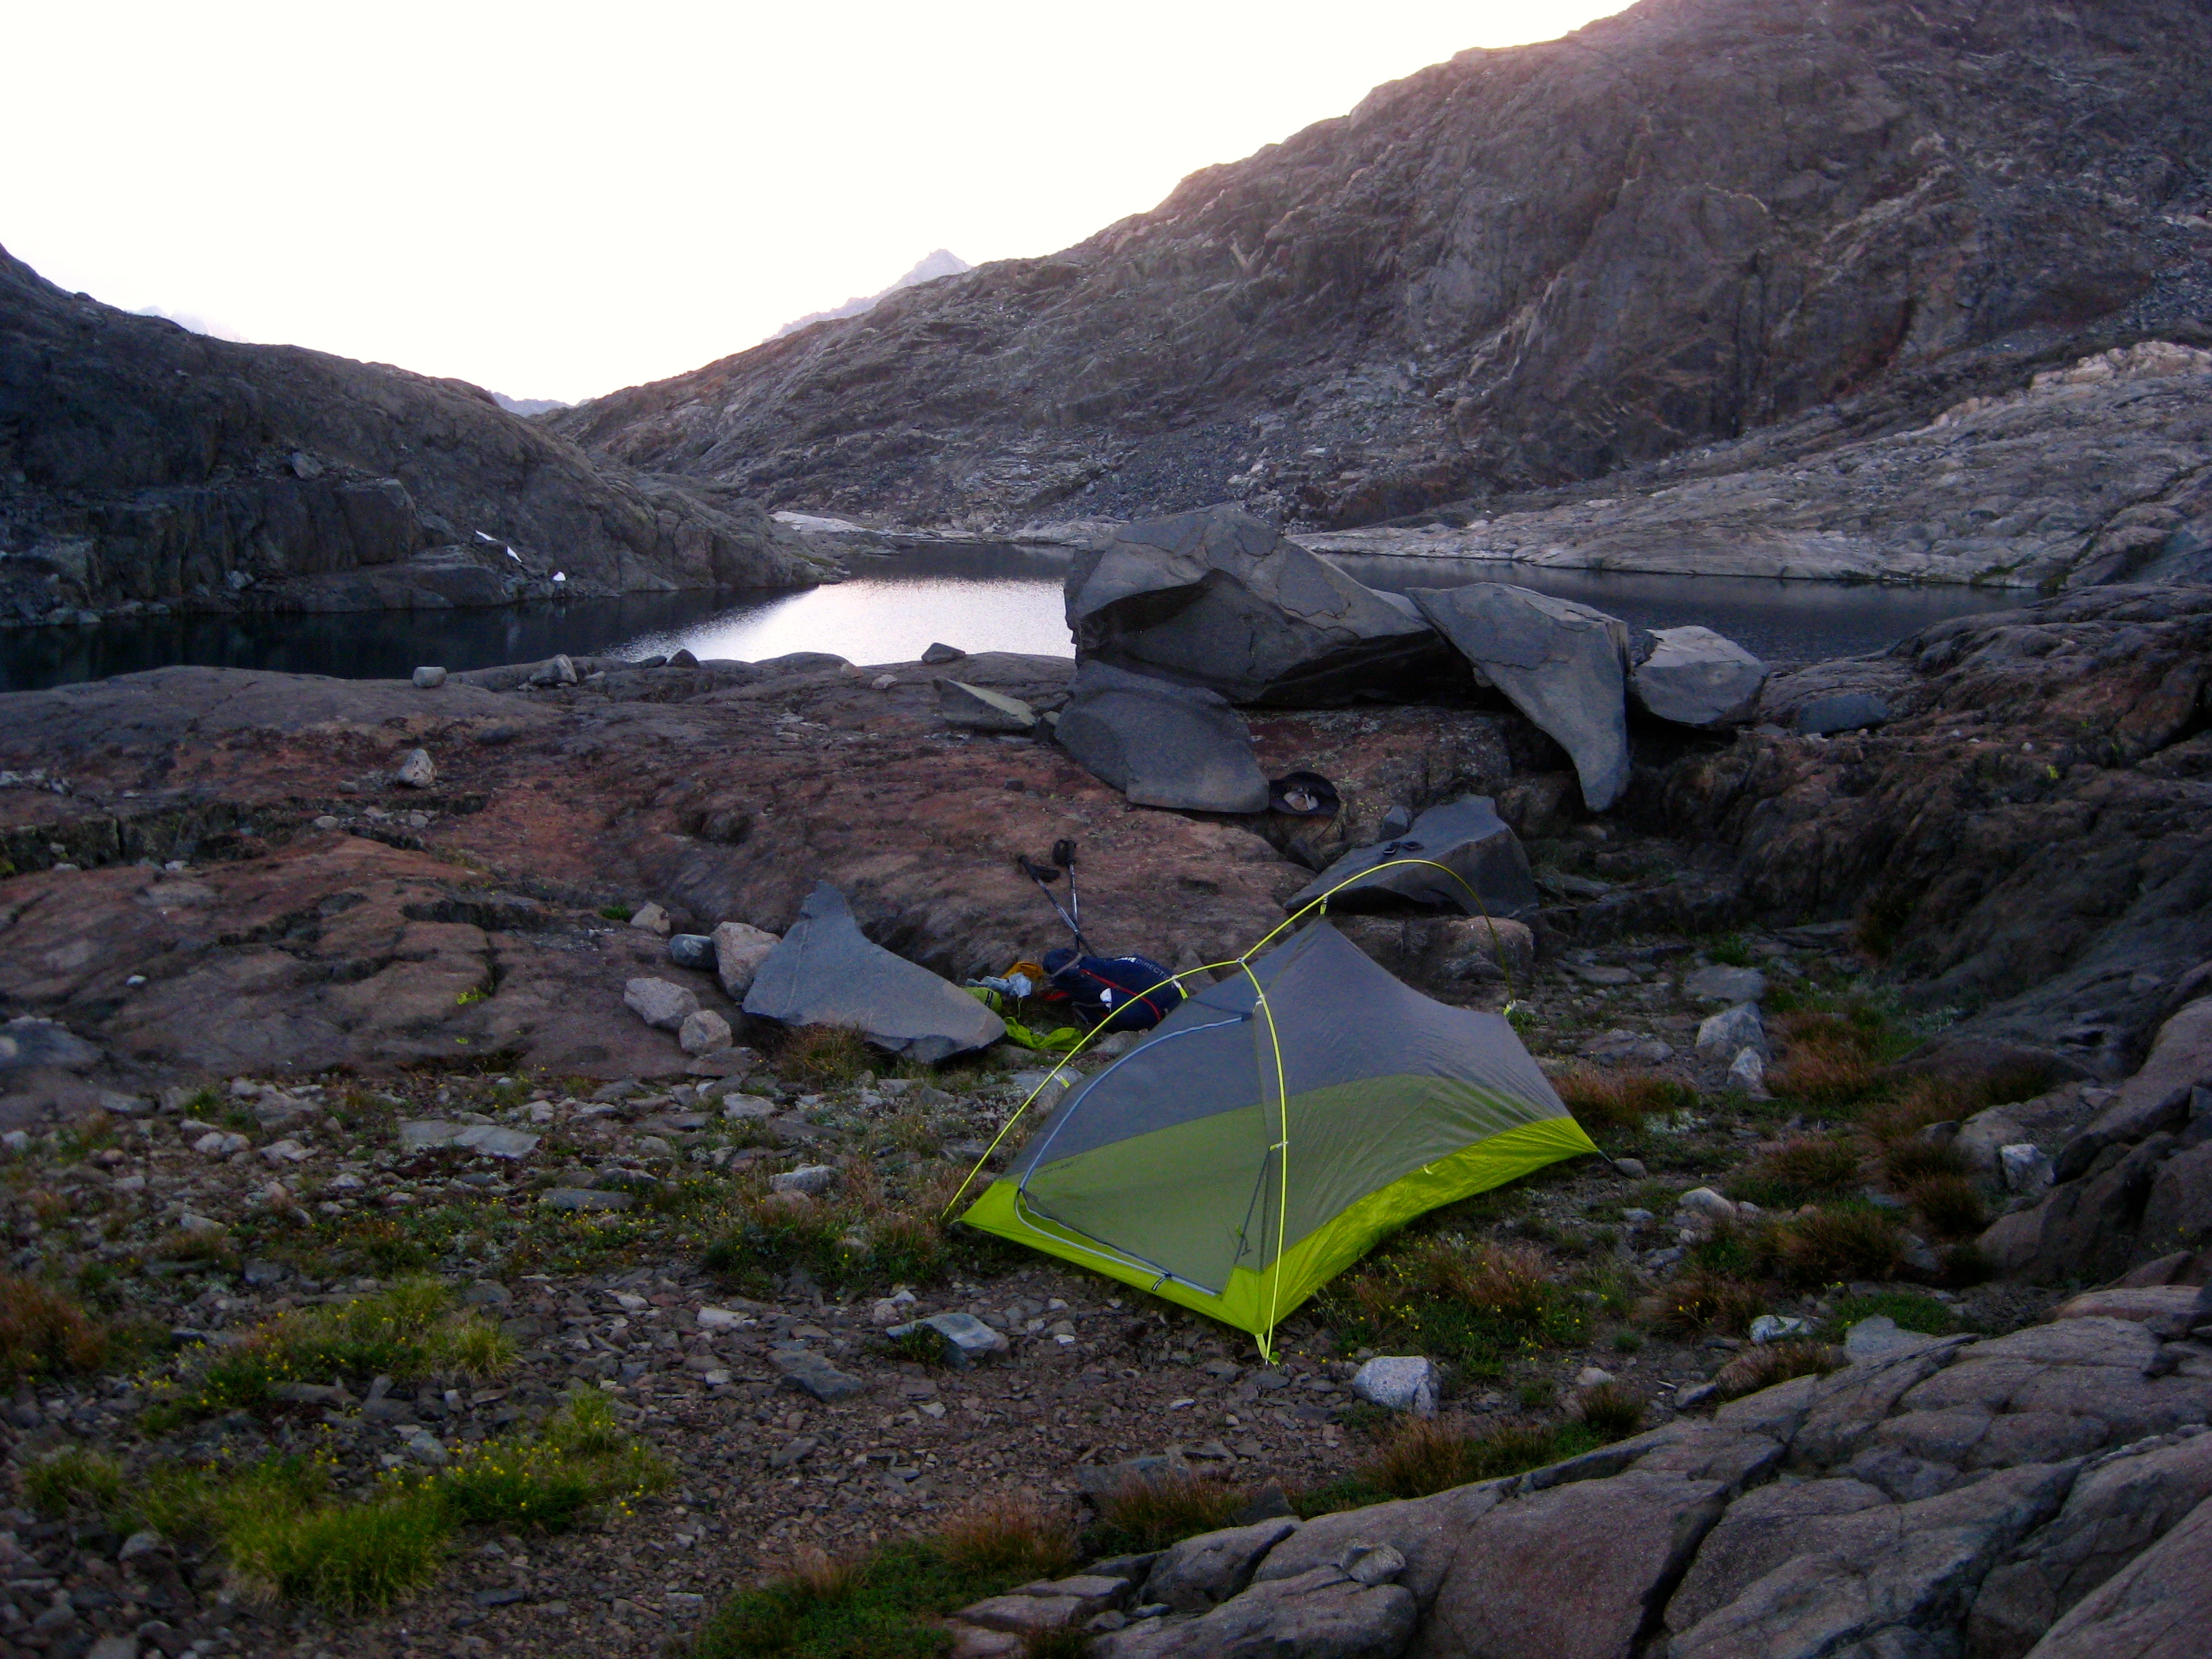
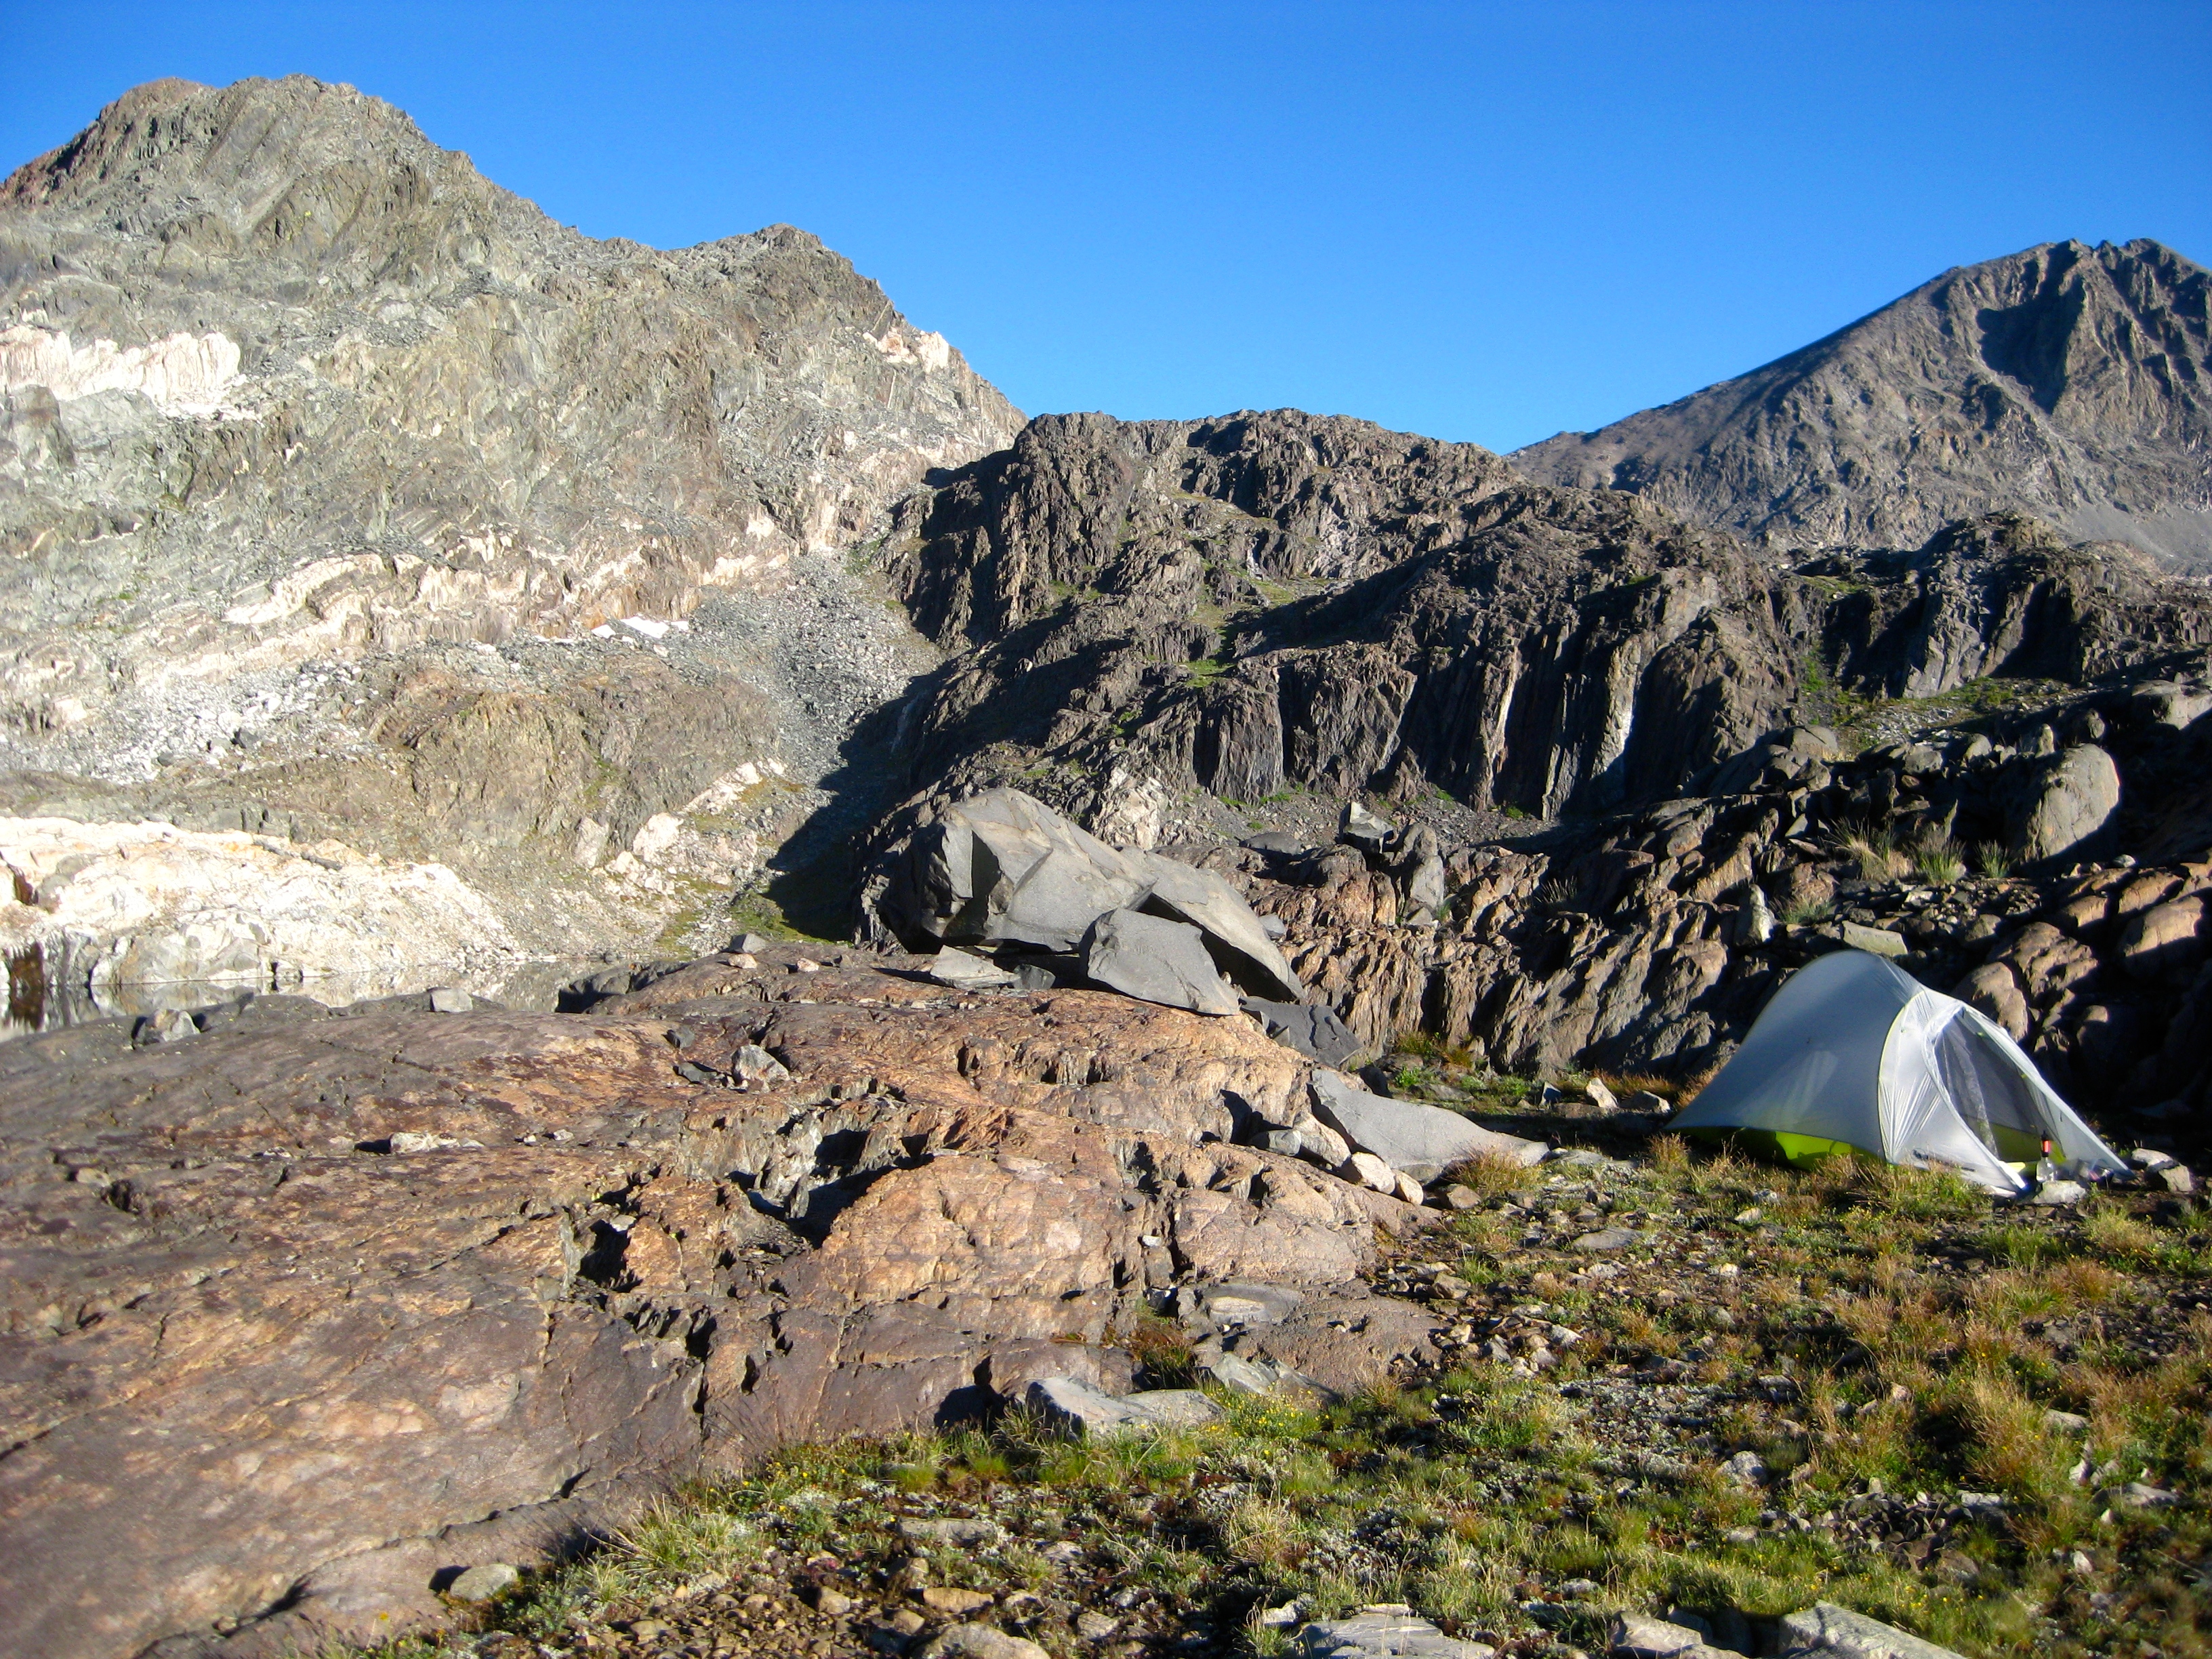
Camping by lake 11,818 was fantastic. You can see Mount Goddard – the next objective – in the right hand background of this picture.
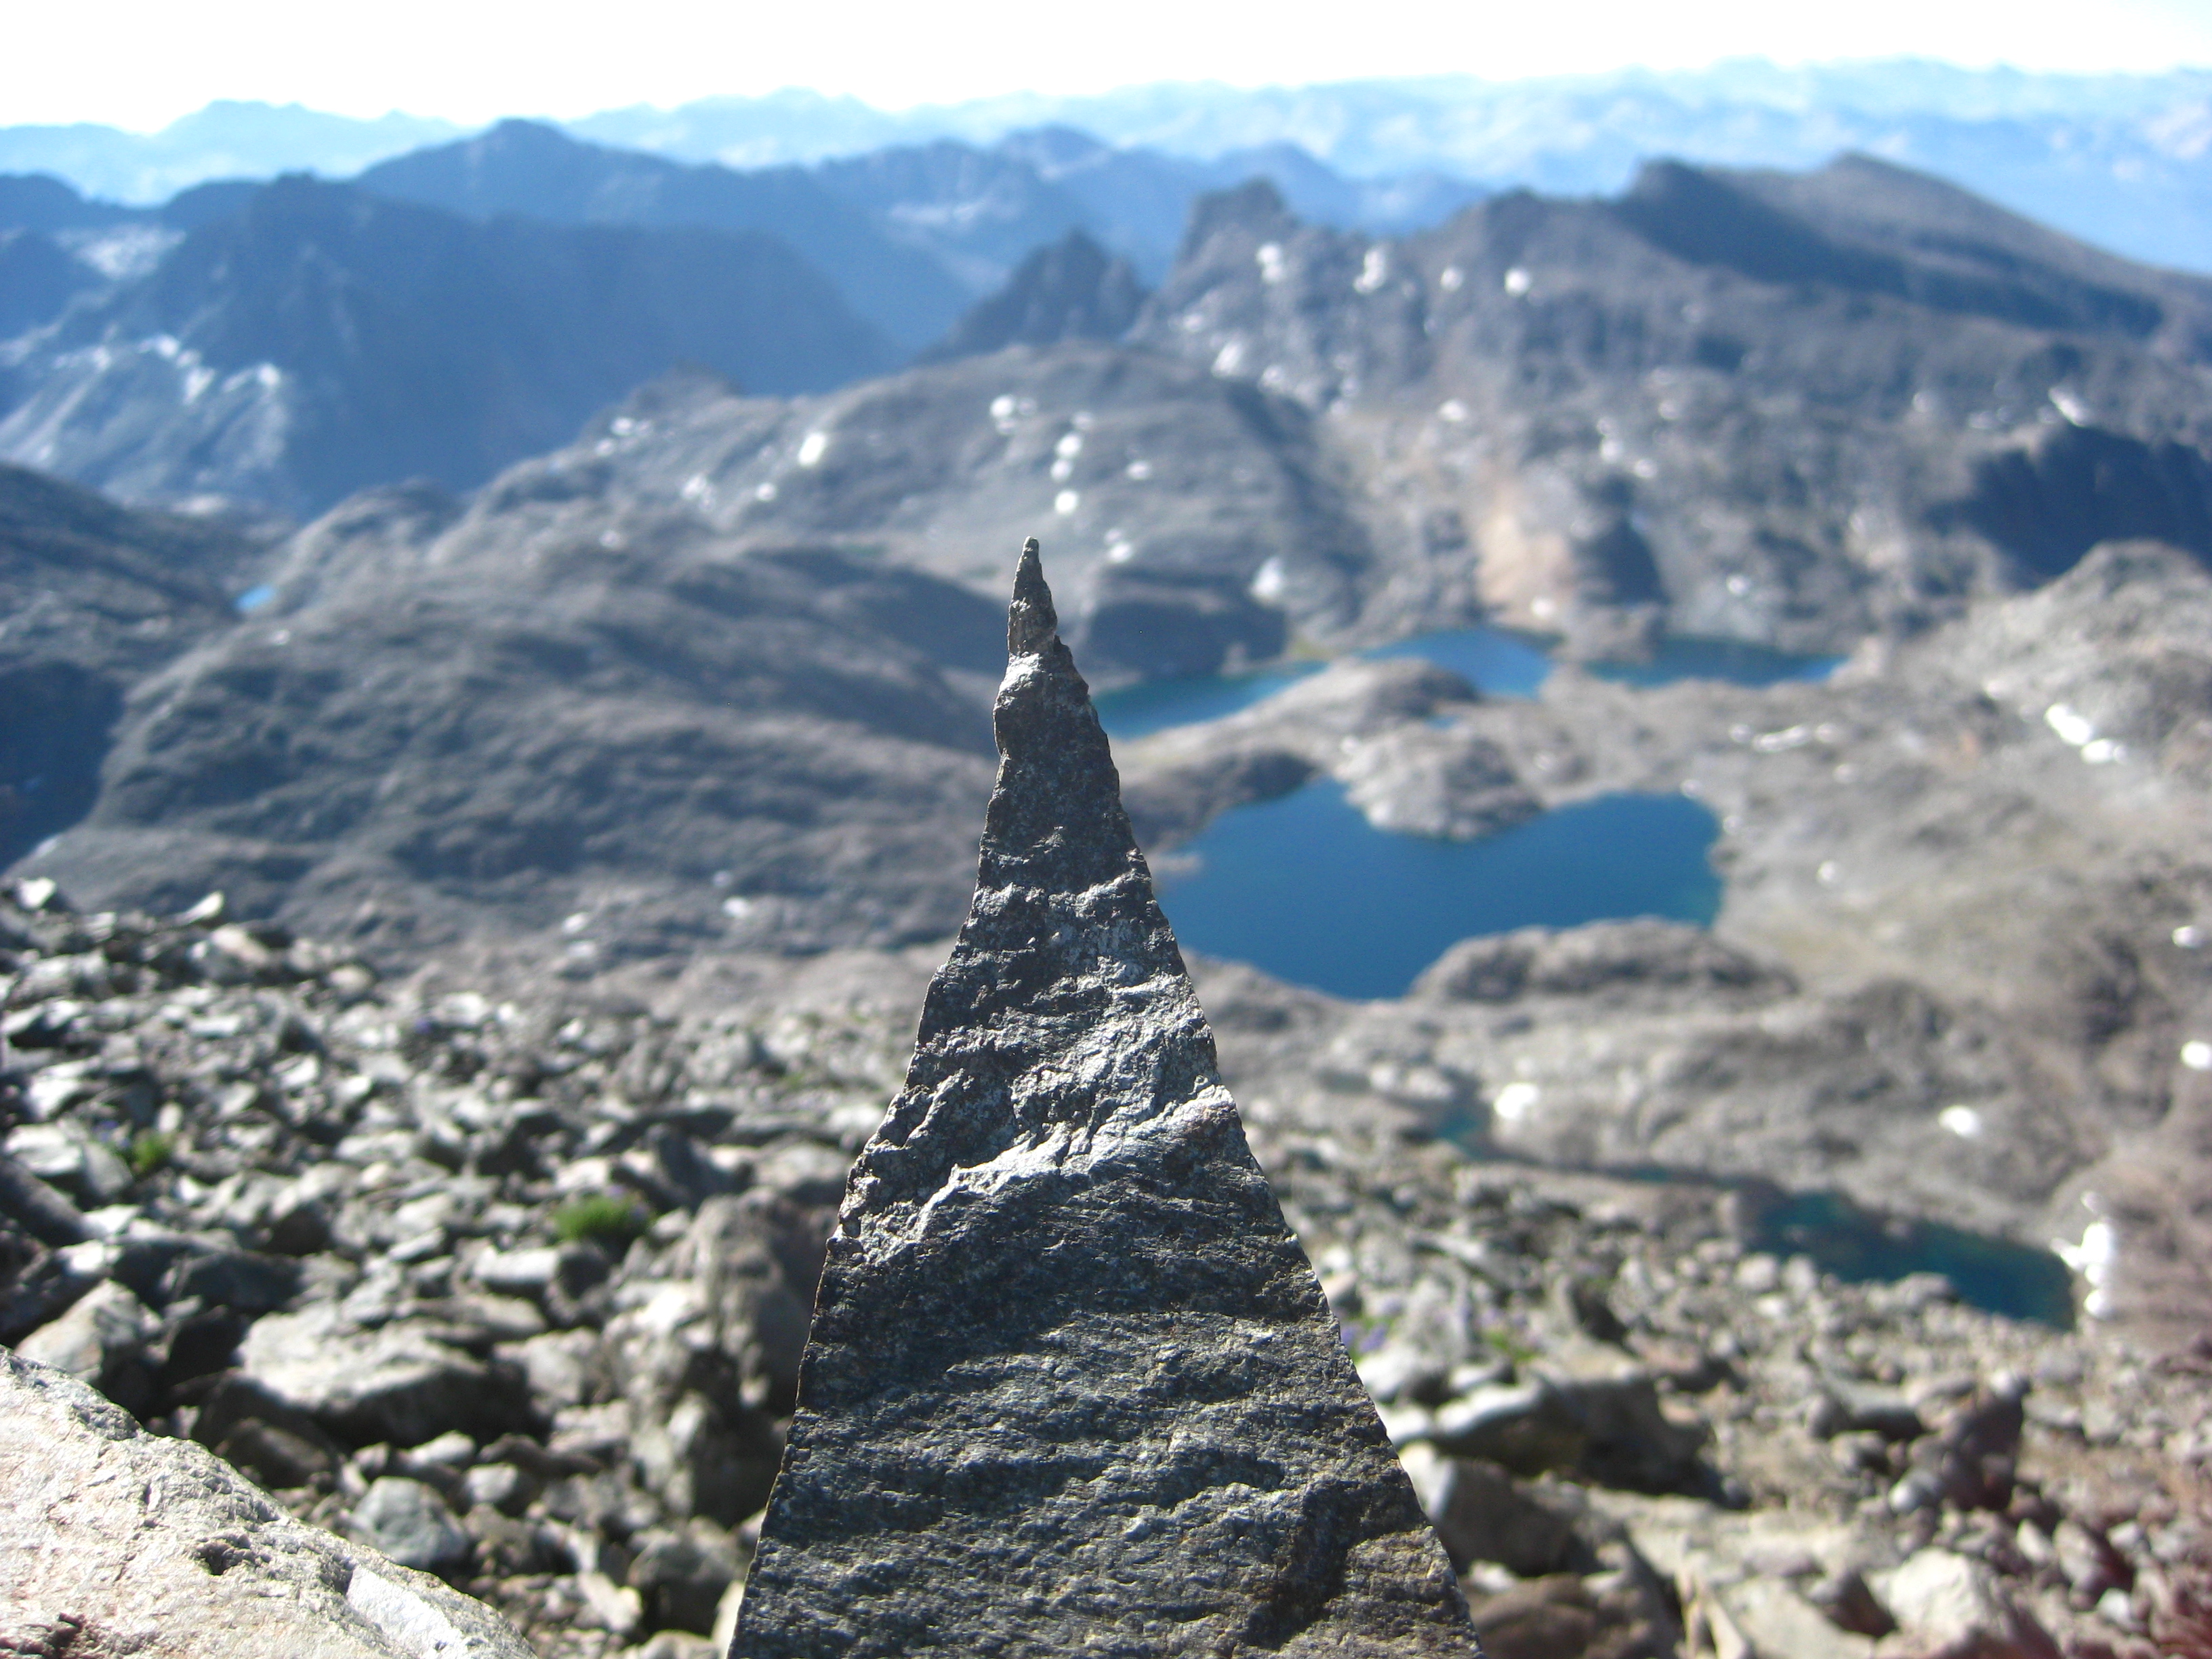
The next day, I wanted to ascend Mount Goddard for a better view. The ascent following my route is fairly straight-forward: once you reach lake 11,951, you’ll see what basically boils down to a faint, but discernible trail. This trail follows an easy gully with a small rivulet that you must cross a couple times up to lake 12,274. From here a clear path leads up the flank of Mount Goddard. Closer to the top, you’ll find more than one path; on the way up, though, I managed to follow the main path (missed it a little bit on my way down). To my dismay upon reaching the “top,” there is another peak (the true summit) that is 10 vertical feet higher. Reaching this 13,568′ peak requires an exposed Class 3 traverse. I traversed to the middle spire and then turned around. One thing I like about reaching summits is finding the register and reading who has been there before. The sheer drops and loose rock made me do a cost-benefit analysis that resulted in a careful turn around. The views from either summit are presumably equal, and I’ve included some pictures here.
In the foreground, you can see the true summit, which is 10′ higher than the one upon which I was standing. the peaks are separated by an exposed Class-3 traverse.
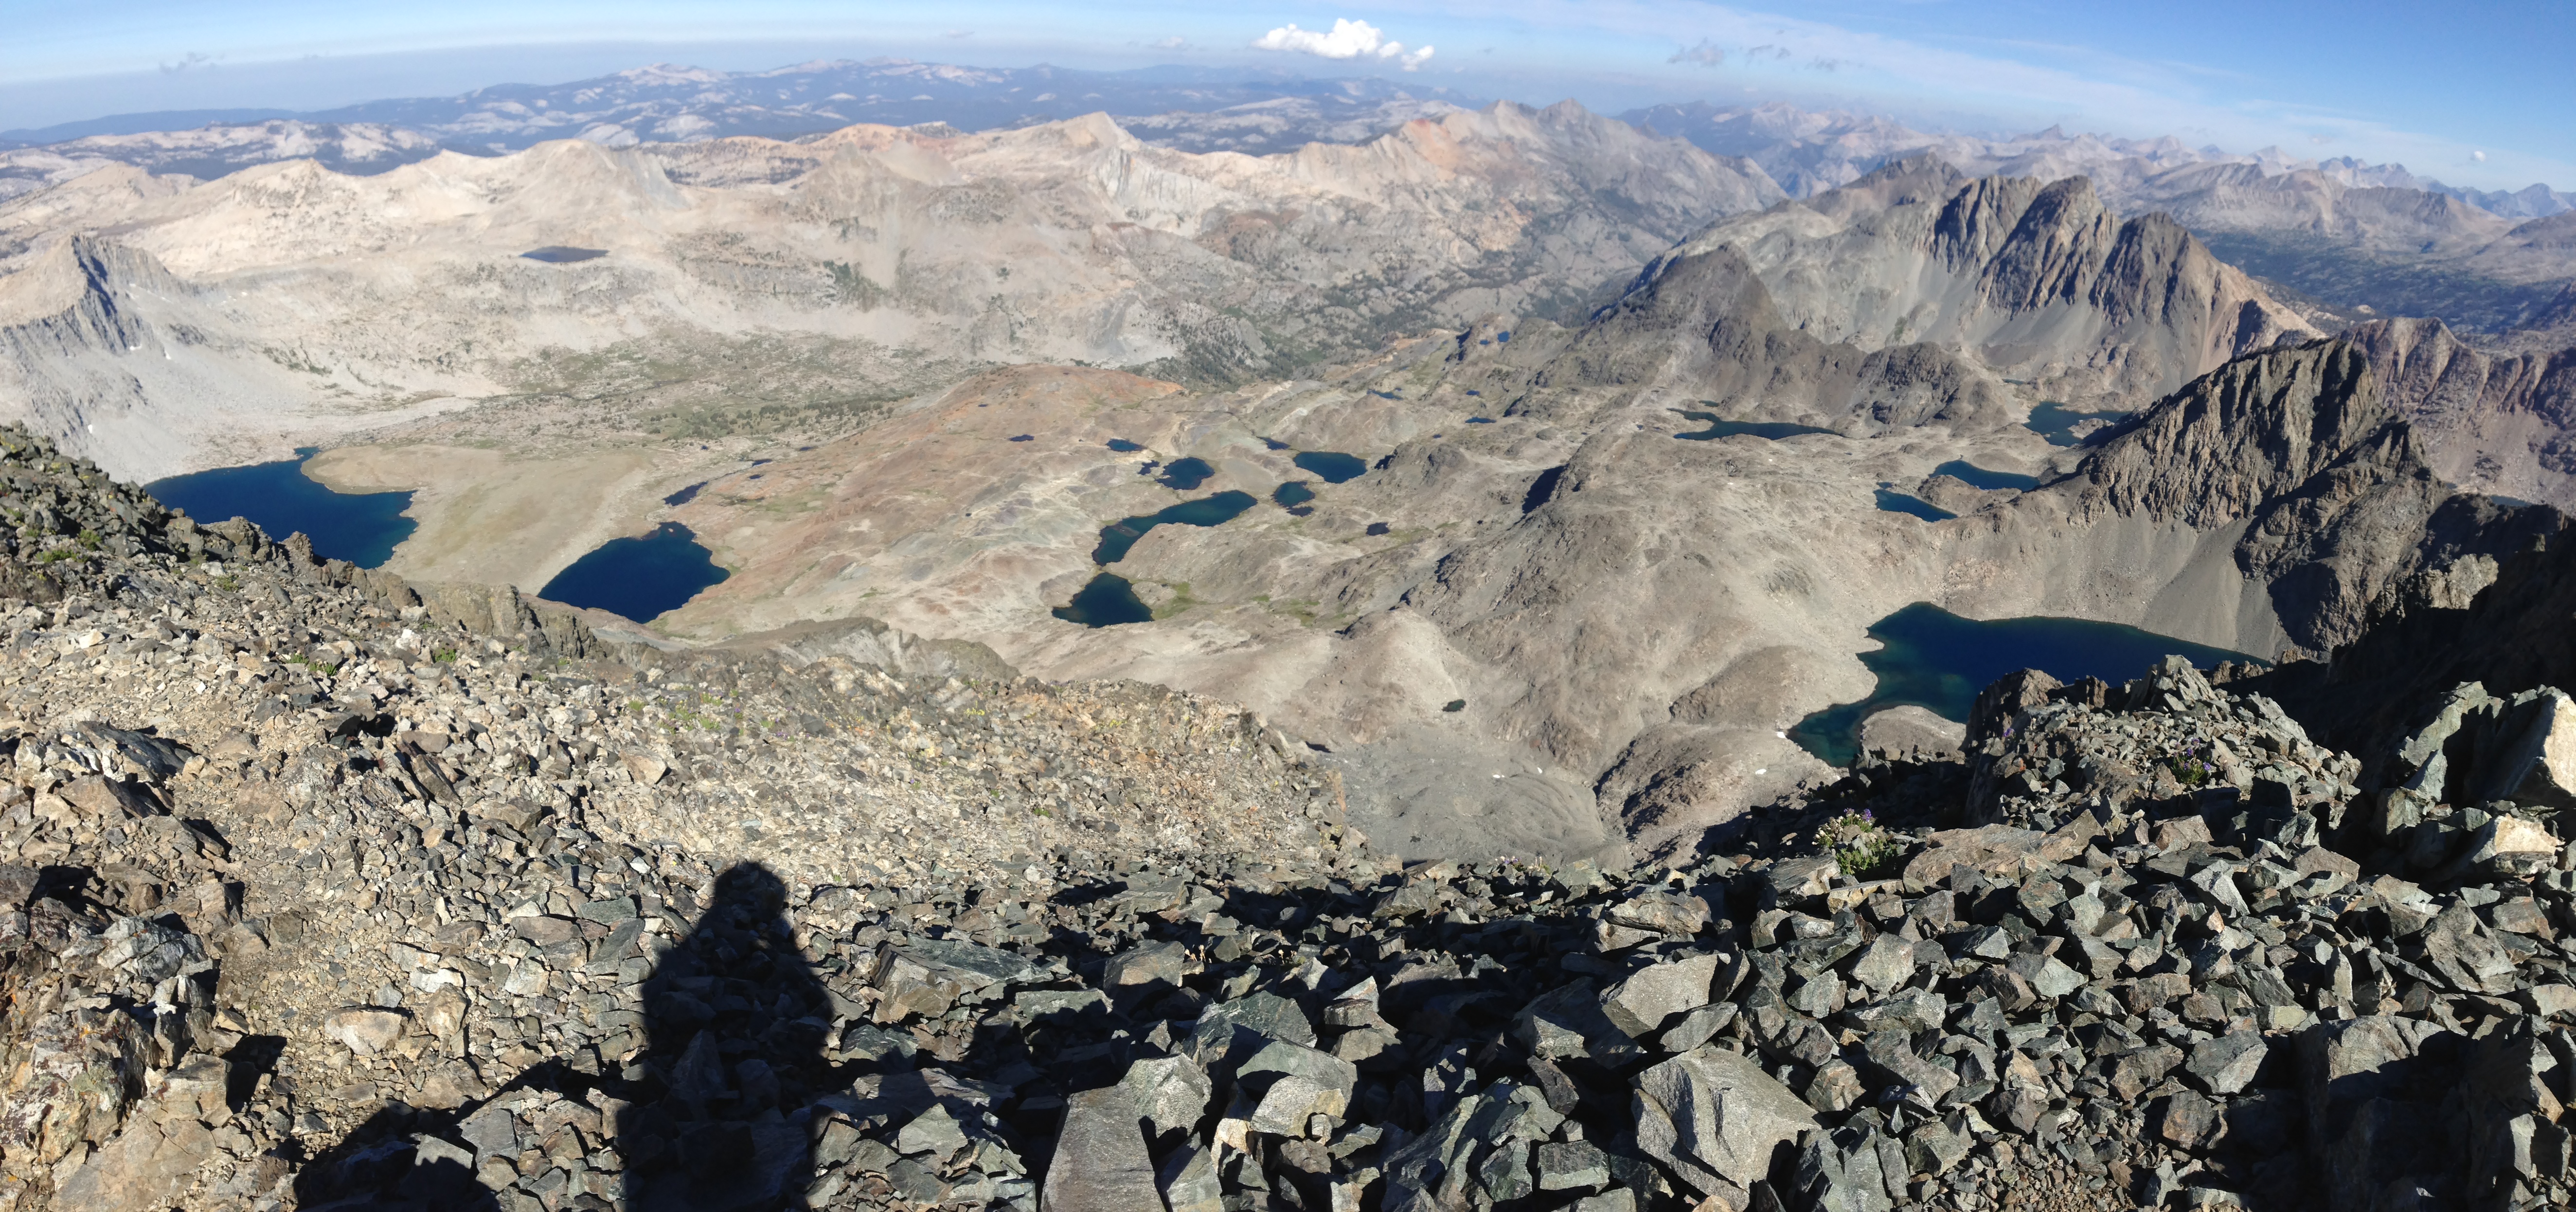
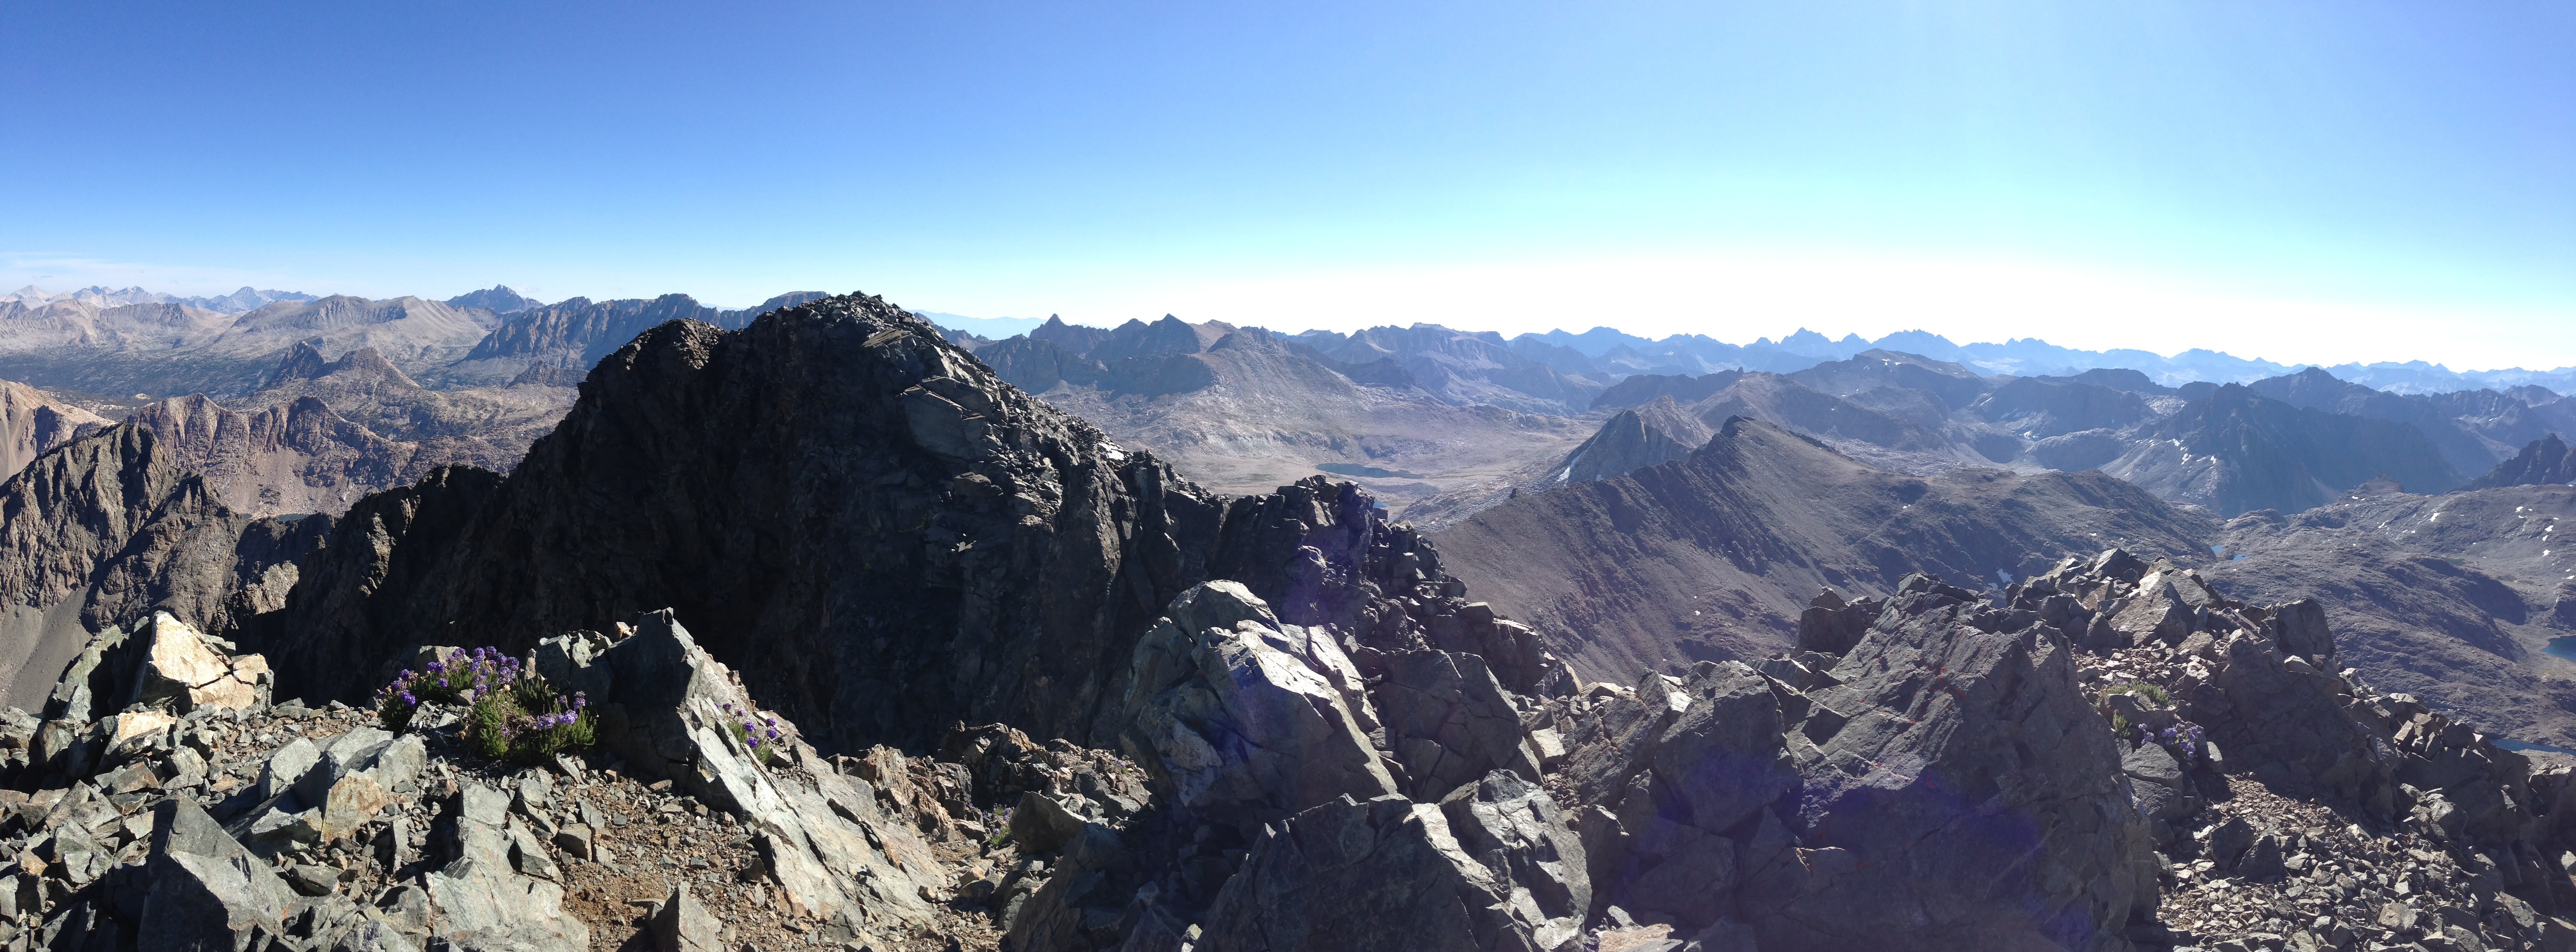
The View to the North from Mount Goddard. The larger peak to the right is Mount McGee. Closer to the middle, a little red peak is Red Mountain, and to the left of the broad saddle, the peak just left of the center of the image is Mount Hutton. (I climbed both these peaks a few weeks ago, so it was really neat to see them from a new angle)!
All the unnamed peaks to the South with a triangle rock in foreground.
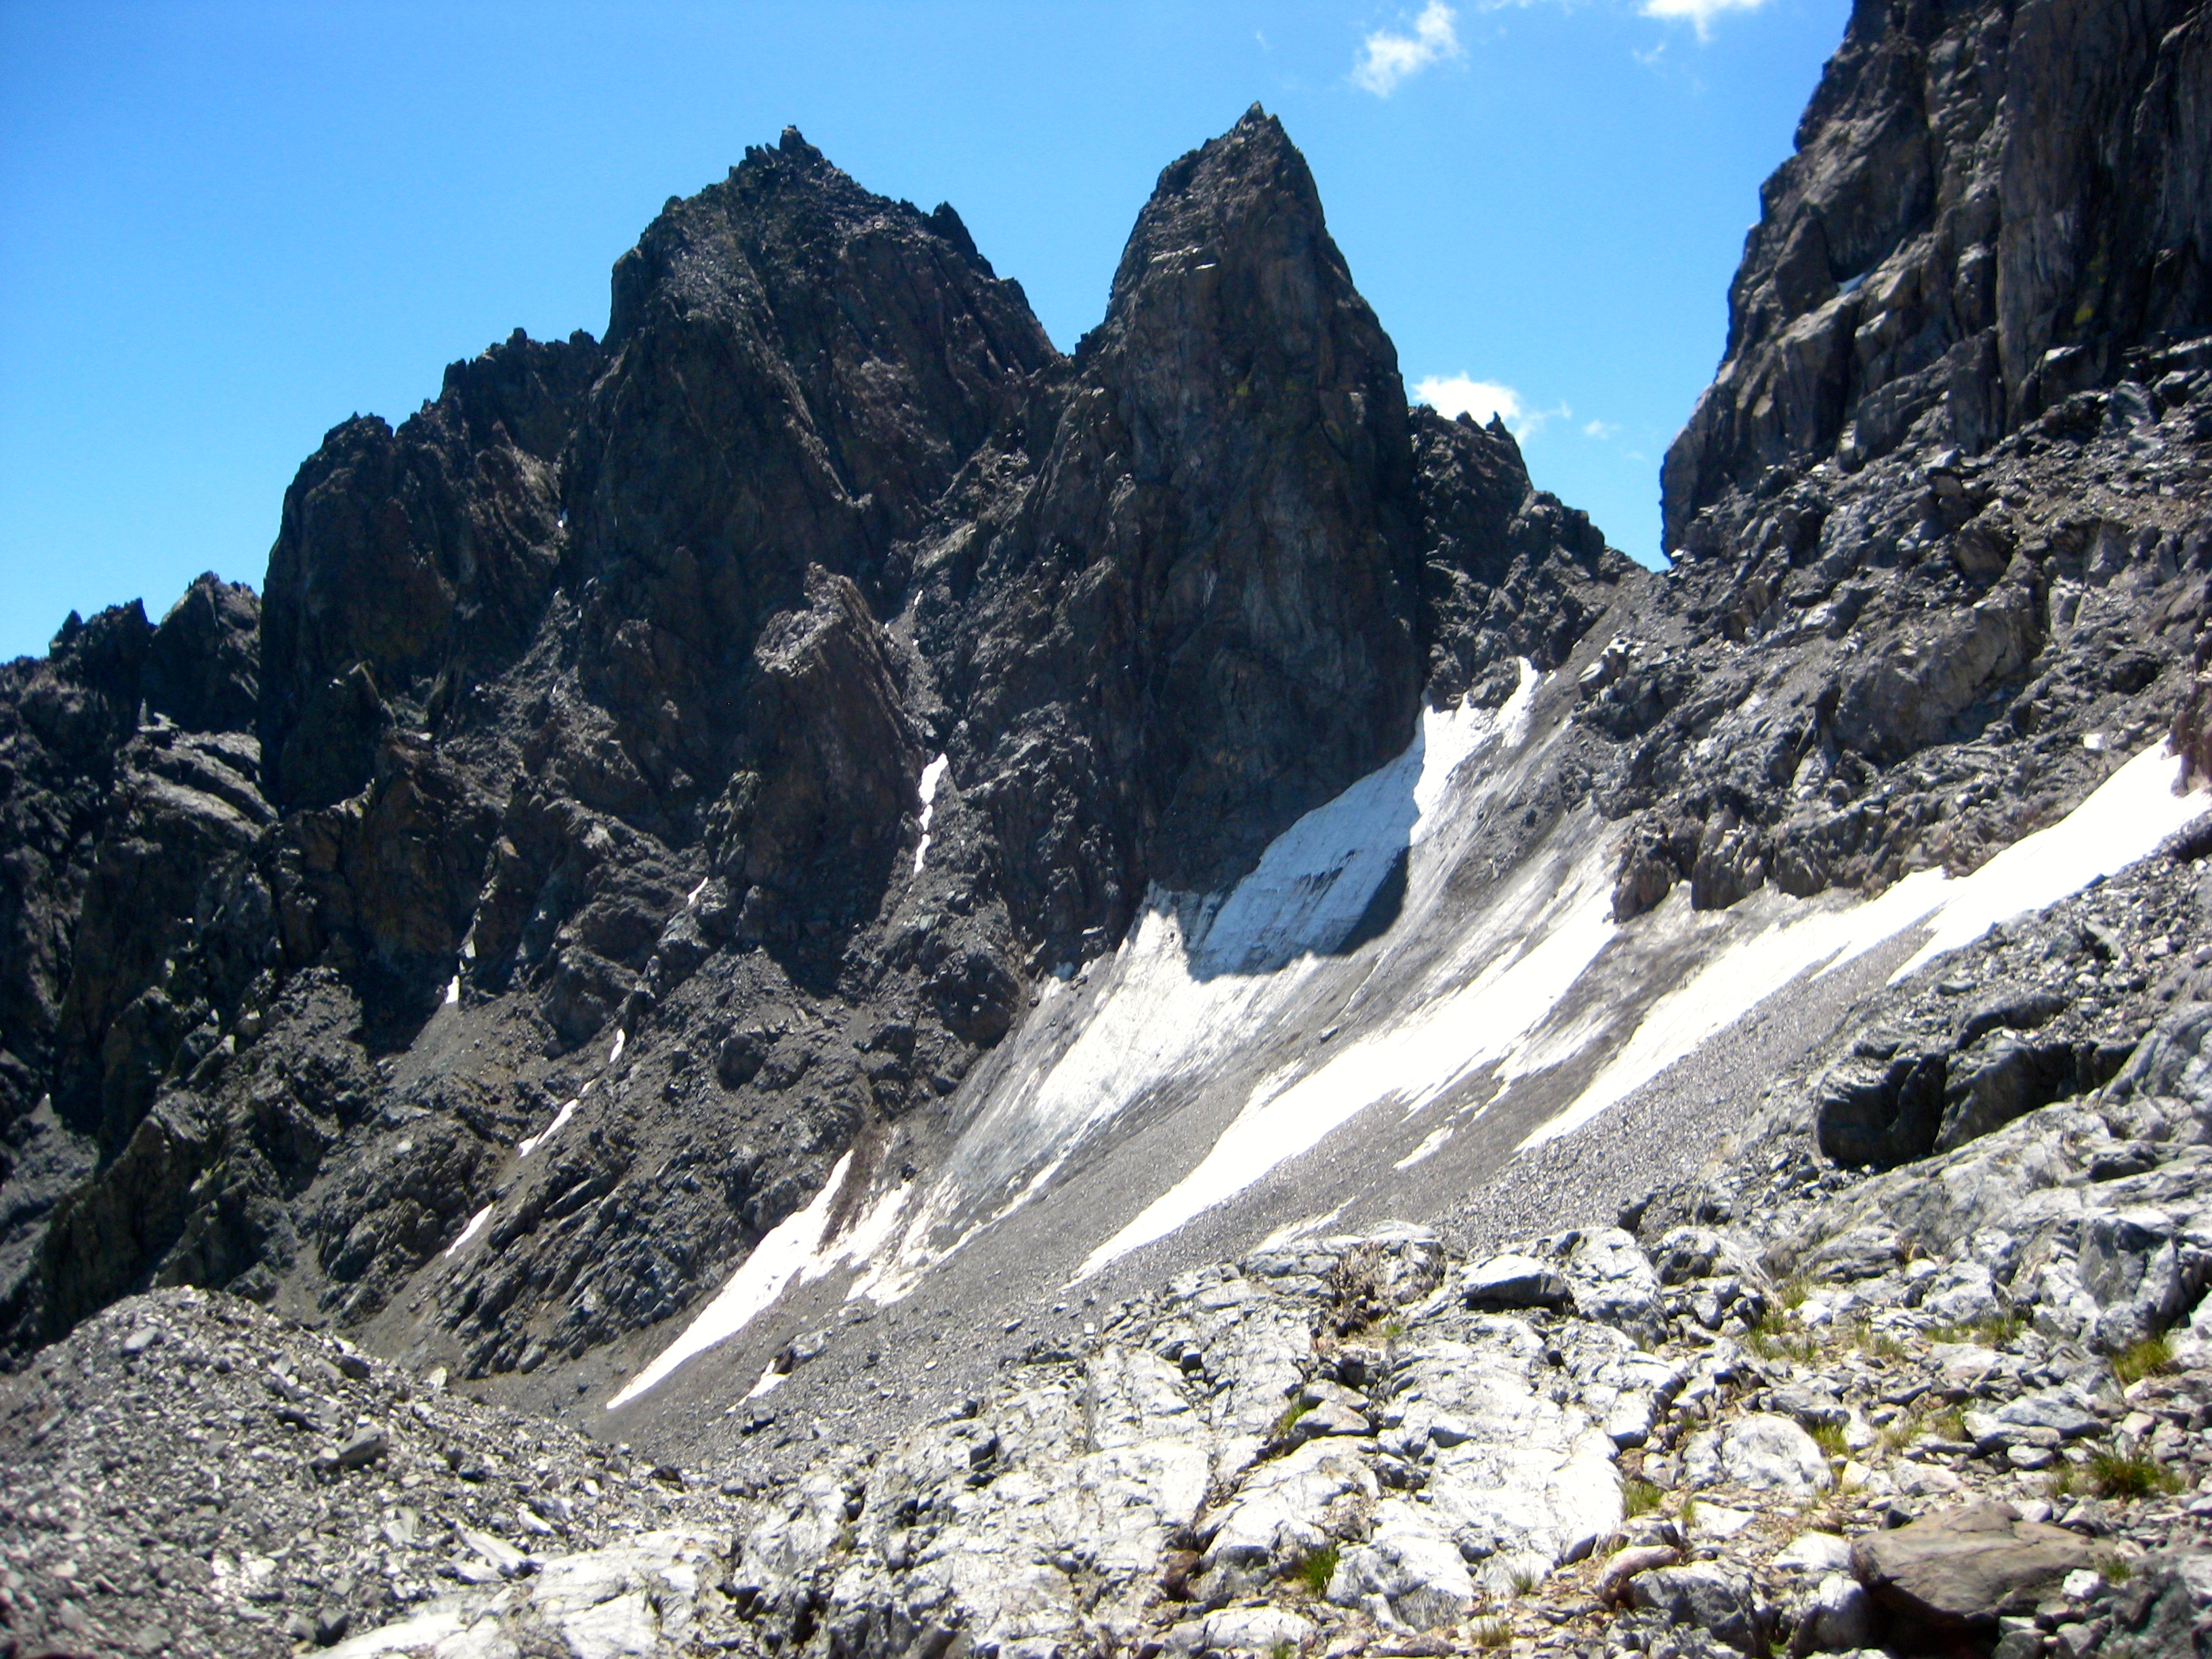
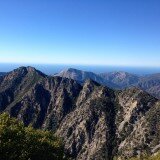
From Goddard, I descended back to lake 11,818, and then started my traverse of the Ionian Basin. This is a remote and barren region. Travel is not as straight-forwad as in other regions; you will constantly find yourself traversing talus and avoiding lake shores. The route sought to reach Chasm Lake – the head of the Enchanted Gorge. Even though I wasn’t going to descend the gorge, I wanted to see the head of it. In studying the topo map, it was unknown if a descent to Chasm Lake would be possible from Lake 11,598 (just North west of Chasm Lake). The contour lines were pretty tight. Rounding the seahorse shaped lake just north of Scylla proved to be quite difficult. You need to stay high – maybe 50-100′ – above the lake. I did need to do a few climbing moves that required both hands on vertical rock. It wasn’t exposed or too scary, but not my ideal route. It may have been easier to round the North side of this lake, but the resulting views of Scylla and the Three Sirens probably made the Southern Route worth it.
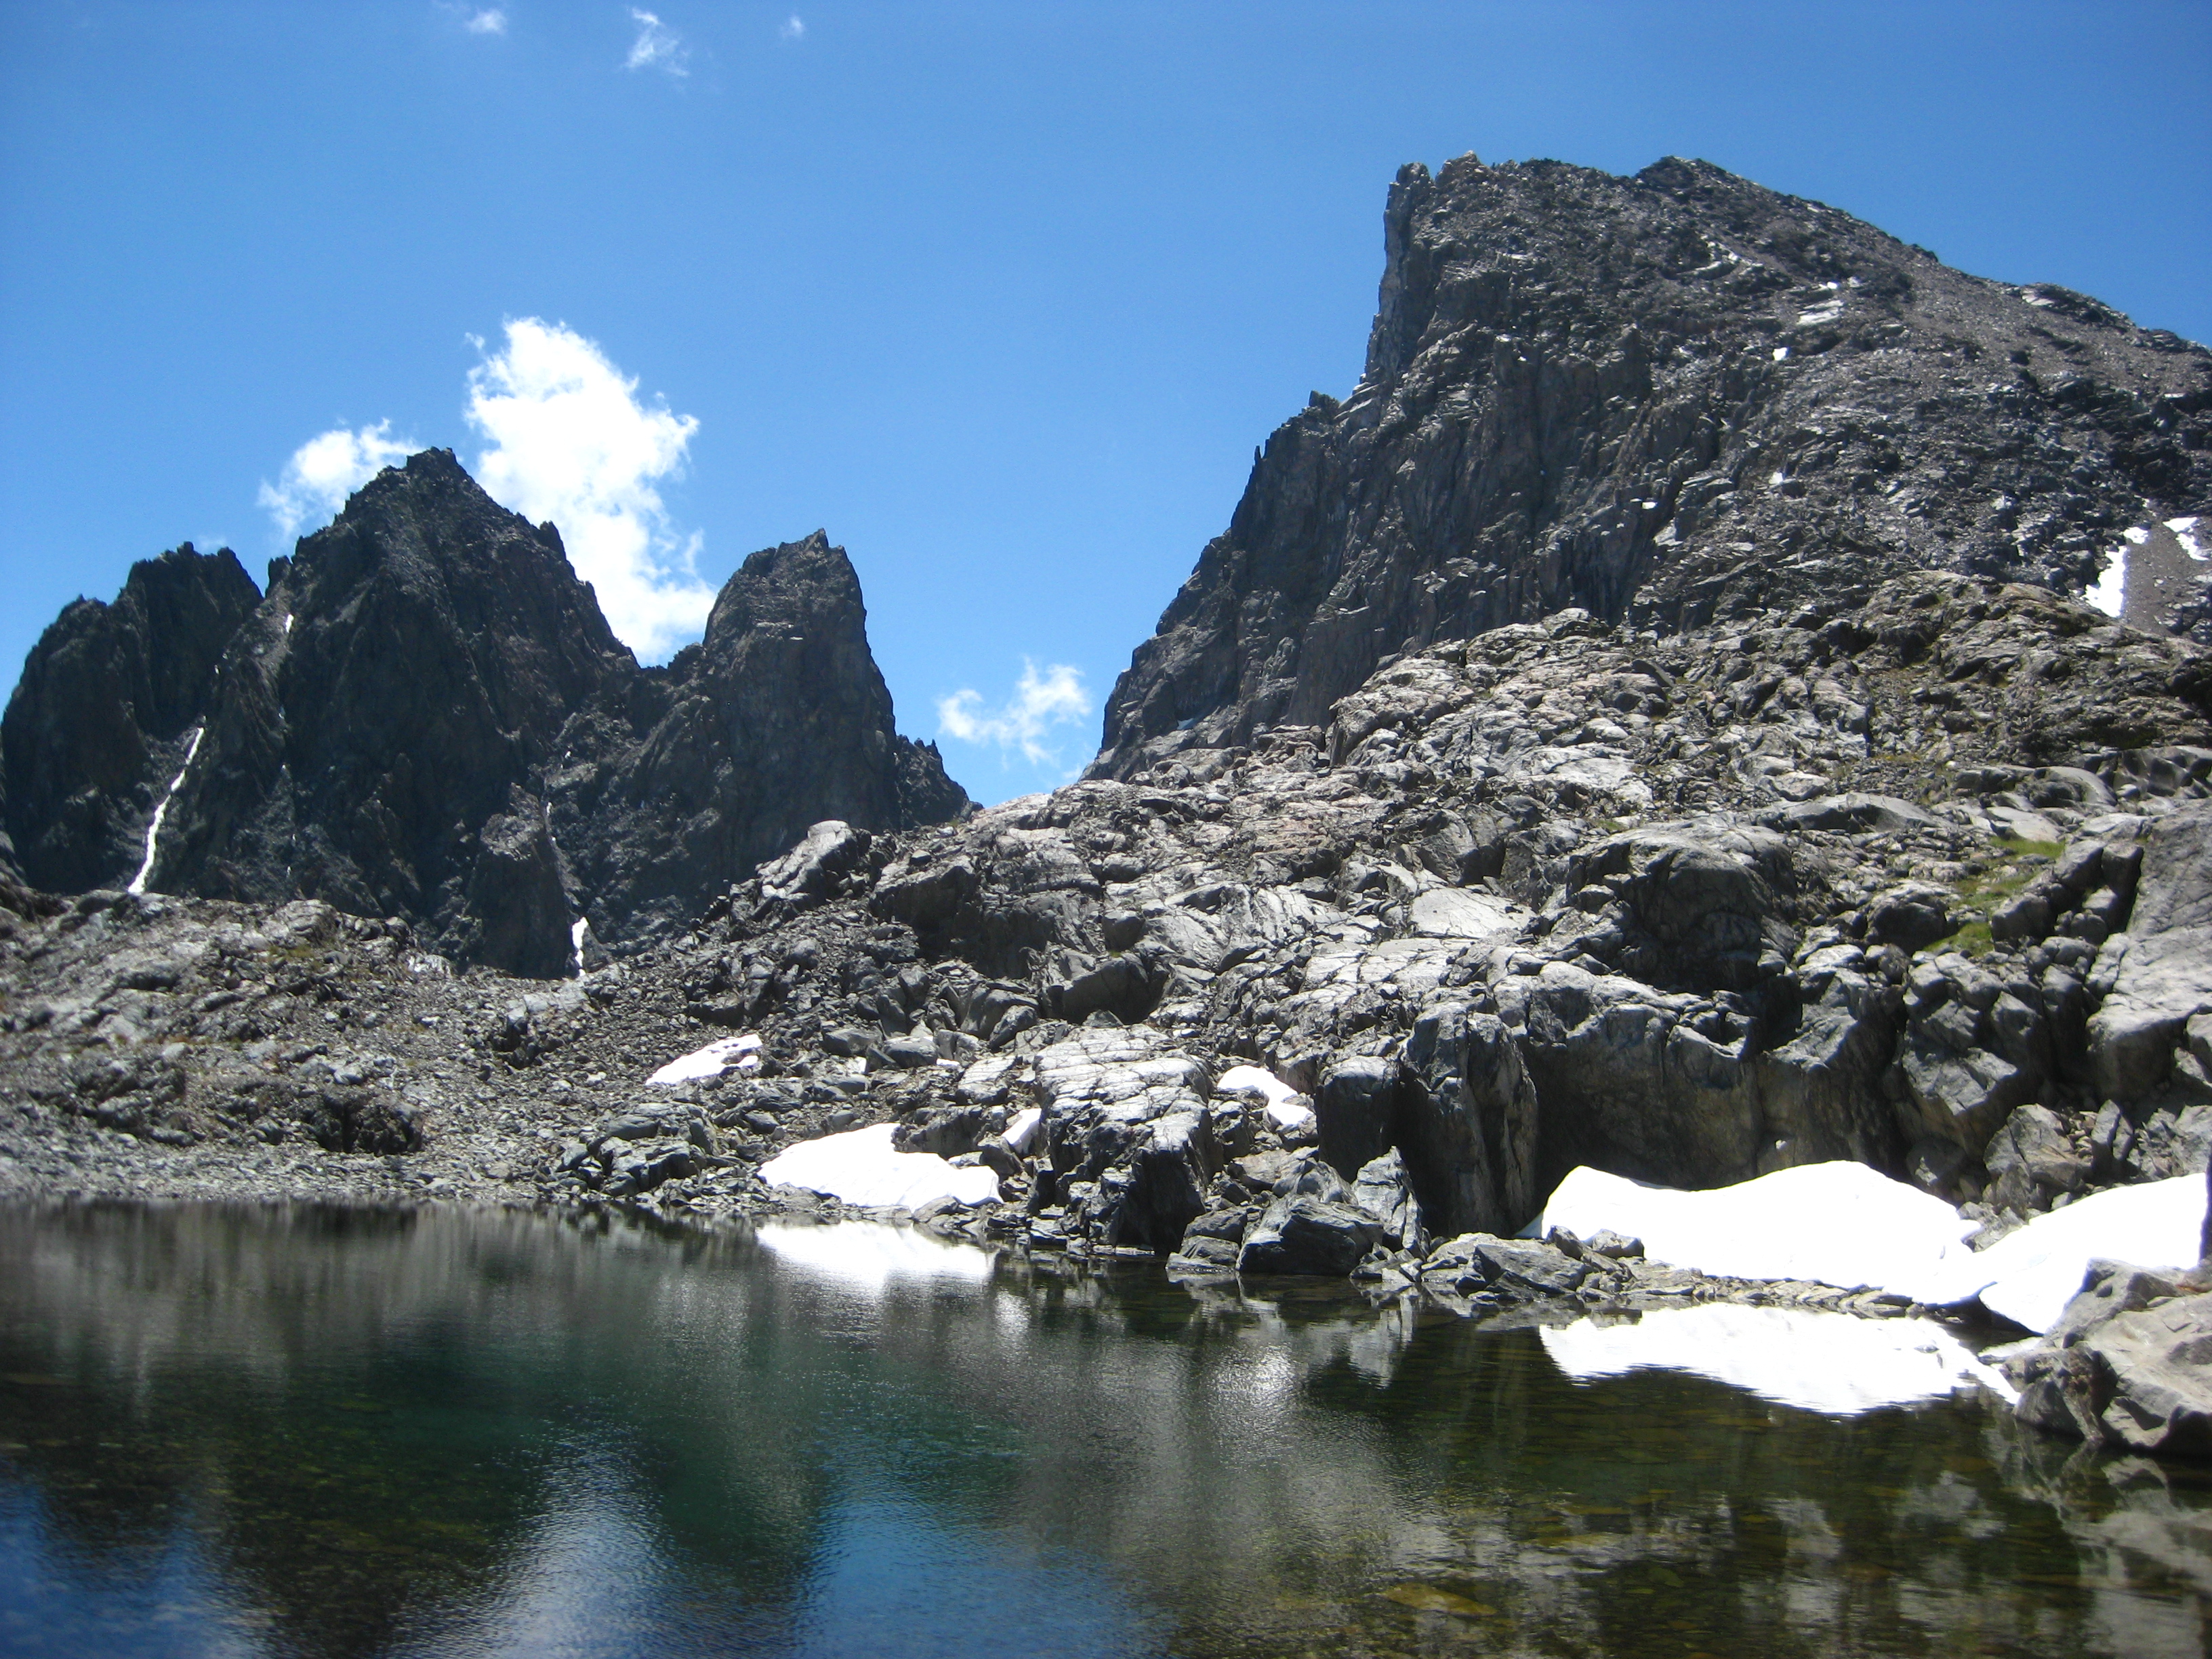
Here you can see Scylla and the Three Sirens.
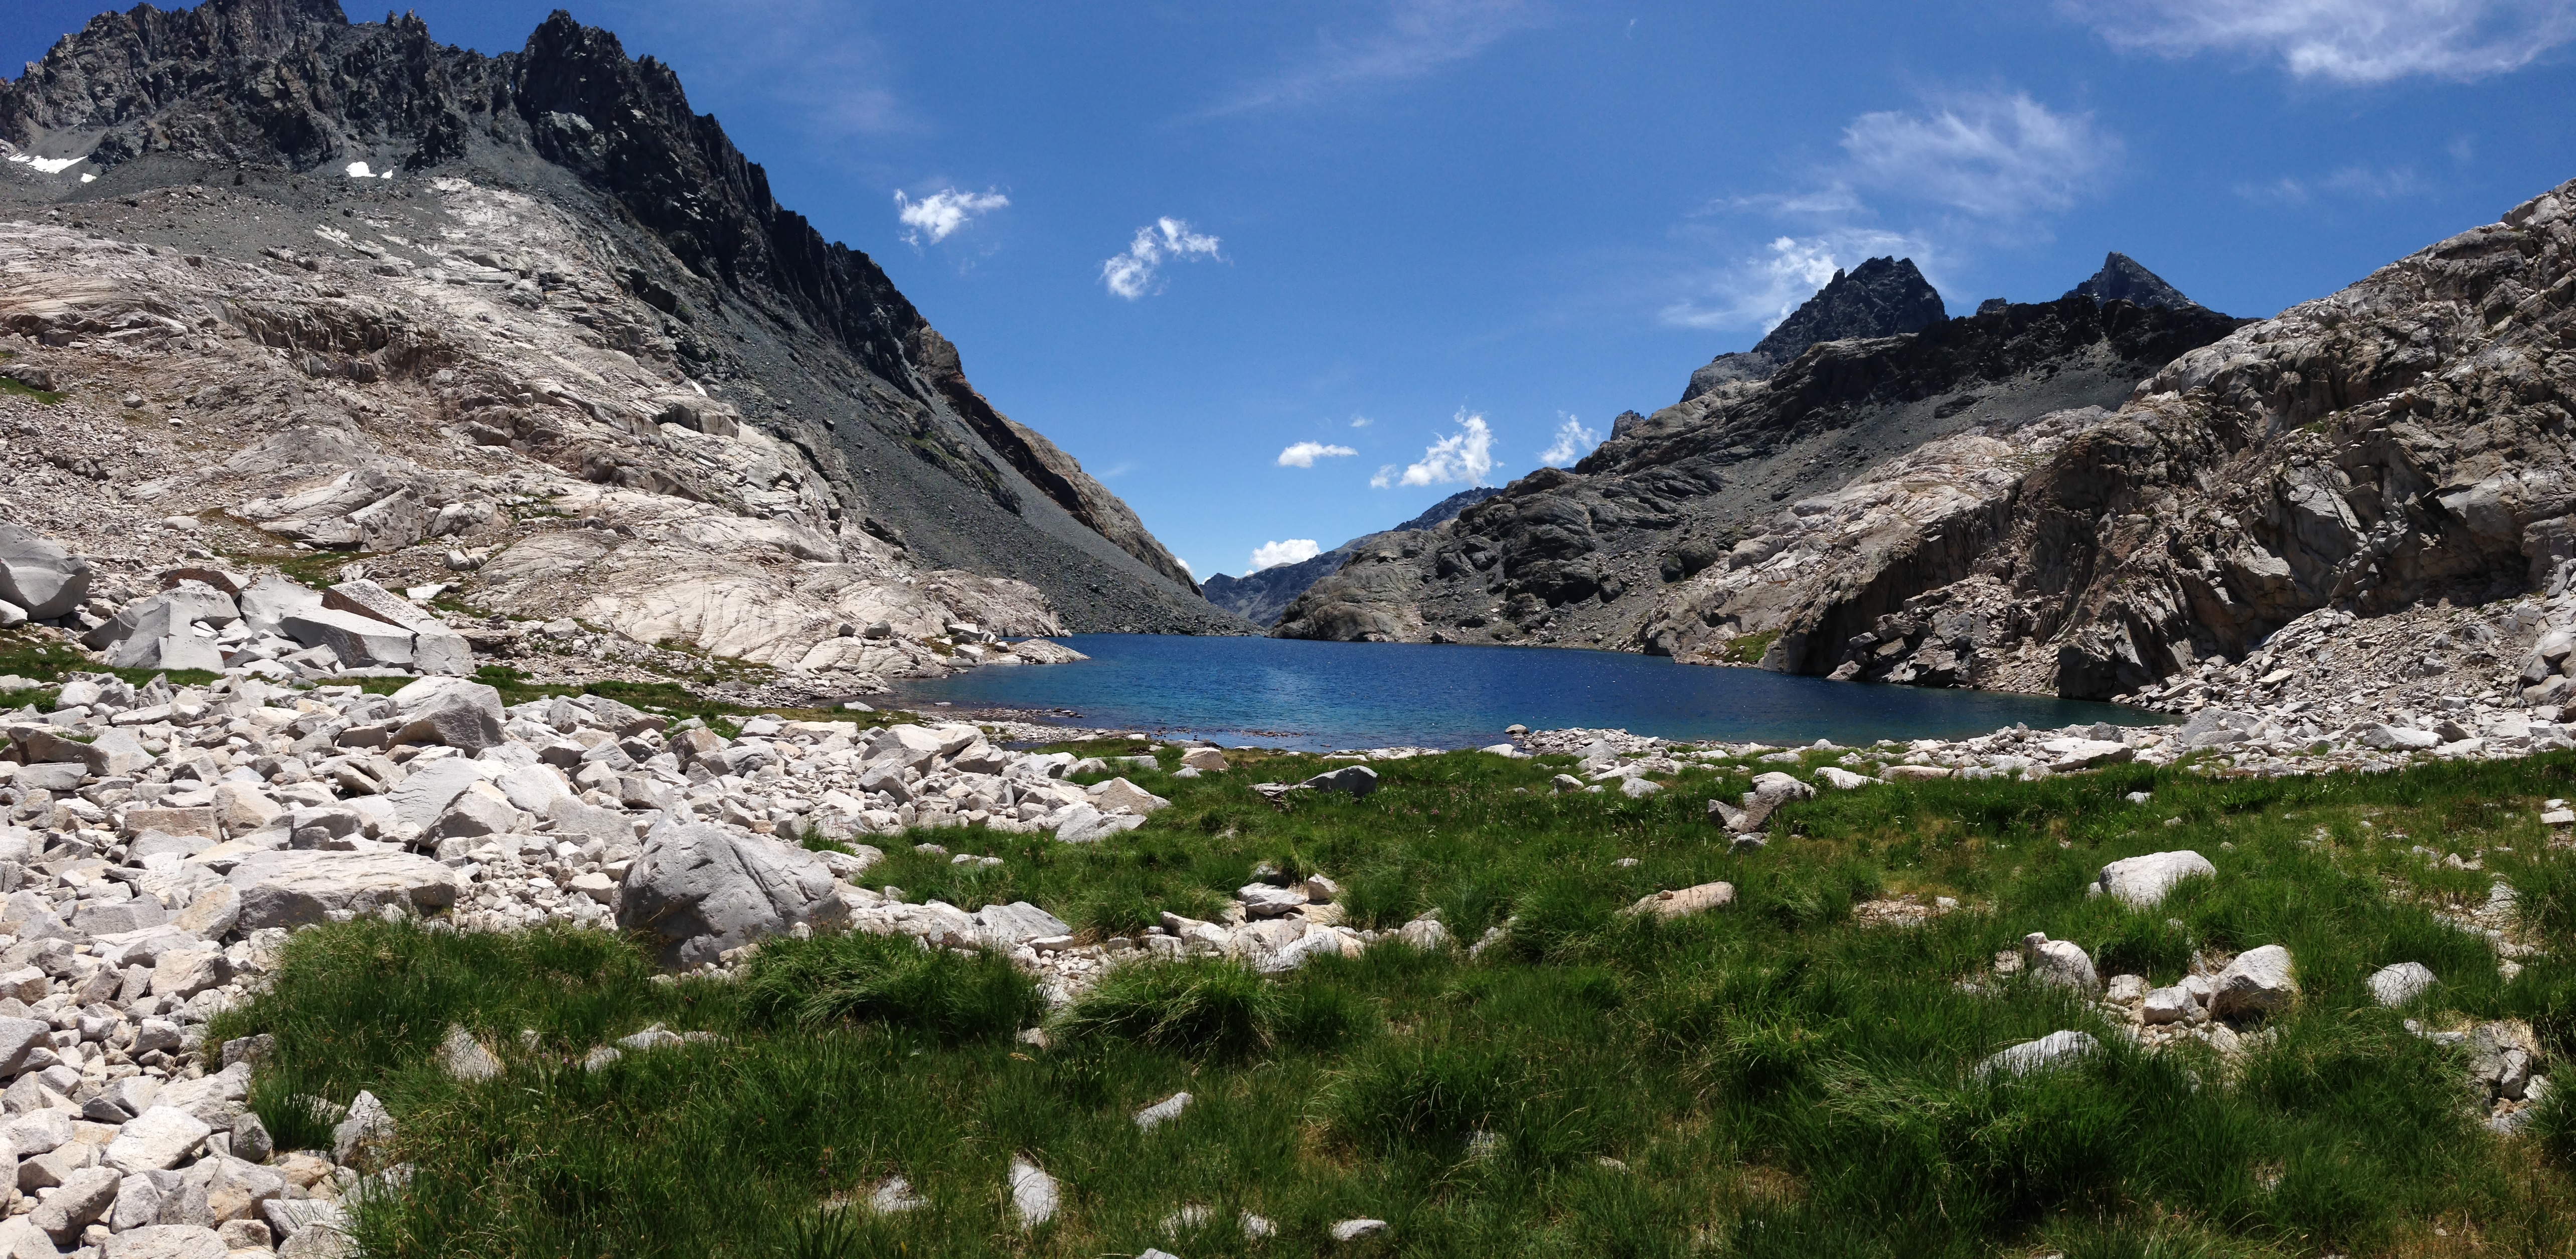
Originally, I had planned to follow the route to the lake in the cirque just North West of Chasm Lake and descend the drainage, but I had worries about the feasibility of this route. Instead, I headed to the South East and found an all Class-2 route down the West flank of the Chasm. You basically follow a series of benches and ledges that ramp down getting you progressively lower. There is a short section of scree at the beginning, but the descent was quite easy. It was a joy to arrive at Chasm lake and the gateway to the Enchanted Gorge!
The entrance to Enchanted Gorge – guarded by Charybdis on the left, and the Scylla on the right! Is the Gorge really Enchanted, or is the Enchanted Gorge name really just a trick?
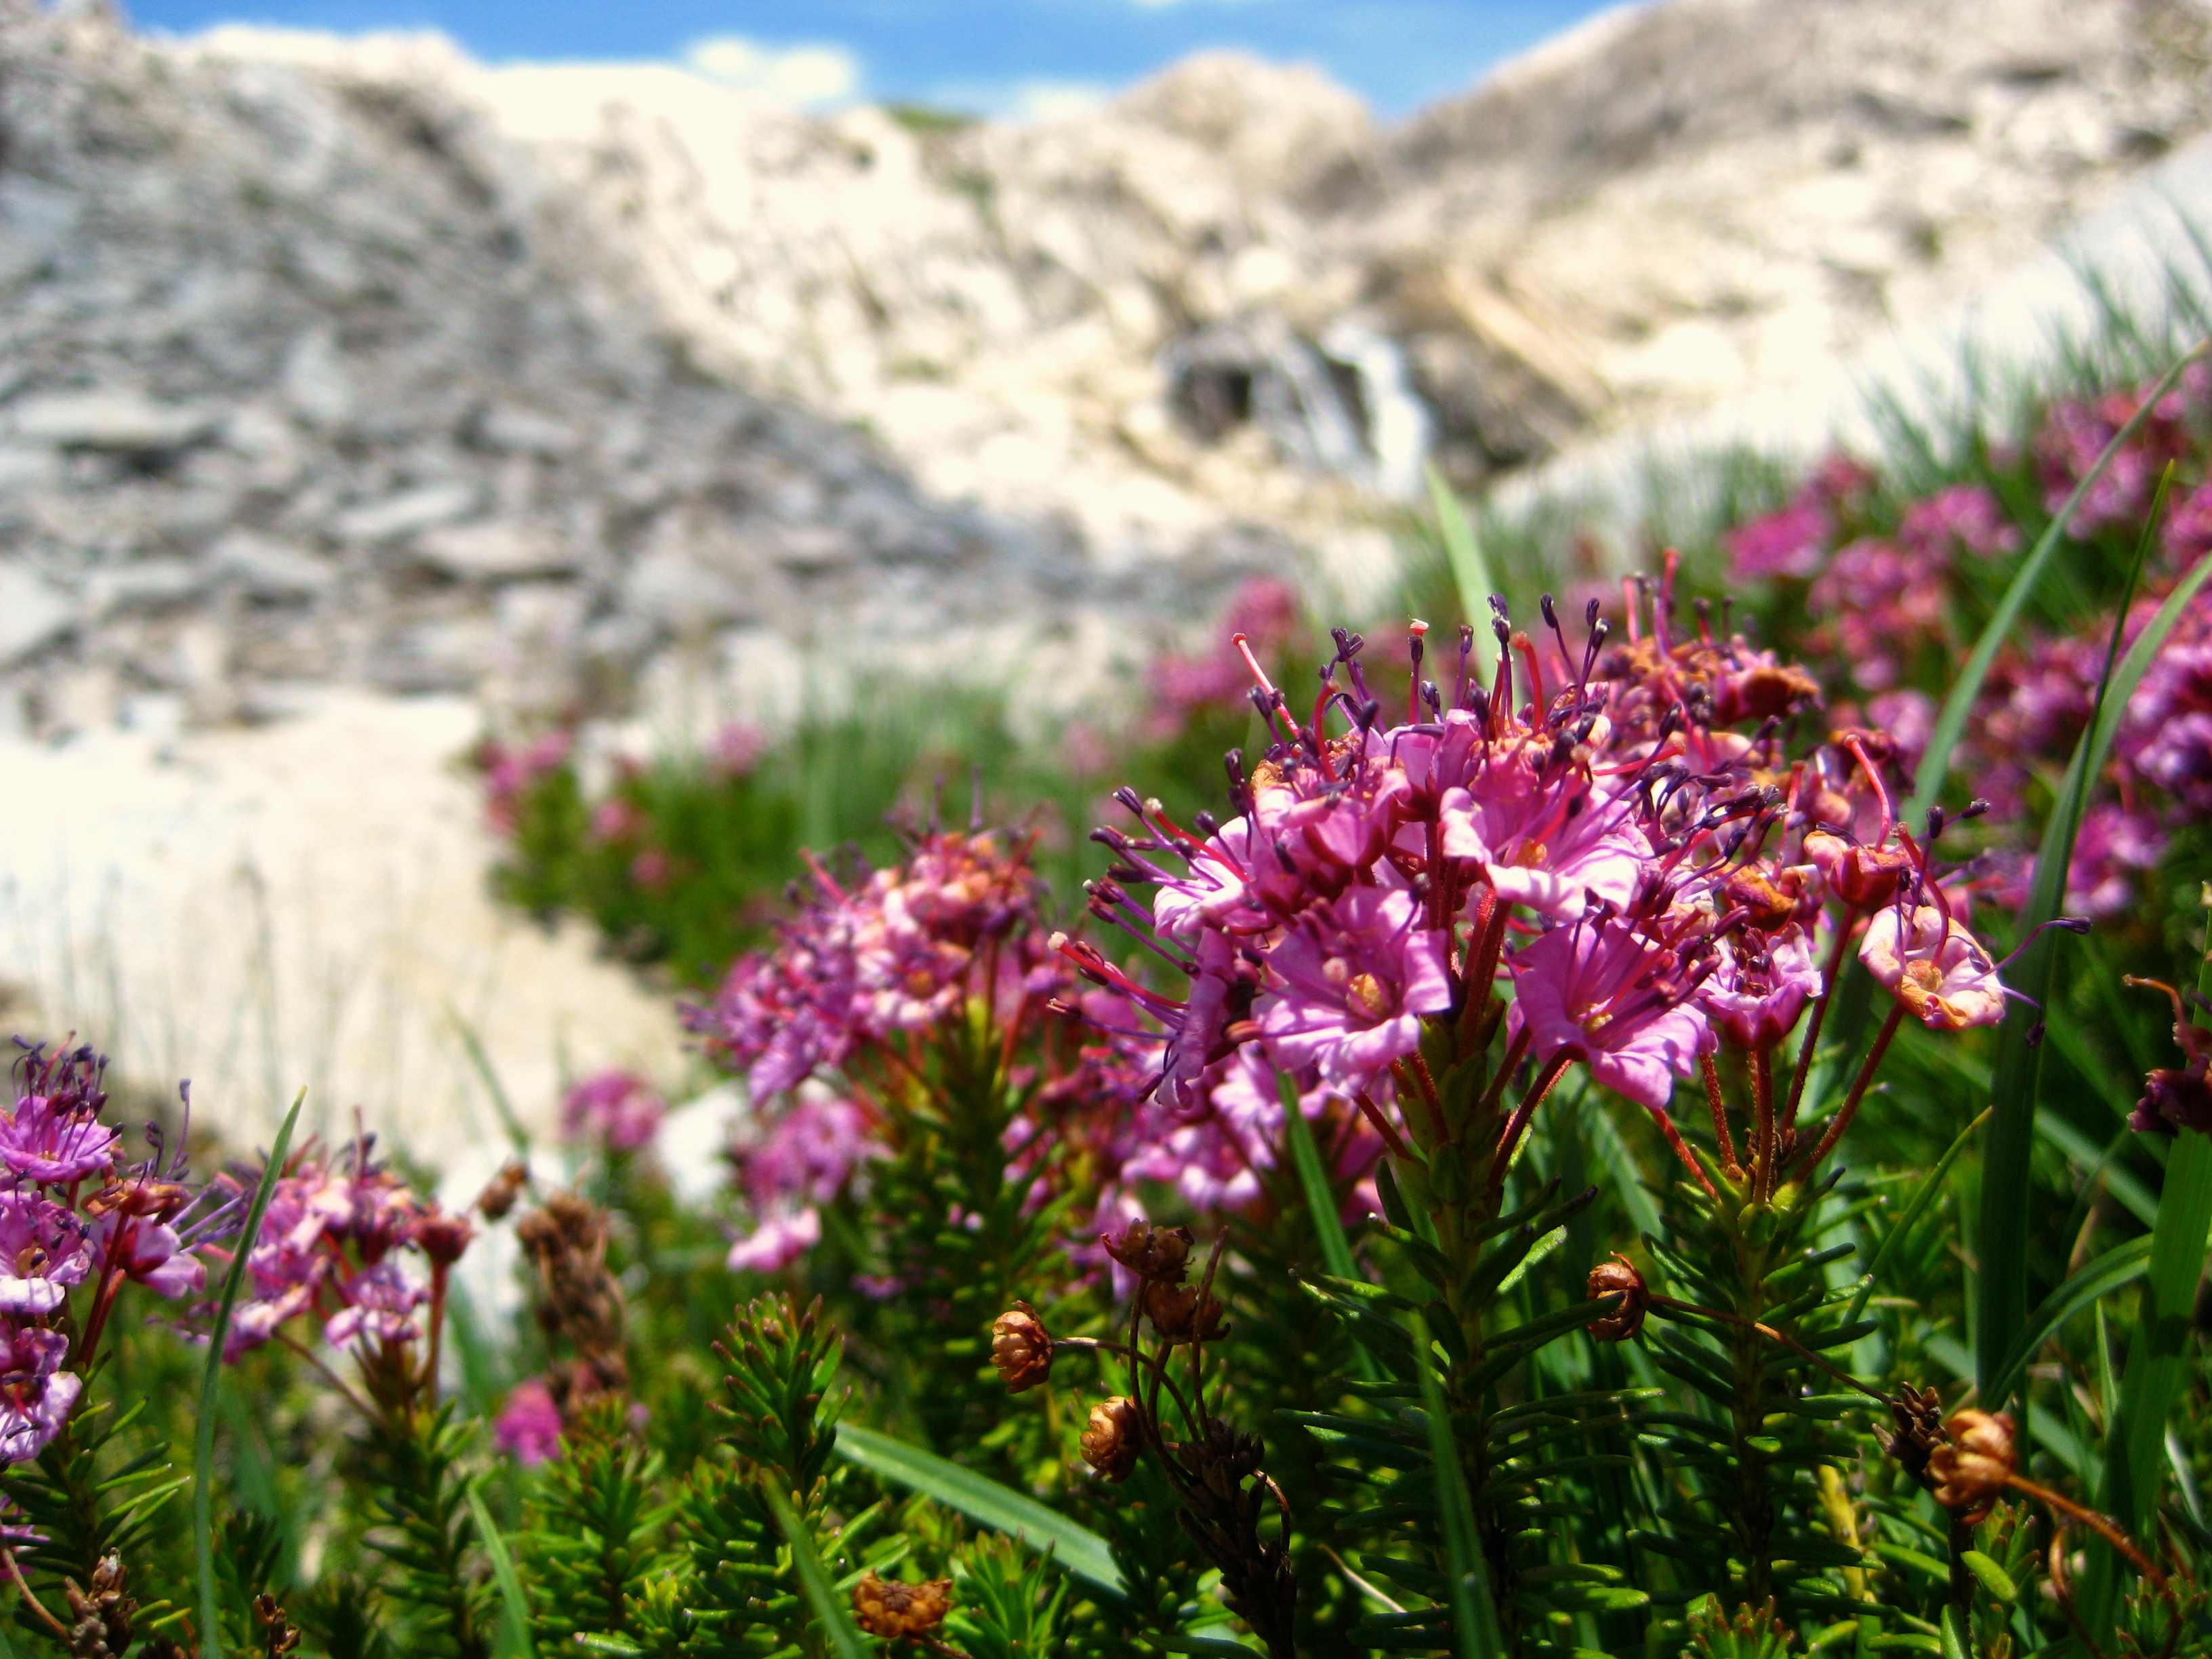
Great flowers and waterfalls seen near Chasm Lake. Red Mountain Heather
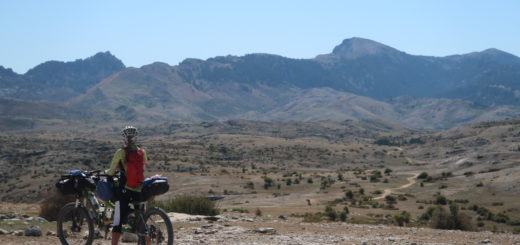
From here, it was a straight-forward ascent to the lakes above, including lake 11,828. The gully below lake 11,828 was especially steep on talus and scree, but there was no need to do anything scary. From Lake 11,818, it’s a pretty straight forward route across the low saddle between Black Giant and peak 12,776. You can head straight toward Helen Lake and the JMT, completing your Ionian Basin traverse. I headed up towards the slopes of Black Giant in the hopes of obtaining cell phone reception to send an “I’m OK” text, as AT&T has a small circle of cellular reception on Black Giant. This ascent (and subsequent descent) is tricky and slow going due to steep talus. From here, you take the John Muir Trail to the Simpson Meadow trail (this trail isn’t exactly named, but it is the one that follows the Middle Fork of the Kings River towards Simpson Meadow) to continue your loop. Most obviously, the JMT is easy going and social. I met a person every 10 minutes on average.
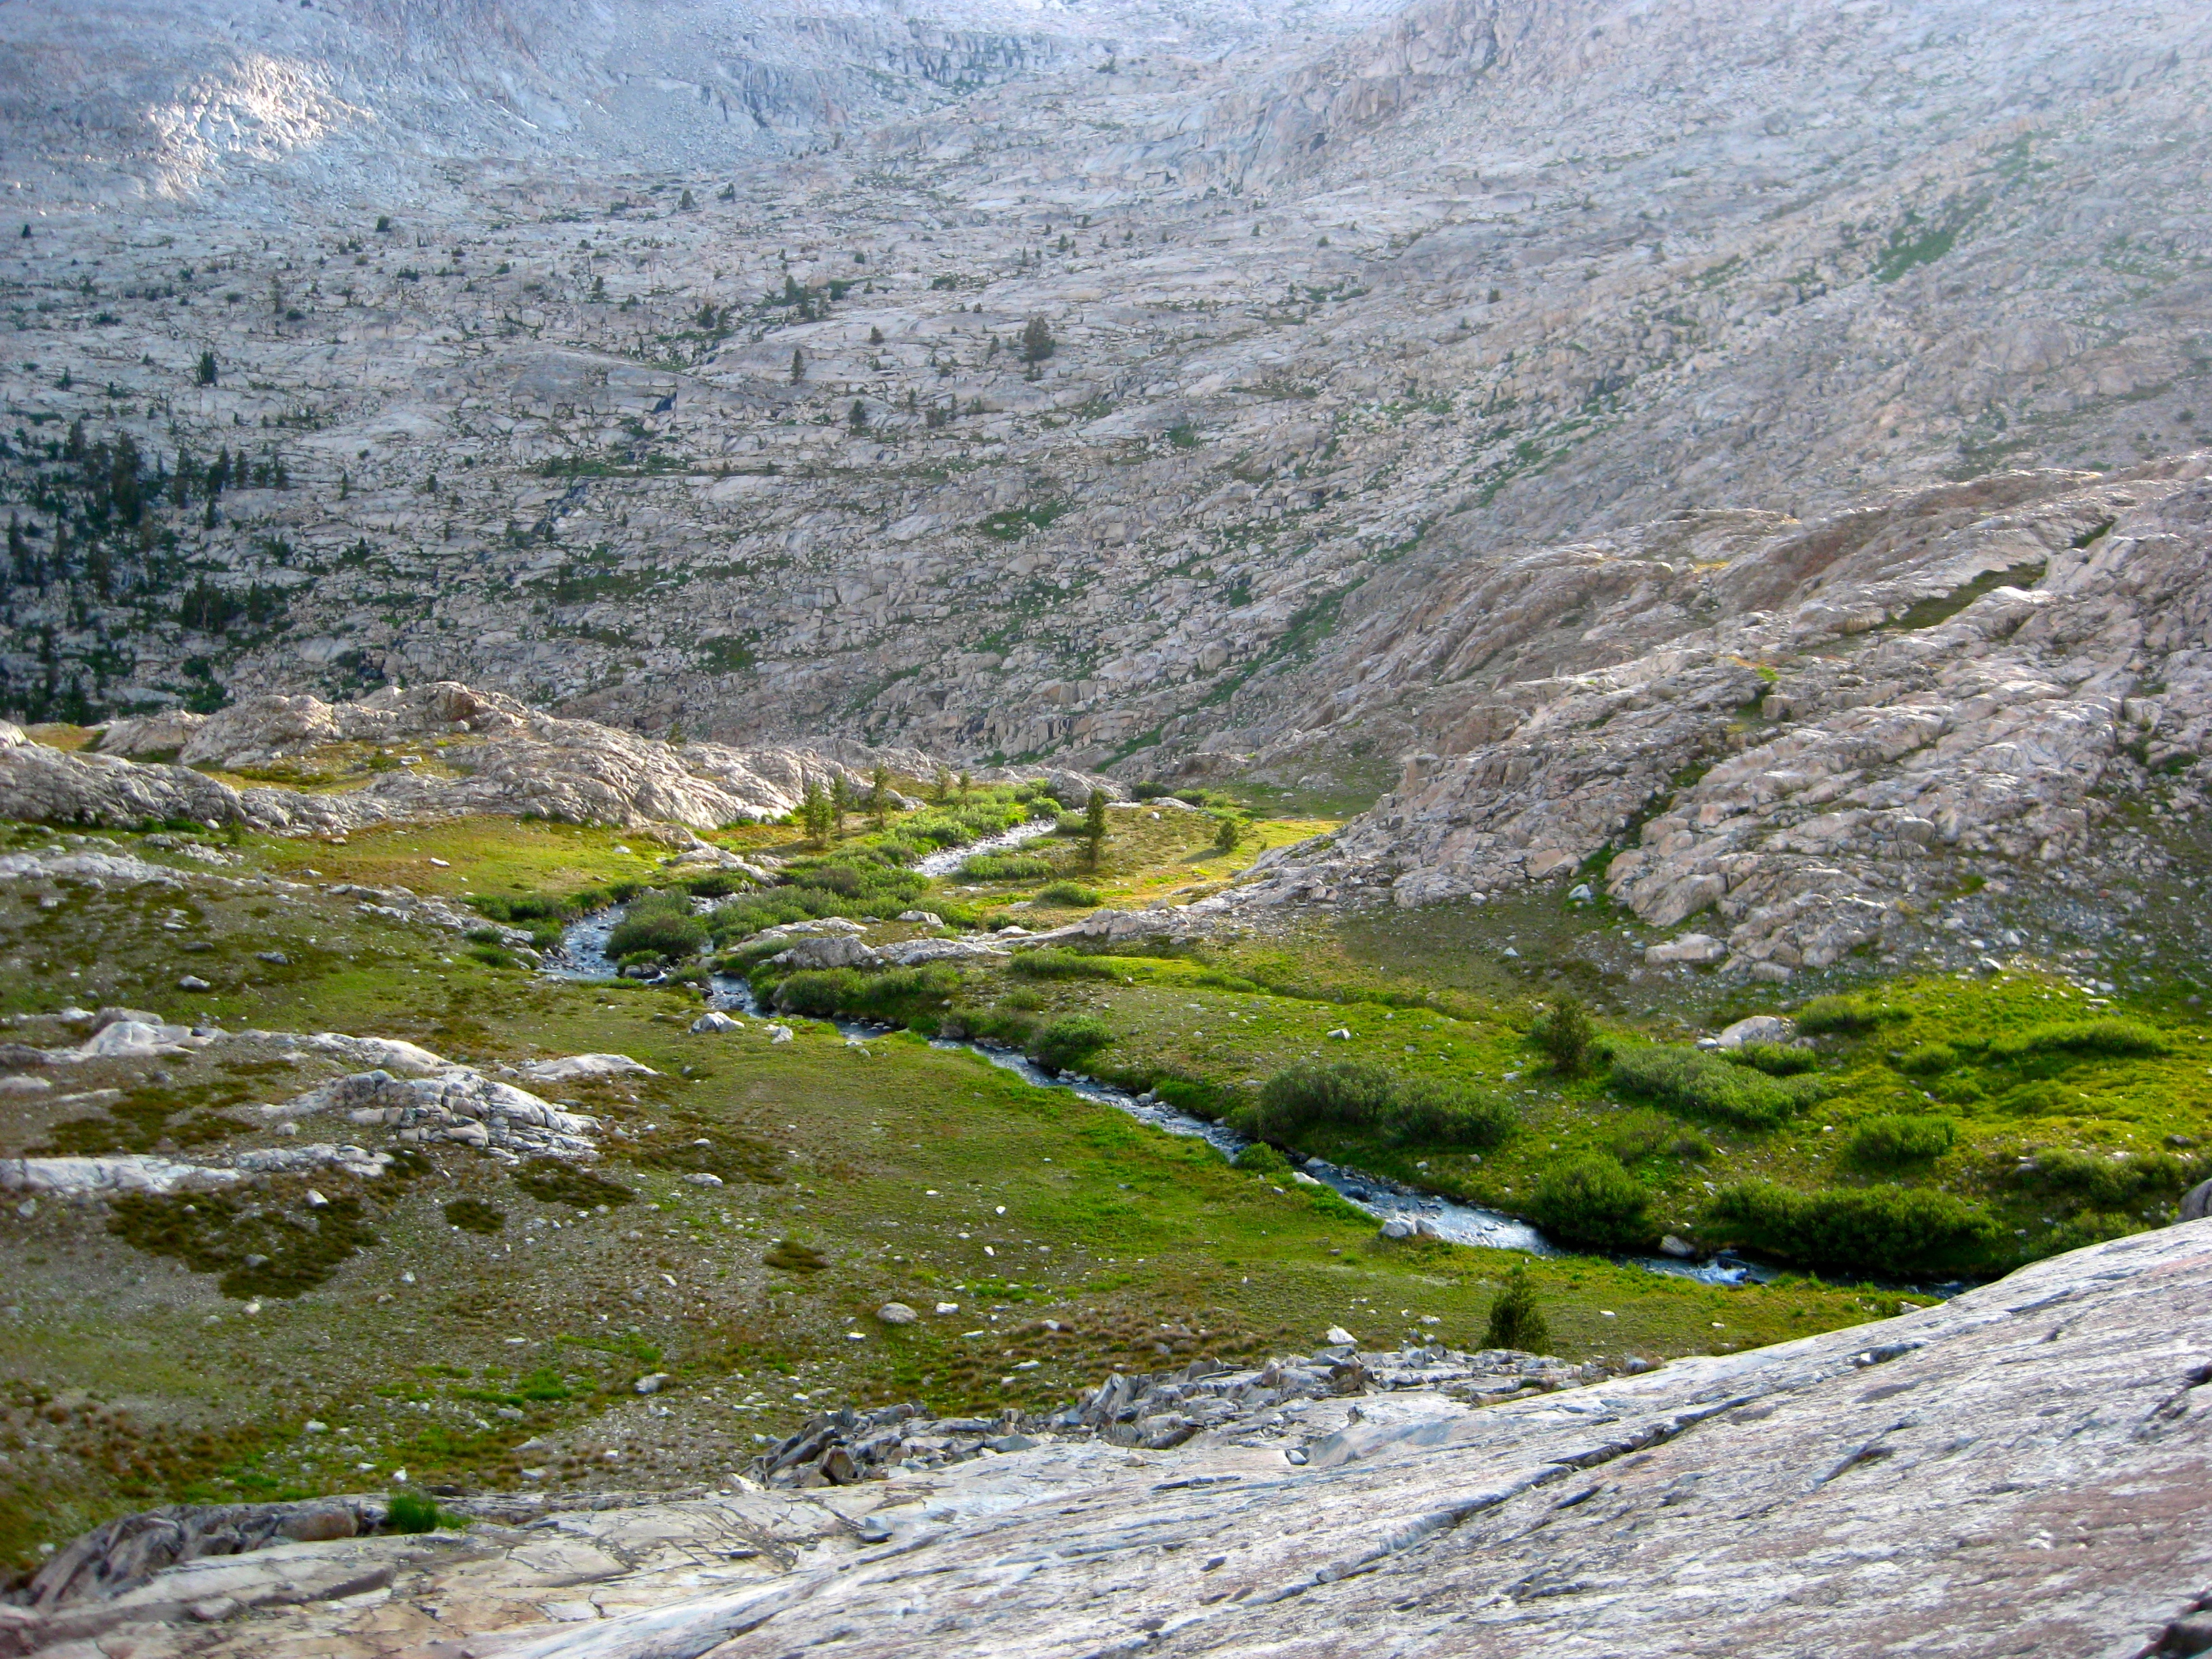
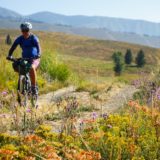
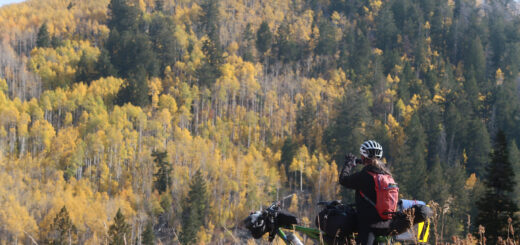
Scenery along the JMT was fantastic, and the going was easy. After an extended period of isolation, it was really nice to be amongst people for a little while. The miles went by amazingly quickly even though I was stoping to talk with people and slowing to their pace. 11 miles of the JMT vanished in just a few hours. The next portion: the turn off towards Simpson Meadow on the trail that follows the Middle Fork of the Kings River takes you to a very well built, but little used trail that descends to Simpson Meadow. The trail is getting to be a little over grown, but the quality of construction shows (especially in the upper portion), so I expect that this trail will last a long time, and be easily navigated with annual brushing.
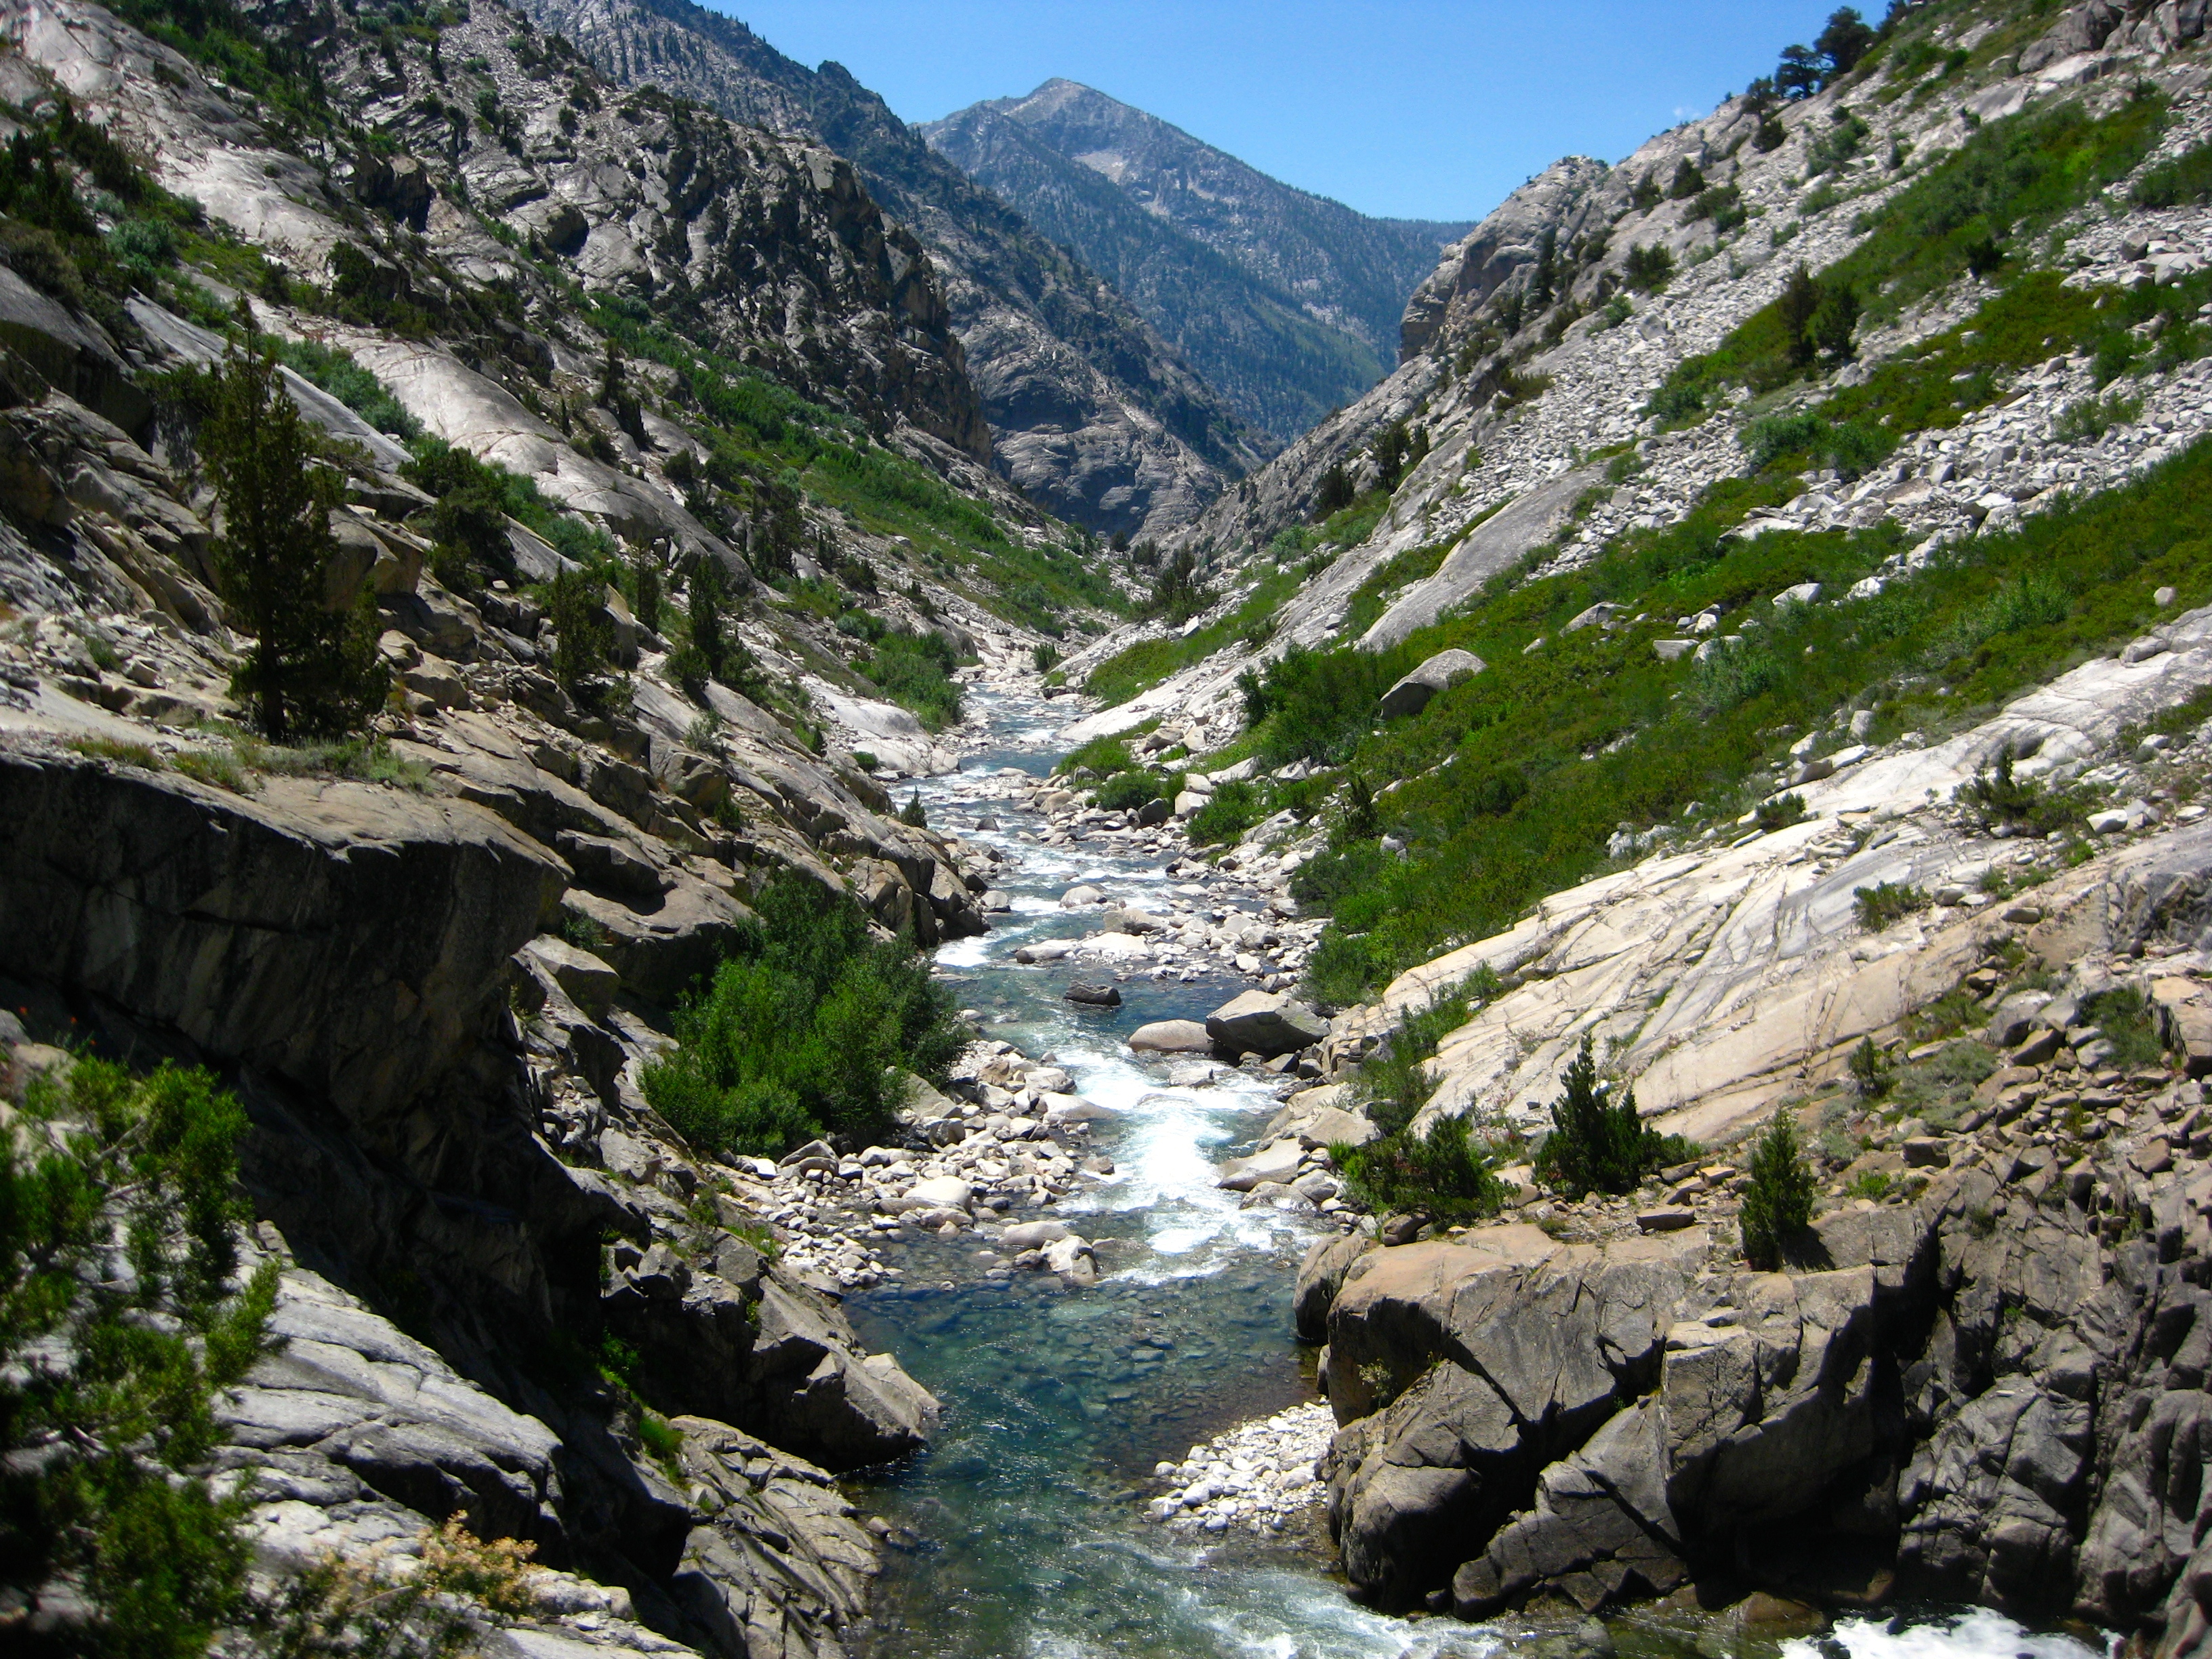
A classic view of the Middle Fork Kings River awaits you!
The trail is slightly overgrown in places – but that doesn’t detract from your enjoyment!
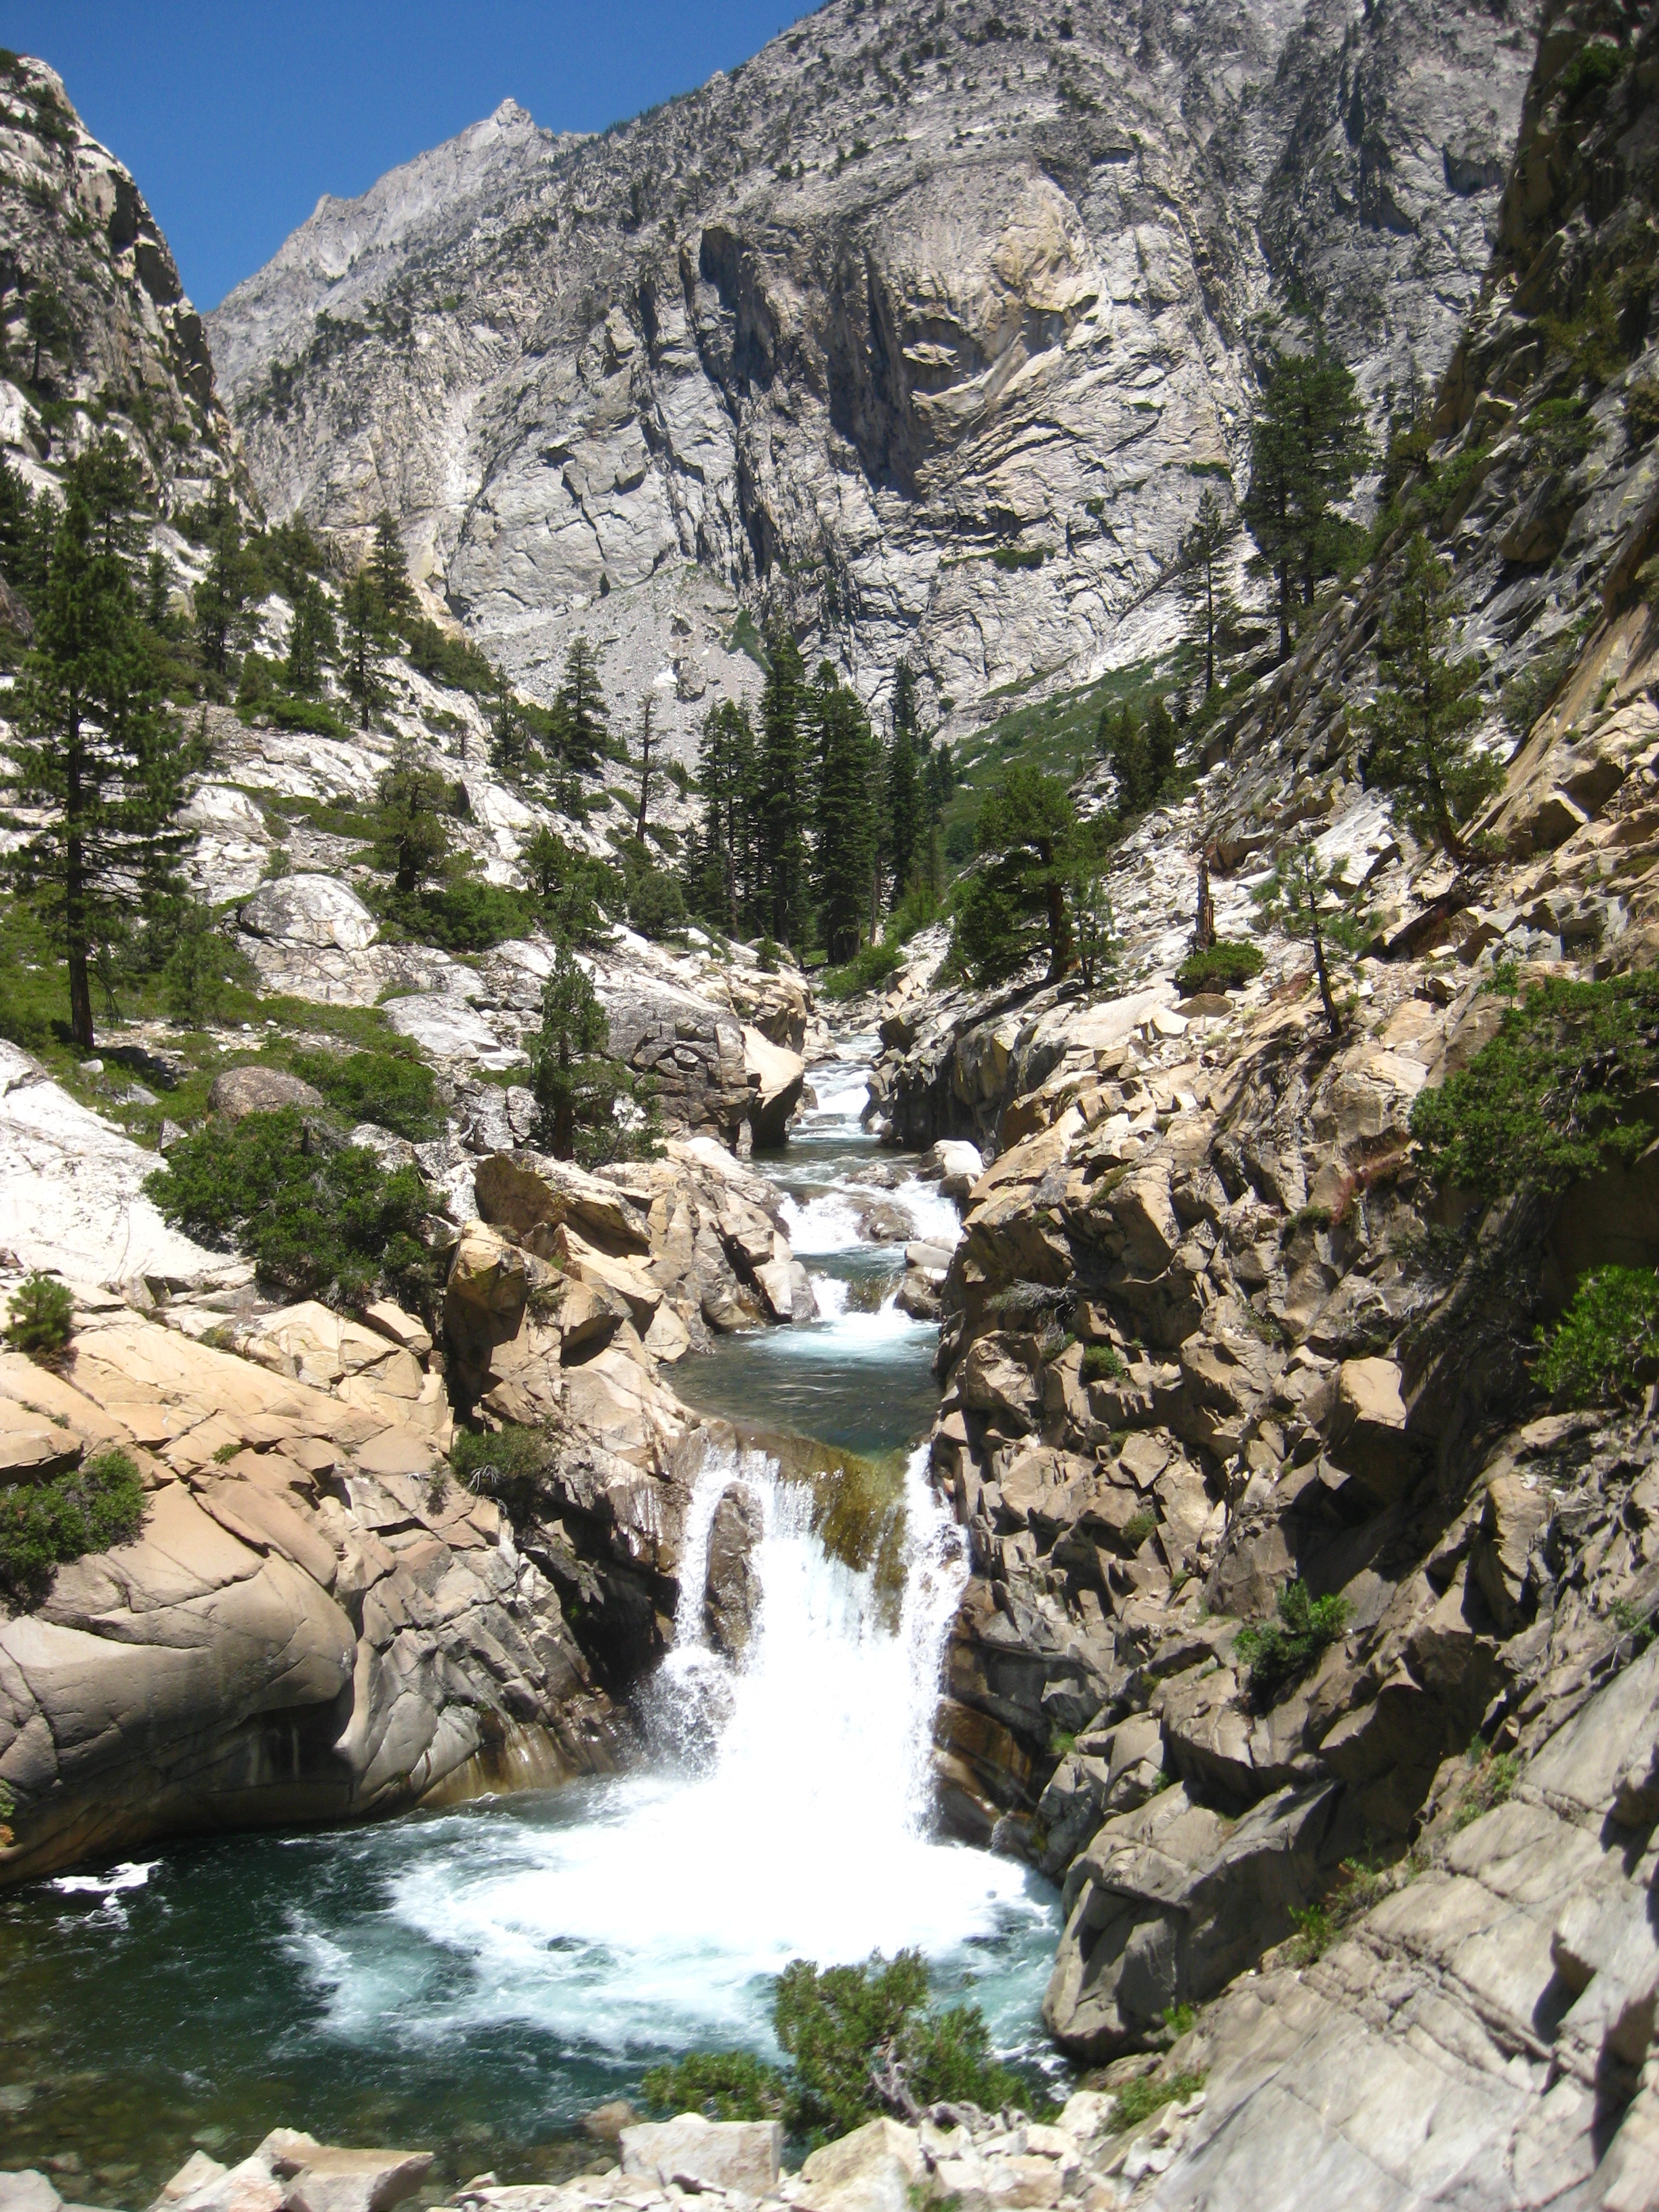
Water falls along the Kings River!
When you reach Simpson Meadow, you might be in for a couple surprises. First, the alignment of the trails on the TOPO map is not exact as you can see from my GPS track. Secondly, you will need to ford the river. The good news is that once you get to the North side of the river, you will find good quality trail all the way to Tehipite dome! I was somewhat shocked by the quality of this trail. It is isolated on the East and West sides (West side is isolated by the abandoned trail that descends steeply into Tehipte Valley). The East side is somewhat isolated by the lack of a bridge over a major river crossing. I postulate that this trail has been recently maintained by people with horse stock. It seems that all of the deadfall has been carefully cut, but annoyances that would bother hikers (but not horses, like large debris on the trail) have not been removed. There are a few sections of stinging nettles, but overall it is in good condition. Don’t be lulled into complacency by the straight down-sloping line, though – this trail takes a lot of time with a lot of climbs and descents.
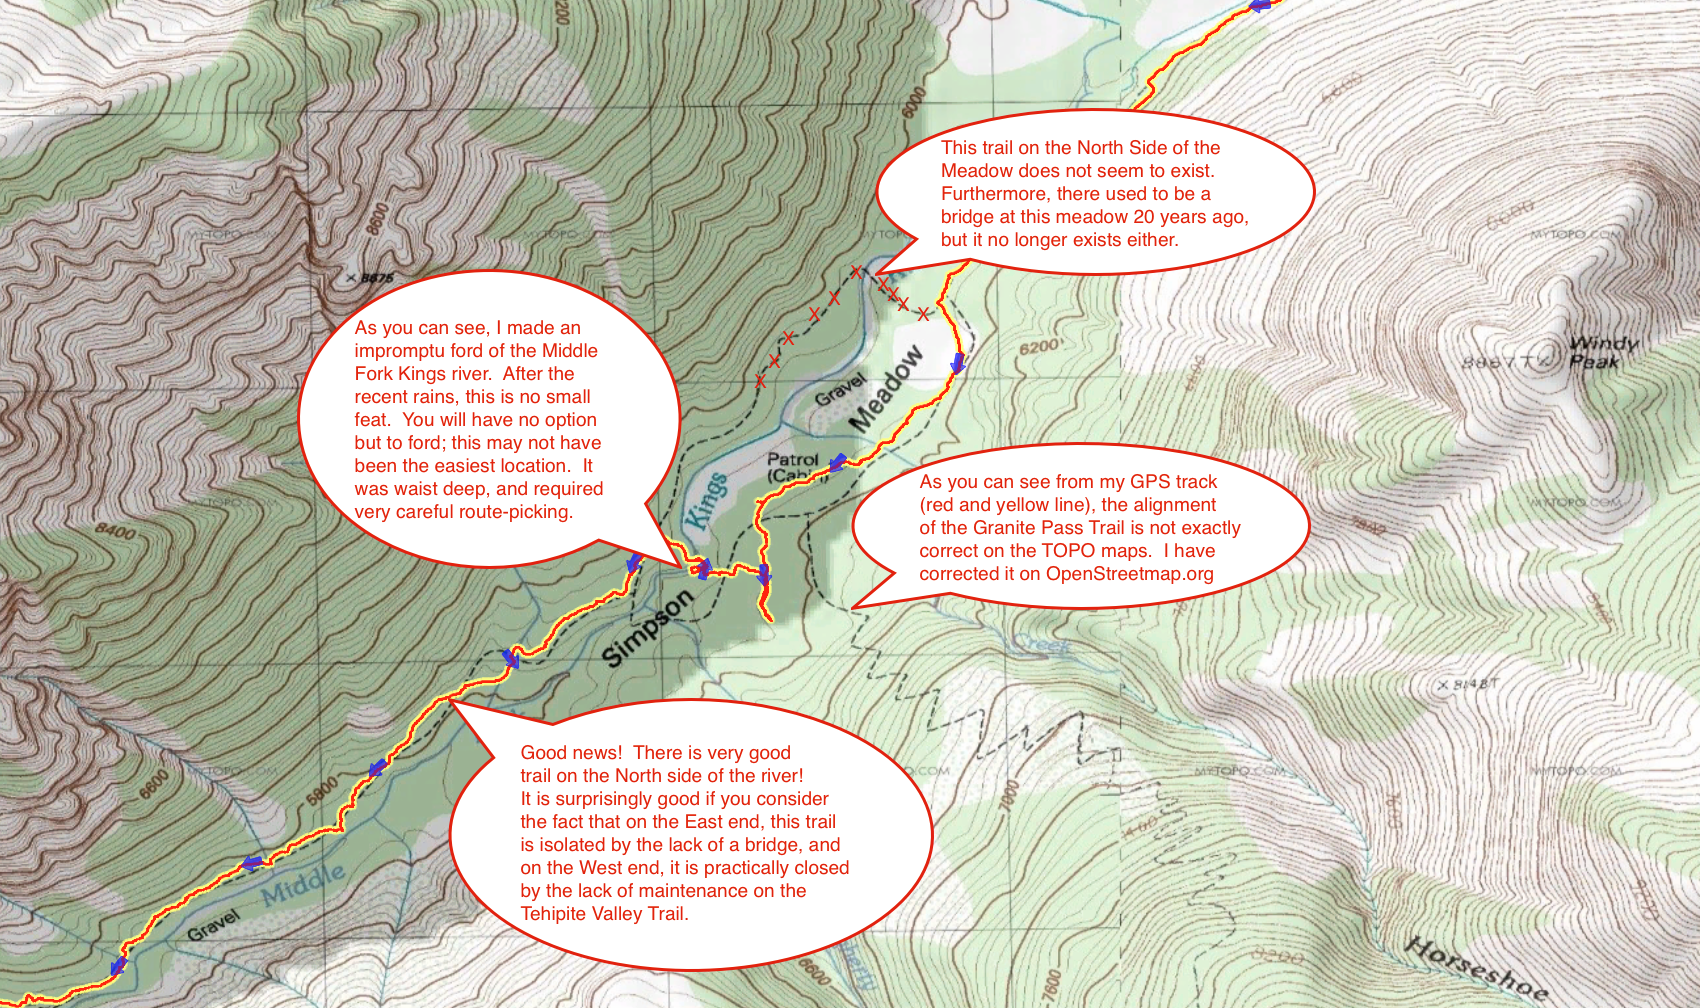
The trail on the TOPO map that goes across the river on the North side of Simpson Meadow does not exist. You could bushwhack and ford the river here if you want. Alternatively, you can do a short bushwhack and follow my route. Either way, you’re fording the river – the bridge washed away over 20 years ago. This July brought us heavy rains, so plan accordingly: my crossing of the river was NOT trivial.
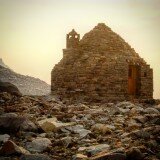
The painted rocks in the Tehipite valley.
Eventually, I made it to Tehipite Valley. I spent a lot of time trying to determine whether or not this location would photograph better at sunrise or sunset. As it turned out the lighting is probably good at both times. The valley is fantastic, but the good trail abruptly ends at Tehipite dome. It seems that people might be traveling from Simpson Meadow to Tehipite valley, and then turning around. Tehipite dome is worth visiting; it is the largest dome in the Sierra. The ascent from Tehipite valley is somewhat ridiculous. Amazingly, for the first 2 miles, the grade averages 30%. It is very loose, and unbelievably covered with brush and downed trees. Trekking poles are a must. Once you finish this beast, it is just a matter of completing the “commute” through average scenery – retracing your steps to your car at Rancherita.
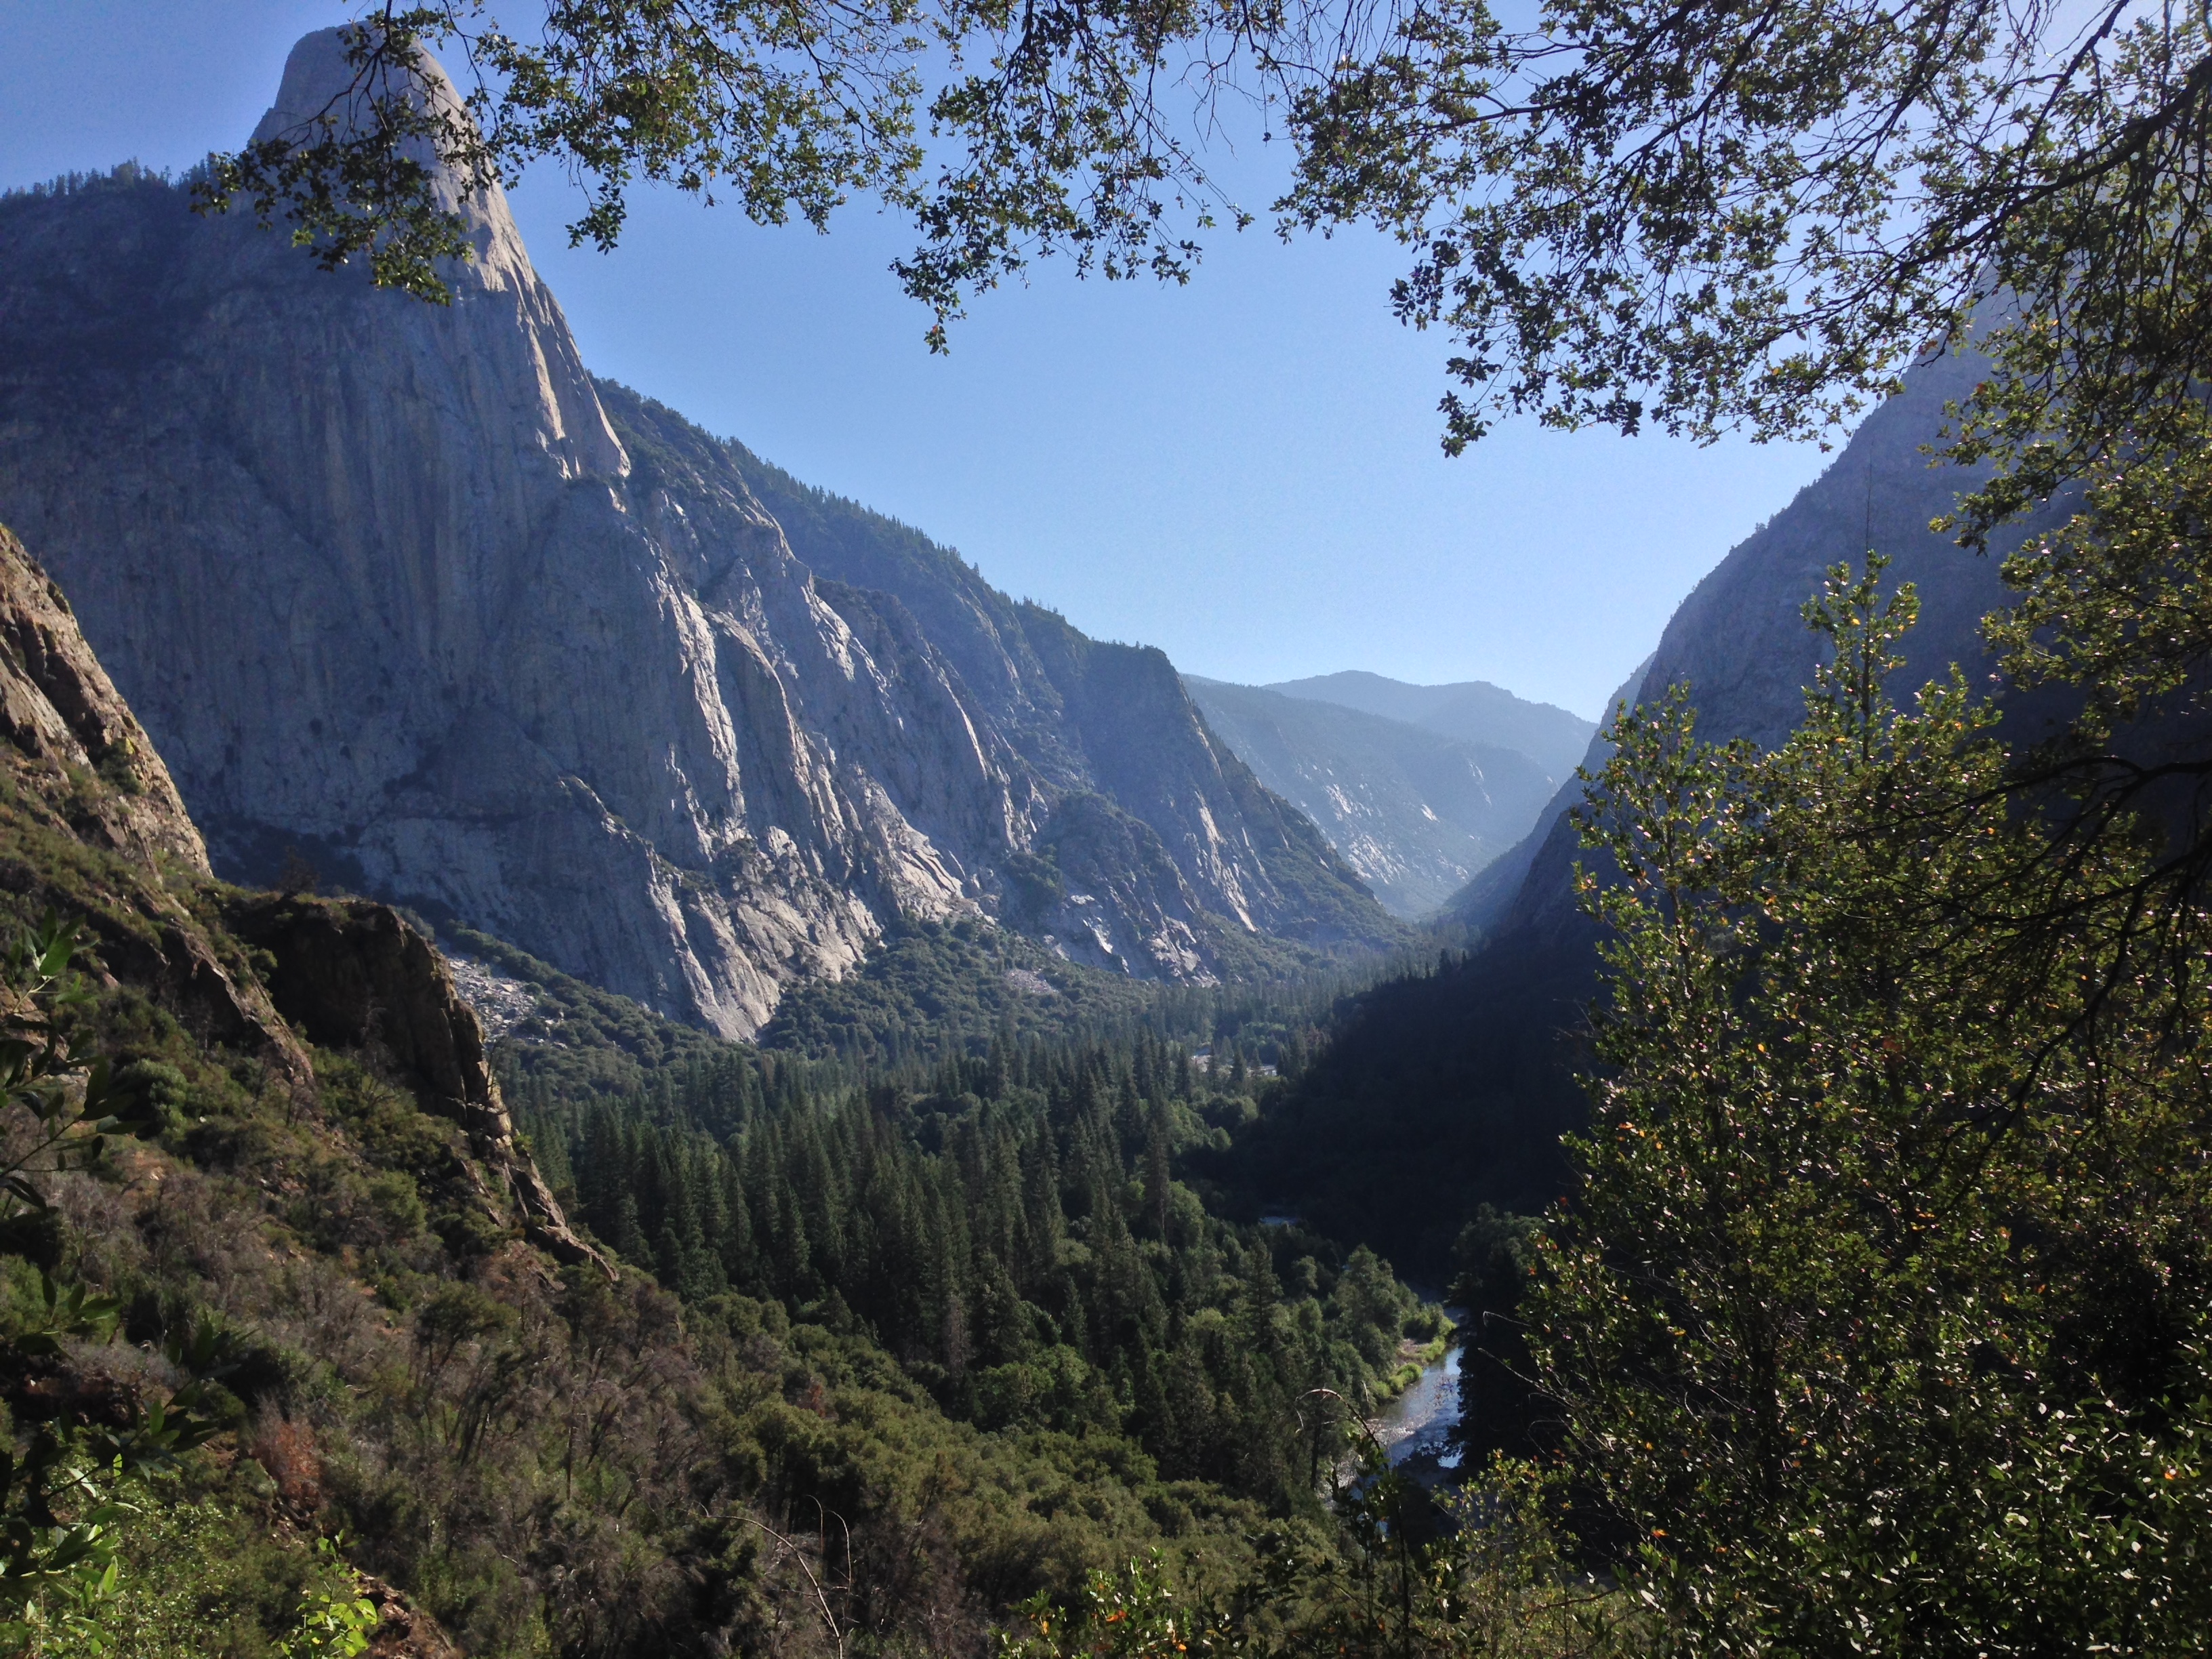
Tehipite Valley seen from above.
This is the map for the entire route discussed in this post. To Export GPX files, click on the three horizontal bars in the upper right hand corner of the map and select Export selected map data…
To see full screen, click here (opens in new window)


Hi Brian. I’m interested in using the gps tracks from your trip if you don’t mind. How would i access them from this site? Im just learning about the technology. Thanks!
Very nice write up and photos. I am always looking for trip ideas, even though my list is longer than my remaining lifespan. It sounds like you may have run into Chris Reyerson (roguephotonic) whose trips in the Sierra are legendary. If you look him up on flickr, you’ll likely find the trip in 2015 where you met him. (Summer Hike 2015 Week 2 07/10 – 07/16/15). He used to post his adventures in detail on the highsierratopix forum. Again, thank you for the trip report. I went on part of this area when I was a teen in 1987 and it was very challenging then. Especially in the area you’d skip next time. Cheers!
Great report, Brian! Unfortunately, I found your writeup AFTER I hiked up the Middle Fork from Simpson Meadow to the JMT. I was curious about the bridge shown on the map at Simpson Meadow, typed “Simpson Meadow Bridge” into the search engine, and your report popped up. The trail from Simpson Meadow to the JMT is a superb feat of engineering, but it is severely overgrown as of my June 2021 hike – the worst being a mile or two before the JMT junction. Despite the brush, I really enjoyed the hike (beautiful scenery). I hope the trail doesn’t disappear completely due to lack of maintenance.
Dave,
The route from Tehipite Valley to the confluence of the SF Kings RIver (below Yucca Point) has been done and reportedly is not a death defying stunt. However, there are places where there is vertical rock on both sides and one is forced to wade in the river. It is decidedly a route only to be attempted in very low water circumstances. Needless to say, expect very slow going with a lot of bounder hopping and brush. .
Brian, do you think it’s possible to keep hugging the middle fork of the kings all the way until it merges with the south fork instead of hiking out of Tehipite? I’m just wondering because you could then hike up yucca point trail to Highway 180 (assuming you had a second car to pick you up). Also how were the mosquitos in Simpson Meadow Area? I was in Granite Basin a couple of years ago and the mosquitos were horrendous. Cheers!
Dave – That is a good question. While it may be possible, I doubt it would be easy. The going is really easy in Little Tehipite valley, but the Kings is a major river, and according to the topo map, the canyon pinches and becomes narrow right as the trail begins ascending back towards Wishon. It could be fun to explore that route, but you would probably want to carry enough provisions in case it became impassable. Mosquitos in Simpson Meadow were non-existent, but I’m sure that is hit or miss. Mosquitos can be quite variable depending on the weather or the season. If you end up pursuing this route, please write back and let us know how it went!
Thank you for your excellent account of this ambitious and creative route. I can understand your not wanting to do the Enchanted Gorge/Goddard creek. Your route cleverly avoids this.
A couple of fine points and additional detail on topics in your narrative:
There never was a bridge at the upper end of Simpson Meadow. The older (15′ series) topo maps and newer (1988) 7.5′ map both show a trail circumnavigating the meadow, which requires two crossing but the upper crossing was always a ford. In 1972 there was a very substantial bridge (built to handle pack stock) at the lower end of SM, but it was washed out when I returned in 1989. Large concrete footings on both sides of the river remain. Back in the day, SM was much more heavily traveled and was the location of a permanent backcountry ranger station. In ’89 I met a ranger there on a patrol, and believe the cabin continues to be used in this manner.
From reading blogs and talking to people about this for many years, I believe the area most commonly used to ford the river by parties descending Goddard Creek or bound for Tehipite Valley is high in the meadow, approximately where the upper crossing is shown on the map, or even higher. I reconnoitered this area in 89 and it looked feasible, though I did not cross. ( I was headed to the JMT)
I believe you are correct the trail between SM and TV was cleared by a pack outfit. In the summer ’17 the trail from the north rim down to TV was cleared by a NPS trail crew. Their season had started, but they were blocked out of high country by heavy snow. Having nothing else to do, they were assigned to clear the trail to TV. Only by this lucky circumstance did the trail get any attention!
I appreciate your recommendation to the reader, inquiring about your route, to skip the part between Rancheria and upper Blue Canyon. I have recently been contemplating a trip going that way and was suspicious of the conditions I would encounter. Your report confirmed my fears .. Ill go another way.
A final note: I have read the book “Angels in the Wilderness”. Im sure it was reported to you as “a couple of weeks” … but you know how things get exaggerated. The correct story is that the lady in question lay in the bottom of TV with two broken legs, crawling by inches for 2-3 days to get closer to where she knew the trail was. Finally someone heard her cries for help. She was very lucky to escape with her life and eventually made an amazing, almost complete recovery. I highly recommend this book!
Again, thank you for your excellent narrative and GPS track.
Hi Brian, I came across your images via the internet. I’m interested in possibly using your photo titled “The painted rocks in the Tehipite valley” as a cover illustration for a novel I’ve written about Tehipite. It’s a somewhat gloomy book (titled “The Gorge of Despair”) and your photo captures much of the ambiance. If you’re willing, let me know what kind of terms you would like. Thanks, James Wright
This looks like a really fun route, thank you for sharing it! My friend and I plan on doing this route early September of this year. We are not fastpackers or even ultralight for that matter. Our packs will probably be in the 30 to 35 lb range.
We only have a MAX of 5 days to do this, so were thinking of just using your route as far as Lake Chasm, and then returning the same way we came.
Any thoughts on this? Is 15 miles per day doable for relatively inexperienced hikers over this terrain?
Hi Tim – It is difficult for me to assess your abilities and how long it will take you… but I can tell you that my pack was about 20 lbs starting, which makes things quite a bit easier. If you’re able (and have time) to drive to the Eastern Sierra, you might be more pleased by starting at the South Lake trailhead, and heading up over Bishop Pass (and then down the Dusy Basin Trail). I suggest this because the scenery from the parking all the way to the top of Blue Canyon Creek (where the lakes are, about 10,400′) is mediocre. Moreover, the trail is barely existent. It isn’t the fun kind of granite off trail, but instead it is climbing over deadfall and bushwhacking. The real treat on this route is the area around Chasm Lake, so ideally, you’d get there faster and more comfortably from the Eastern Sierra. One disadvantage of the Eastern Sierra is that you might see more people – but permits from that trailhead should still be easy to obtain. My favorite portion was the Chasm Lake, and the lakes around it. I also really liked looking at the gap between Scylla and Charybdis – it is a quite astounding portion of the Sierra! I hope that helps!